Blackboard's Date Management tool lets you view and adjust the due dates and availability dates for all the content (items, files, etc.), assessments (assignments, tests, surveys, etc.), tools (discussions, blogs, journals, announcements, etc.), manually graded columns, and tasks in your course. That makes this tool an excellent next step after performing a course copy. But it's important to note that this tool only lets you change availability and due dates. To set a new due date or availability window, you'll need to go to the item itself.
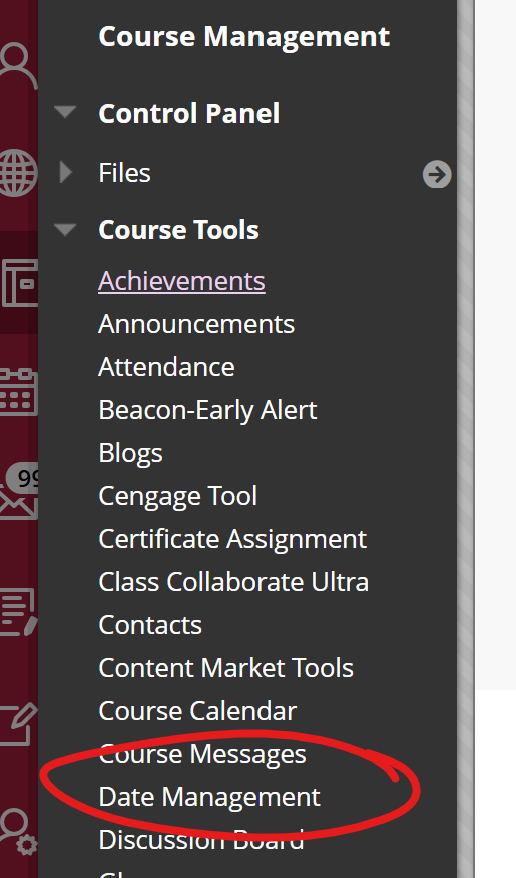
In a classic style course, you'll find the Date Management tool in the black menu on the left, under the Course Tools heading.
There are three ways you can adjust the dates in your course: Course Start Date, Number of Days, and List All Dates.
Use Course Start Date
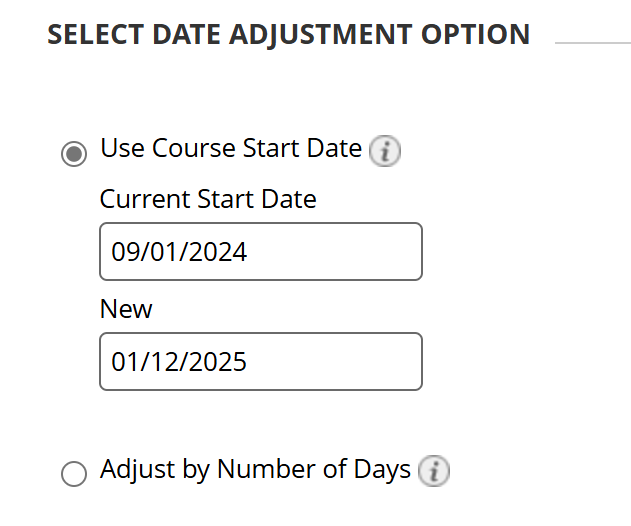
The first adjustment option is to use a course start date. This lets you give Blackboard a current start date, then set a new start date. Blackboard will then adjust the dates for all items relative to that new start date.
For example, the original course started September 1 with an assignment due September 26. The assignment is due 25 days after the start date. If you adjust the new start date to January 12, the assignment is now due February 6, which is 25 days after the new start date.
To use this tool, select Course Start Date on the Date Management tool page.
Enter the start date that all the items are currently keyed to in the Current Start Date field and the new start date in the New field. Click START at the bottom to make the adjustment.
Blackboard will apply the date shift, to all items, then push you to a Date Management Review page where you can see and fine-tune each change (see List All Dates below).
Adjust by Number of Days
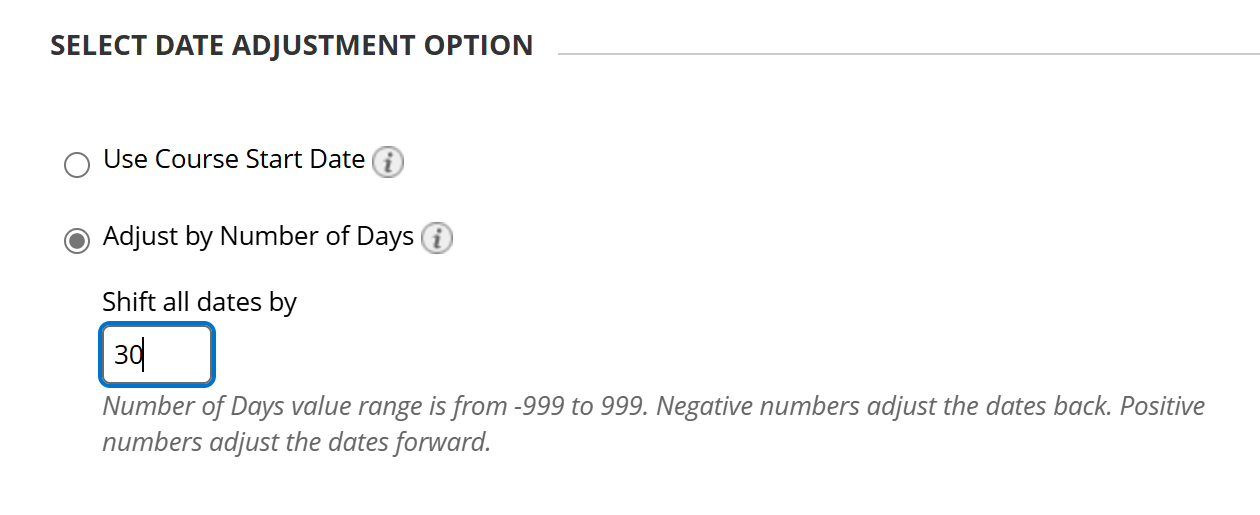
The Adjust by Number of Days tool lets you push all your dates forward that number of days. If you enter a negative number, due dates will be shifted back that number of days.
For example, if you shift all dates by 30, then an item that was due September 1 will now be due October 1. If you shift all dates by -30, then an item that was due September 1 will be due August 2.
To use this tool, select Adjust Number of Days on the Date Management tool page.
Enter the number of days you want to shift . Click START at the bottom to make the adjustment.
Blackboard will apply the date shift, to all items, then push you to a Date Management Review page where you can see and fine-tune each change (see List All Dates below).
List All Dates for Review
The List All Dates for Review option pulls all the items (and assessments, and tools) into a single page. From here you can view and edit all the dates from a single page. If you use either of the above options, you'll get pushed to the List All Dates page for review after Blackboard applies your change.
To use the review Dates option, choose List All Dates for Review, then click START.
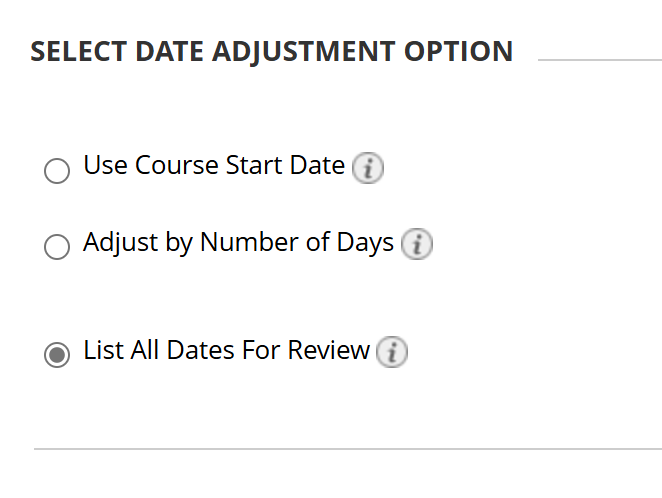
Blackboard first runs an "item collection" process (during which it makes the Start Date or number of days adjustment, if you entered that information). Once that is done, click the NEXT button to continue.

The Date Management Review page lists all the items with Due, Starts and/or Ends dates in the course. To edit any of these entries, click the edit button to the right of the item in question --

Then type or choose new dates. Click the green check button on the right to save your change

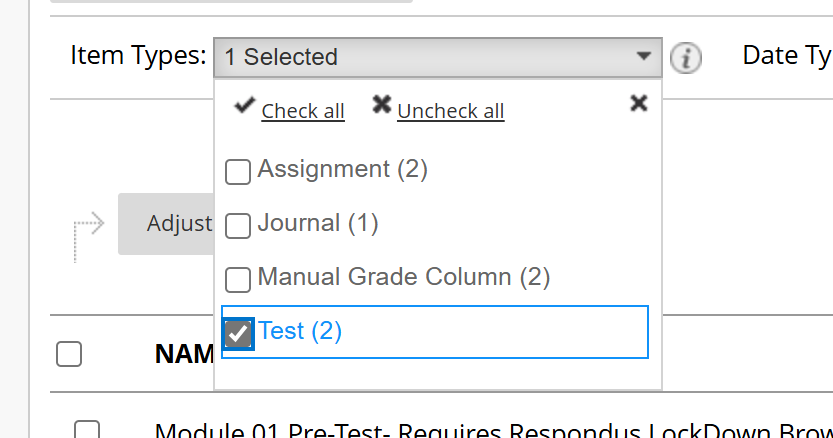
You can use the filters above the list to choose what item types you wish to view (e.g., only Assignments and/or Tests) --
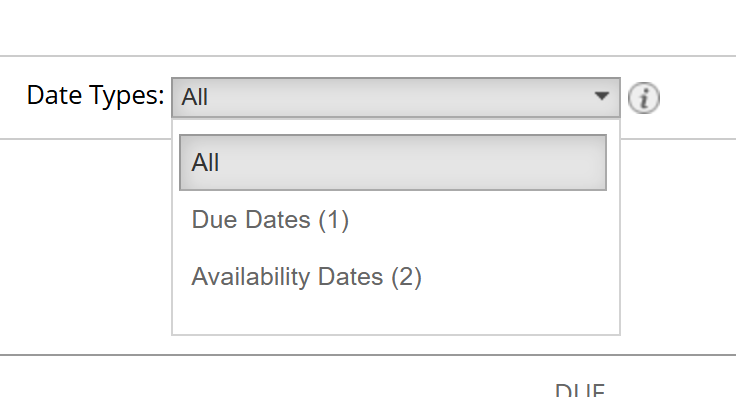
Or Date type (due dates or availability dates)
Blackboard's ultra style courses have Batch Edit tool that lets you view and adjust the visibility, due dates and availability dates for all the content (items, files, etc.), assessments (assignments, tests, surveys, etc.) in your course. That makes this tool an excellent next step after performing a course copy. Unlike the classic style course's Date Management tool, you can also set a new due date or availability window on items that did not already have them.
Find the Batch Edit Tool
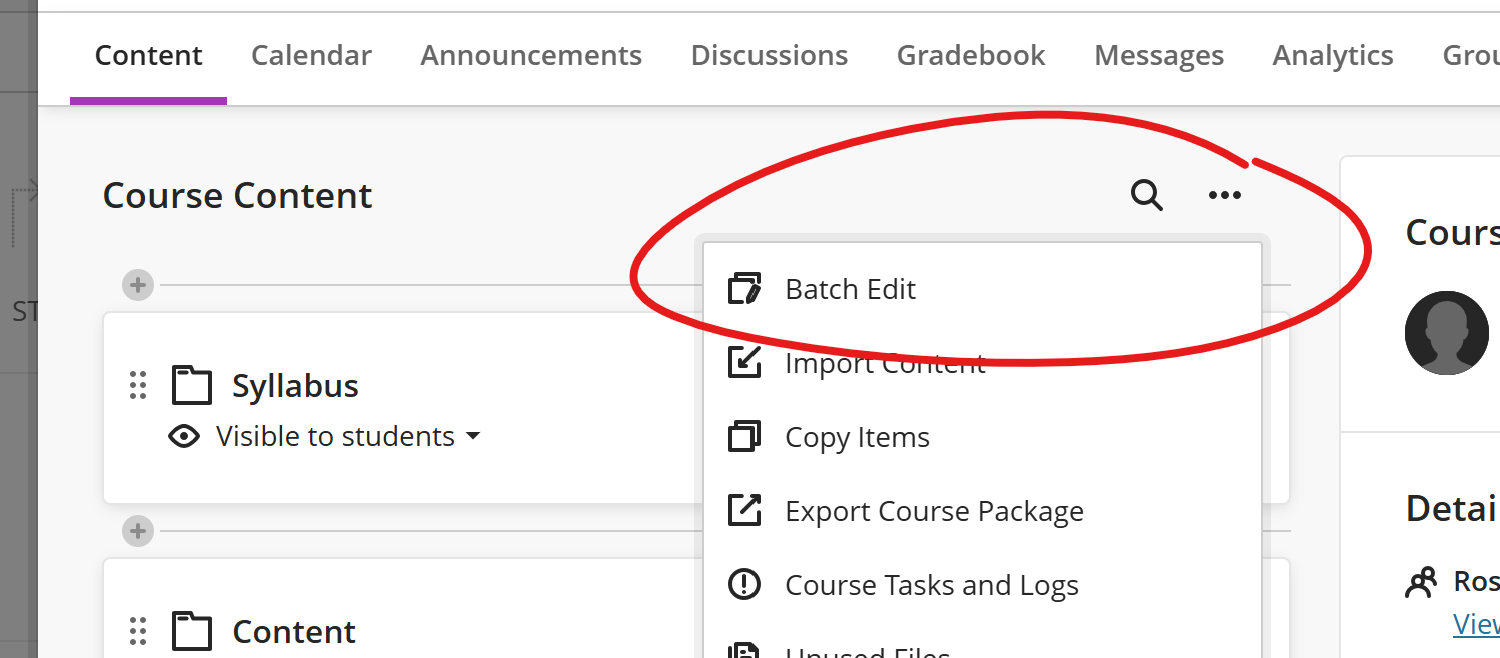
You'll find the Batch Edit tool by going to your ultra style course's Content page (the default page when you open the course) and clicking the "..." button to the right of the Course Content heading.
The Batch Edit page reproduces the Course Content page's hierarchy. If you've organized your course into folders and subfolders, you'll see the folders and subfolders on this edit page as well. Click the down-arrow button on the far right of a folder to view its items and subfolders. When a folder is expanded, the down-arrow will convert to an up-arrow.

Individual Item Edits
To add or edit the dates on an individual item (folder, document, assignment, test, link, etc), click the calendar icon to the right of that item.
You can then add or edit the show on date, due date, and/or hide after date for that item. Click SAVE to commit your changes.

You can make items visible or visible or hidden from this page, but must use the Batch Edit Visibility tool to do so, even if you are adjusting a single item.
Batch Edit Visibility
You can edit the visibility of one or more items at once by clicking the checkbox left of the items' names, then clicking the Edit Visibility button at the bottom of the page.

A pop-up window will let you choose whether you wish to make the selected items visible or hidden.
Batch Edit Dates
You can edit the dates on a number of items at once by clicking the checkbox left of their names, then clicking the EDIT DATES button at the bottom of the page.

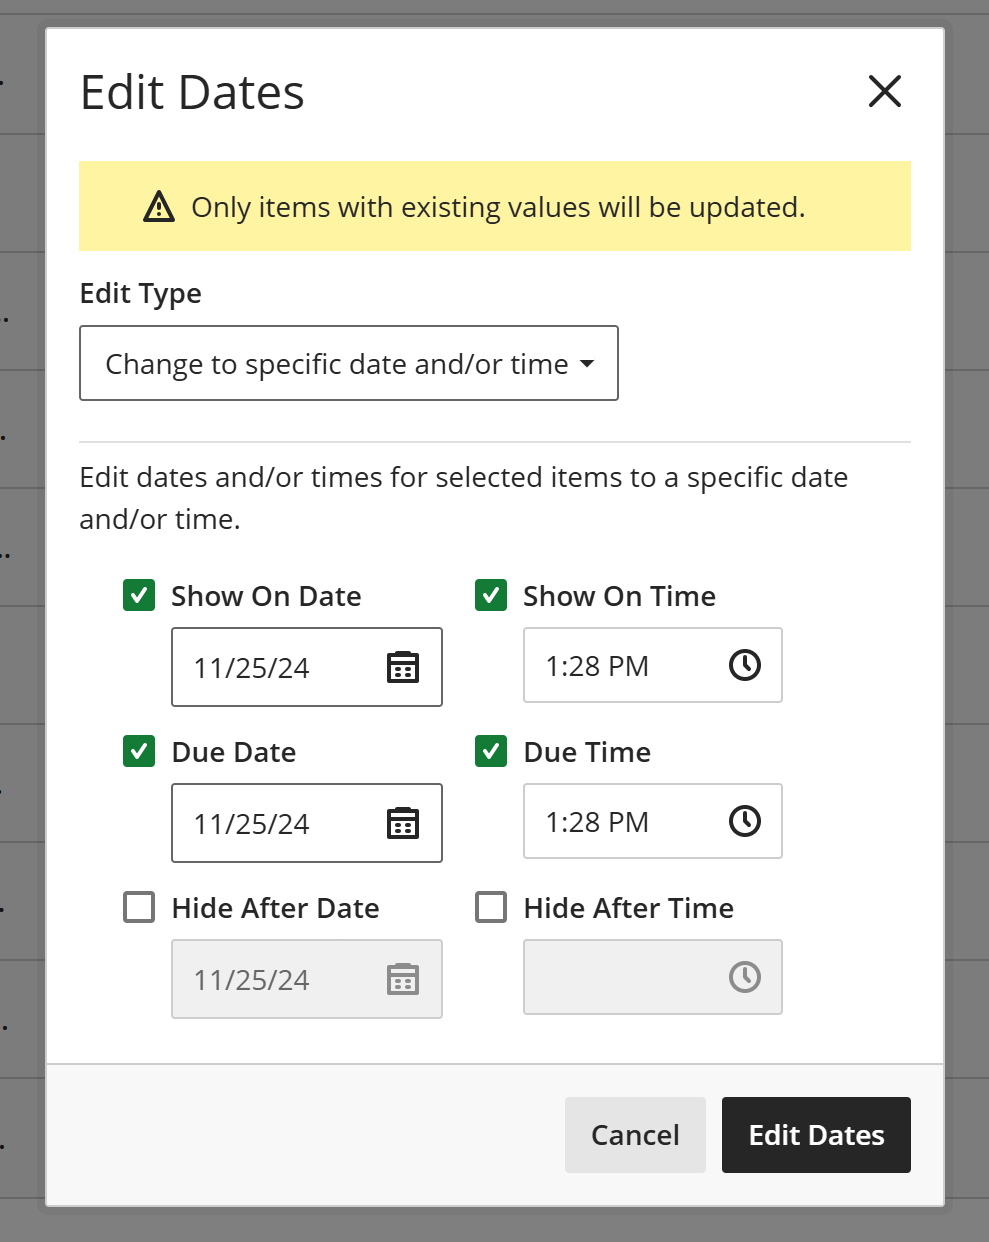
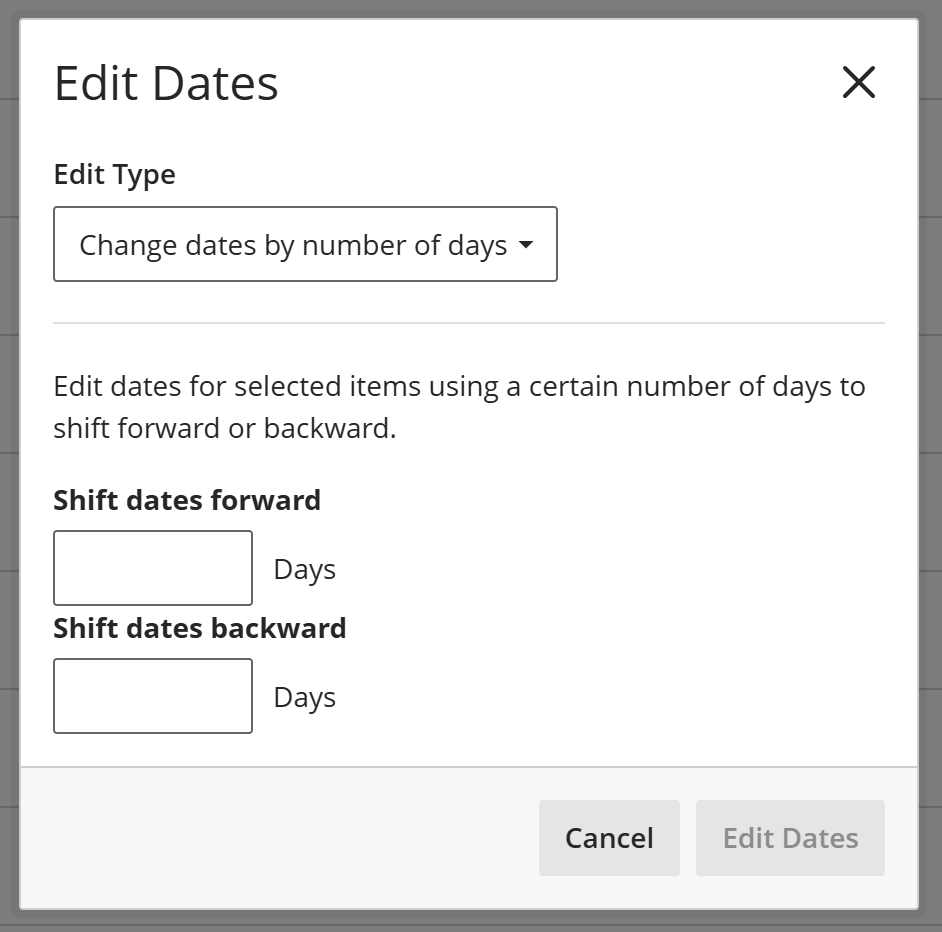
The EDIT DATES page lets you make three types of changes. You can set a specific date and time, shift the dates by a set number of days, or push the dates a set number of days by establishing a current (or old) start date and then setting a new one.
Note, as indicated in the Edit Dates window, using this method you cannot put availability or due dates onto an item that does not have them (you have to do that individually, as outlined above).
Batch Change to a Specific Date and/or Time
Specific Date and Time is the simplest: Check the boxes for the dates/times you want to adjust, enter the dates / times in the appropriate boxes, and click EDIT DATES to put that date and time onto all the items you've selected.
Batch Change Dates by Number of Days
The Change Dates by Number of Days tool lets you push all your dates forward or backward that number of days.
For example, if you shift all dates forward 30, then an item that was due September 1 will now be due October 1. If you shift all dates backwards 30, then an item that was due September 1 will be due August 2.
To use this tool, select Adjust Number of Days on the Date Management tool page.
Batch Change Dates by Course Start
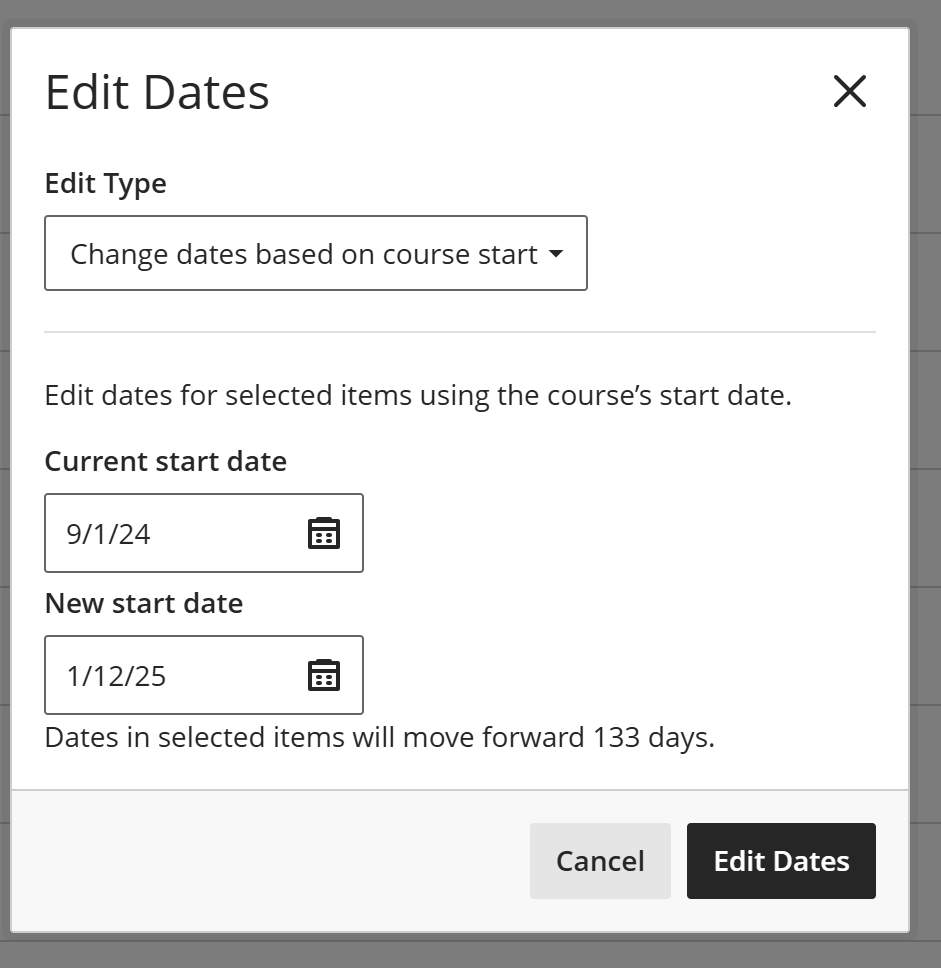
The Change Dates by Course Start tool lets you give Blackboard a current start date, then set a new start date. Blackboard will then adjust the dates for all items relative to that new start date.
For example, the original course started September 1 with an assignment due September 26. The assignment is due 25 days after the start date. If you adjust the new start date to January 12, the assignment is now due February 6, which is 25 days after the new start date.
To use this tool, select "Change dates based on course start" from the pulldown list at the top of the Edit Dates window.
Enter the start date that all the items are currently keyed to in the Current Start Date field and the new start date in the New field. Click Edit Dates at the bottom to apply the change to all the items you've selected.
