OneDrive makes it easy for the Detroit Mercy community to share files with one another. A file uploaded to OneDrive may be shared with anyone, whether they are a member of the University community or not. By choosing the appropriate settings, you may:
Let anyone with a link access the file
Let only specific invited individuals access the file.
You may also adjust the levels of access, letting folks view, download, and / or edit the file.
To get started, you'll need to navigate to OneDrive
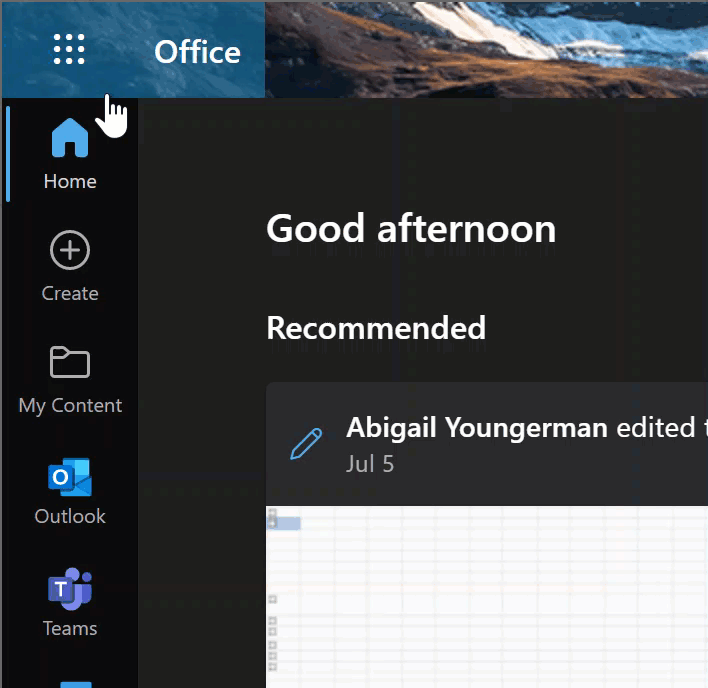
Find OneDrive
You can access OneDrive from anywhere inside your University of Detroit Mercy Office 365 site.
Just click the "waffle" button in the upper left corner, then choose OneDrive.
Add a File to OneDrive
Next, you'll need to upload your file (or files).
To add a file to OneDrive, you'll first need open OneDrive.
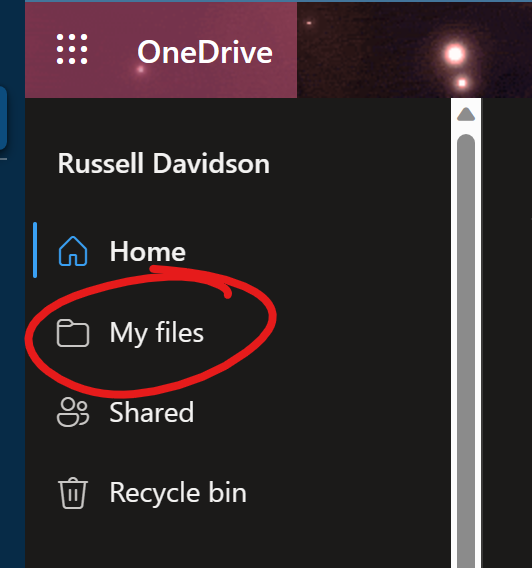
While you can upload files directly from the OneDrive home page, we recommend navigating to MY FILES first. We recommend this because your newly upload files will not appear in the Home page's RECENT list immediately. This can result in some confusion over whether your files actually uploaded and where they have gone to.
Click MY FILES on the left, beneath your name.
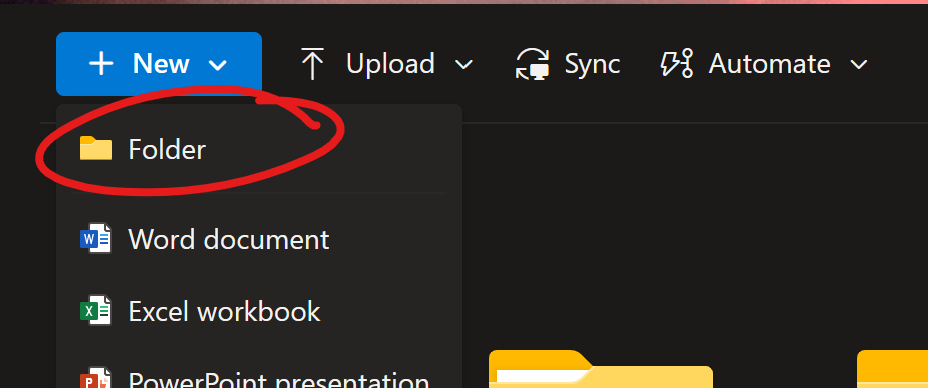
If you would like to create a folder for your file (or files), click NEW, choose FOLDER.
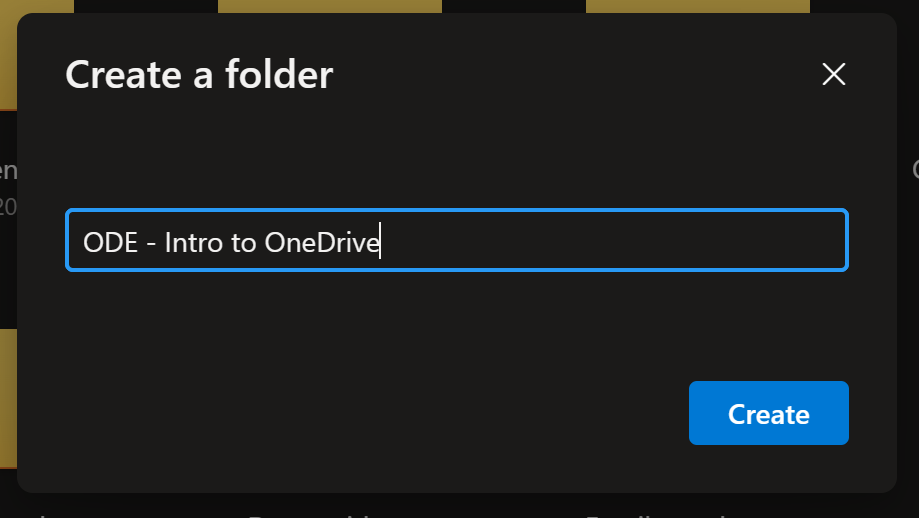
Give your folder a name, click Create.
To upload files to your new folder, locate it in the list, then click to open it.
At the top of the screen, click the UPLOAD button, then choose FILES. If you have opted to upload from the OneDrive HOME page, this button will look slightly different, but its location and functionality are the same.
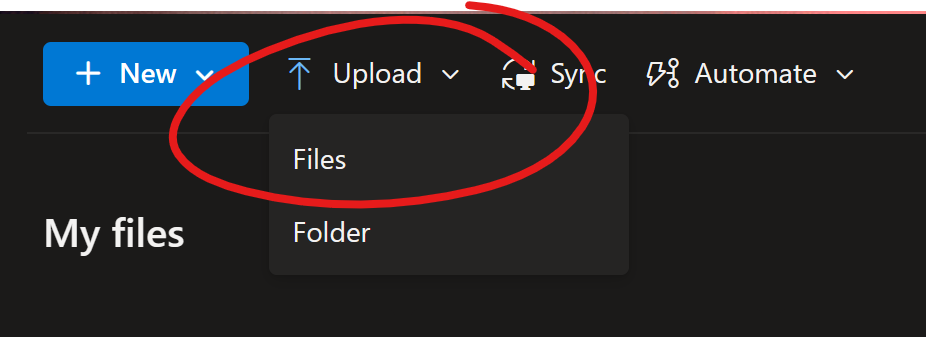
This will open a BROWSE window. Locate the file (or files) you wish to upload.
Click OPEN to add the files to your folder. The amount of time it takes to upload the files will vary depending on the number and size of the files selected.
Share a OneDrive File
Finally, you may want to share the file. Sharing may mean posting the share link to Blackboard, putting the link into the chat in a live session (Collaborate or Zoom), or emailing the link out to individuals.
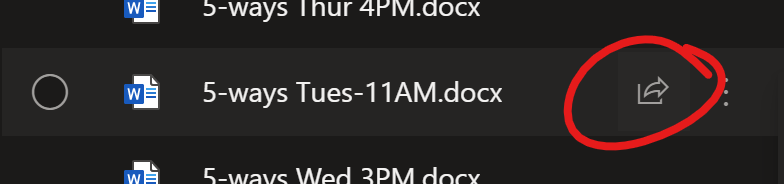
To share a file stored in OneDrive, you'll first need to locate the file. Open OneDrive and navigate to the folder that contains the item(s) you wish to share.
In list view, mouse-over the item you wish to share to find the share button, which looks like the bottom-left corner of a box with an arrow emerging.
In tile view, putting your mouse pointer over the item will open a panel that contains the share button
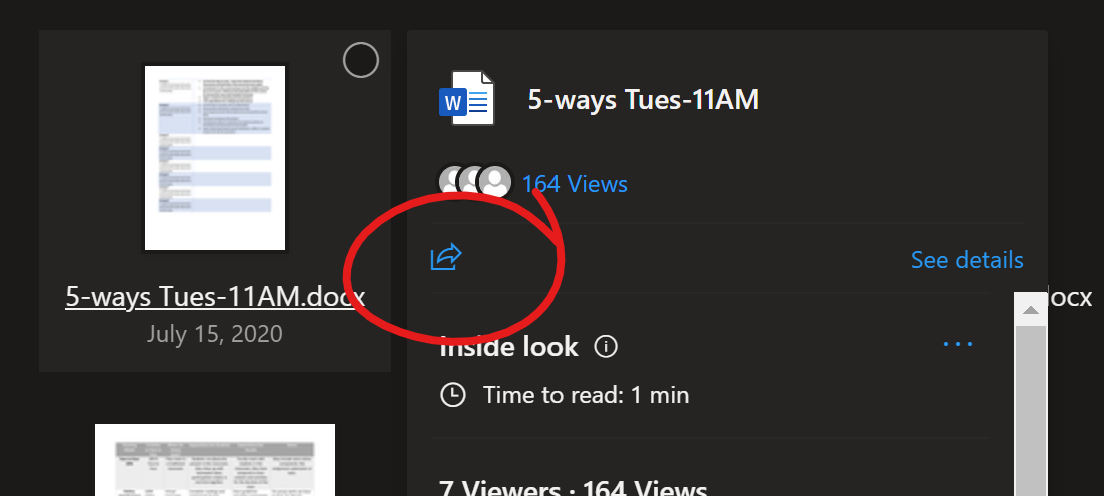
In either view, click the share button to open the SHARE panel.
The top half of the share pane is for emailing a link to the file. If you would like to put a link to the file into Blackboard or a virtual classroom chat window, you'll want to focus on the lower COPY LINK section.
The default access type for a file is ANYONE WITH THE LINK CAN EDIT.
If you want this to be the case, click the COPY button to add the link to your clipboard for pasting.
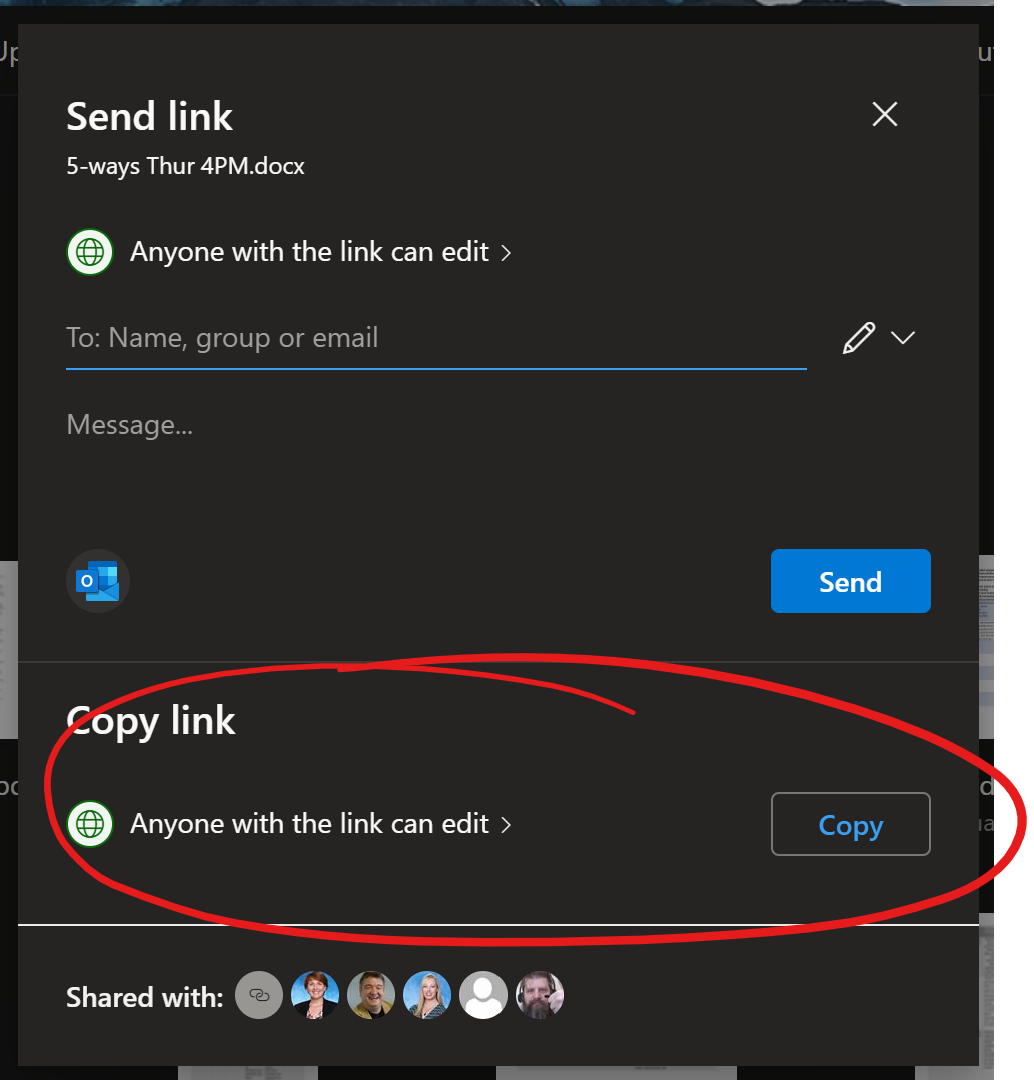
To share a VIEW-ONLY version of the file click the "Anyone with the link can edit >" text to open the LINK SETTINGS pane.
Here you can adjust a number of options for your share.
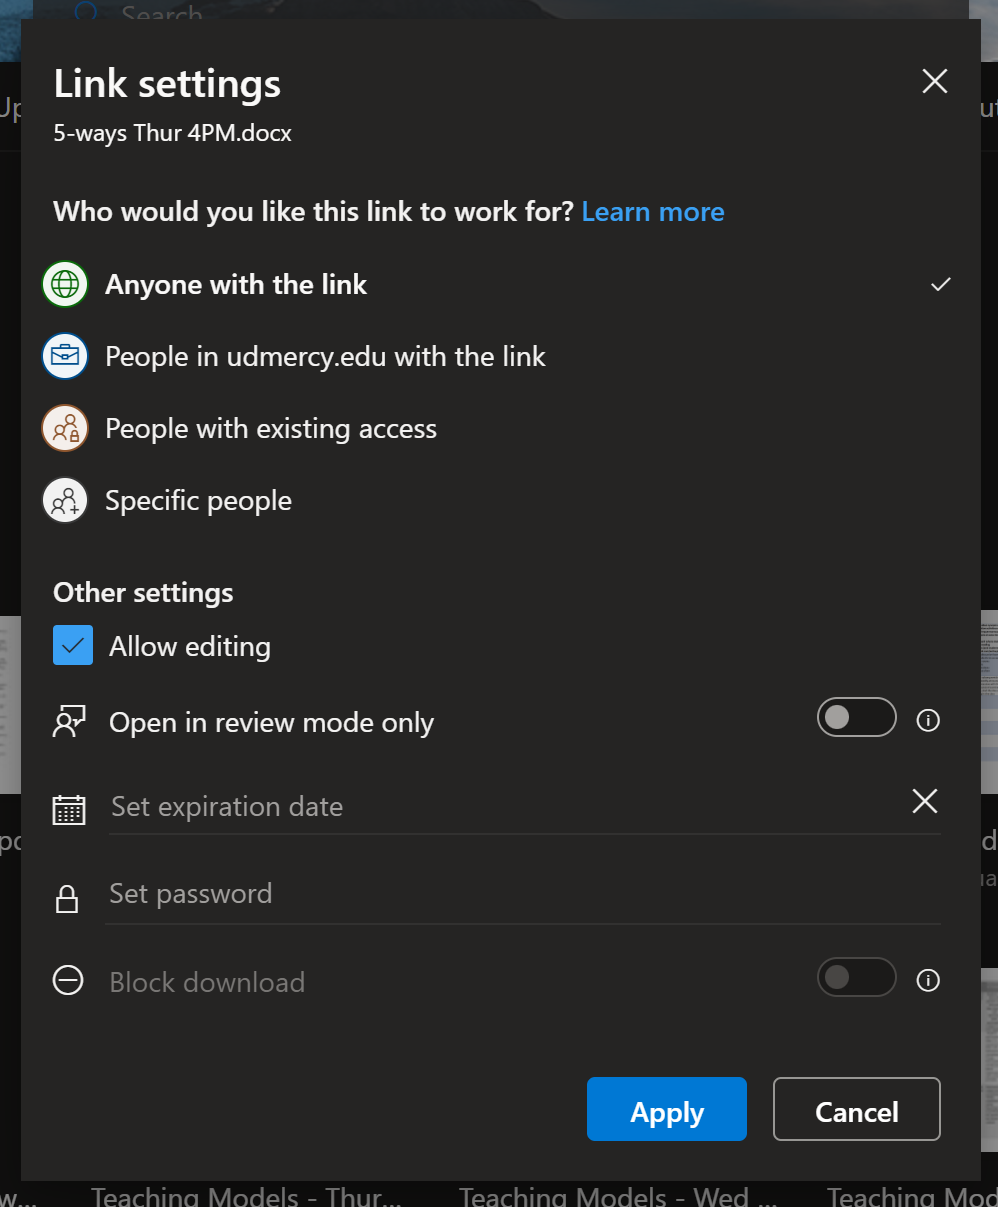
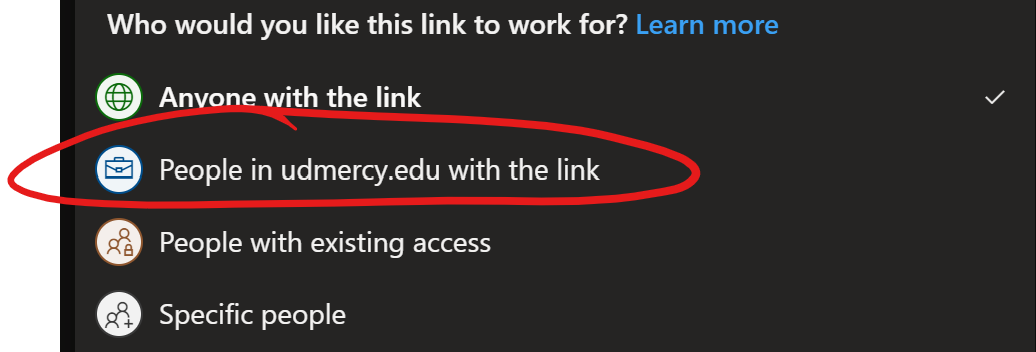
Use the Who would you like this link to work for option to limit access to the file.
The default selection (anyone with the link) means what it says -- anyone with the link will have access. If a student copies the file and sends it to a friend, that friend will also have access.
To limit access to only folks who have @udmercy.edu email addresses, choose People in udmercy.edu with the link. This will force folks to log in with their Office 365 account to view the file (note, because Blackboard uses Office 365 for authentication, nearly everyone who accesses the file from Blackboard should be logged into their Office 365 account and therefore will not need to log in).
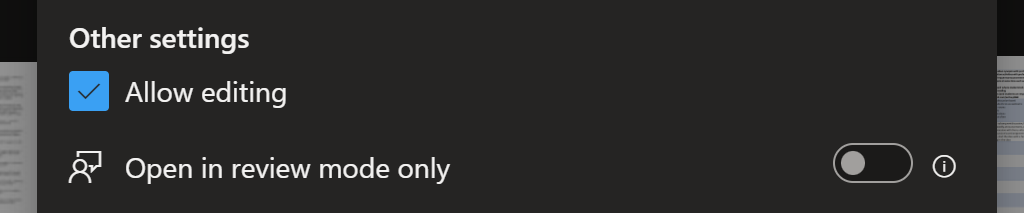
To prevent folks from editing the file, uncheck the ALLOW EDITING box OR choose OPEN IN REVIEW MODE ONLY to allow folks to comment on the file without making actual changes.
To implement additional security, you can set an expiration date on the link (after that date, the link will no longer work) and / or set a password that folks will be required to enter before viewing the file.

Finally, to prevent folks from downloading the file, click the button right of BLOCK DOWNLOAD to enable this feature.

Click APPLY to implement these changes.
Note: These settings are fundamental to the link. If you make changes to the Link Settings, OneDrive will create a new link with those new settings. Any previously created links will still work with the settings that were applied when the link was created.
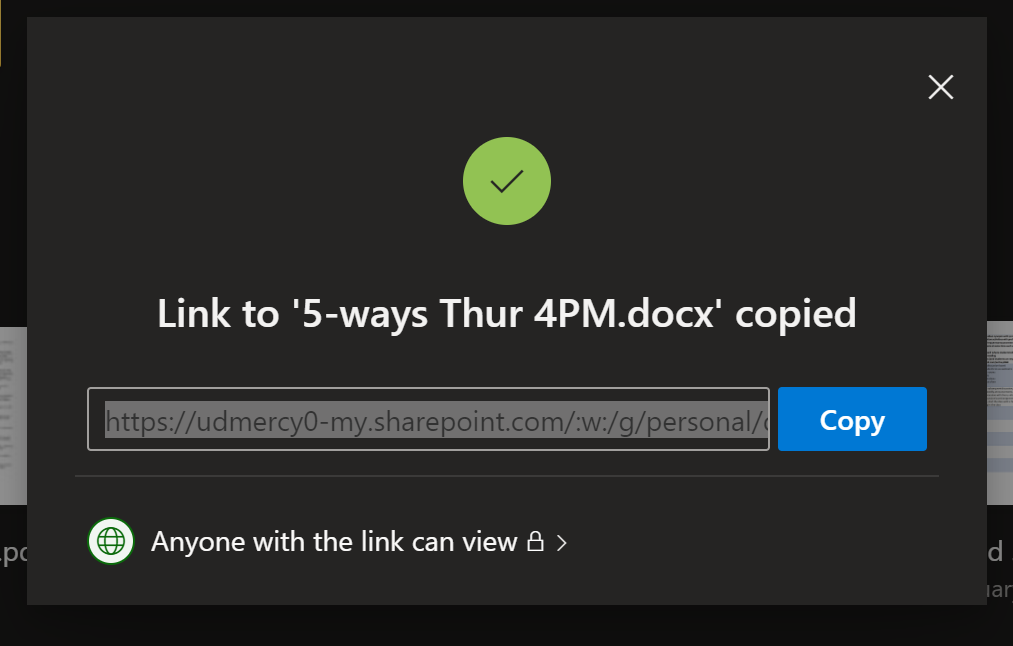
Click the COPY button to copy the link to your clipboard. You can then paste this into any Blackboard web link field.