The free, web-based content creation tool Canva can be used to create a variety of attractive items for use in a Blackboard course site. In particular, it is an excellent tool for quickly creating banner for your classic- or ultra-style course site.
Create Custom Size Design in Canva
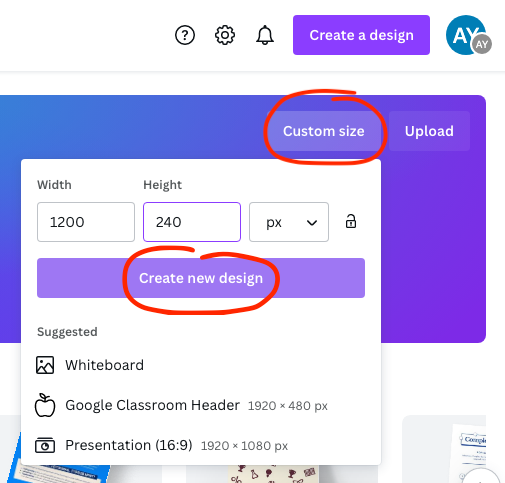
After you have created an account in Canva.com, you can create a custom-size design. This is particularly helpful if you want to add a banner header in a Blackboard course (see example below).
From the Canva home page, select the “Custom size” button. Enter your dimensions based on pixels, inches, millimeters, or centimeters. Click “Create new design.”
This will open a blank design canvas. You can then add many different types of elements, including text, images, shapes, photos, and your own uploaded images. You can also download your design once it’s complete.
Be sure to rename your design so you can easily find it later (found at the top right of the window).

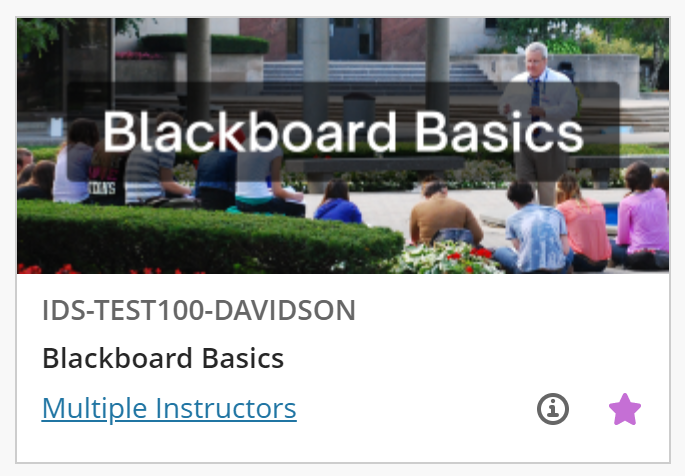
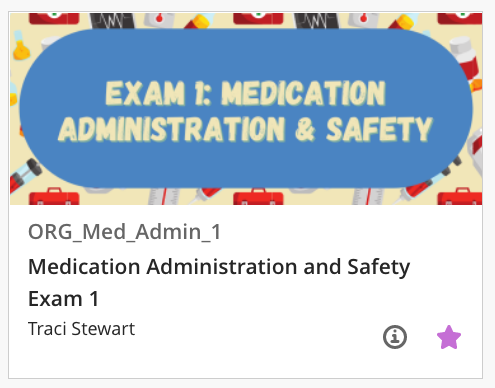
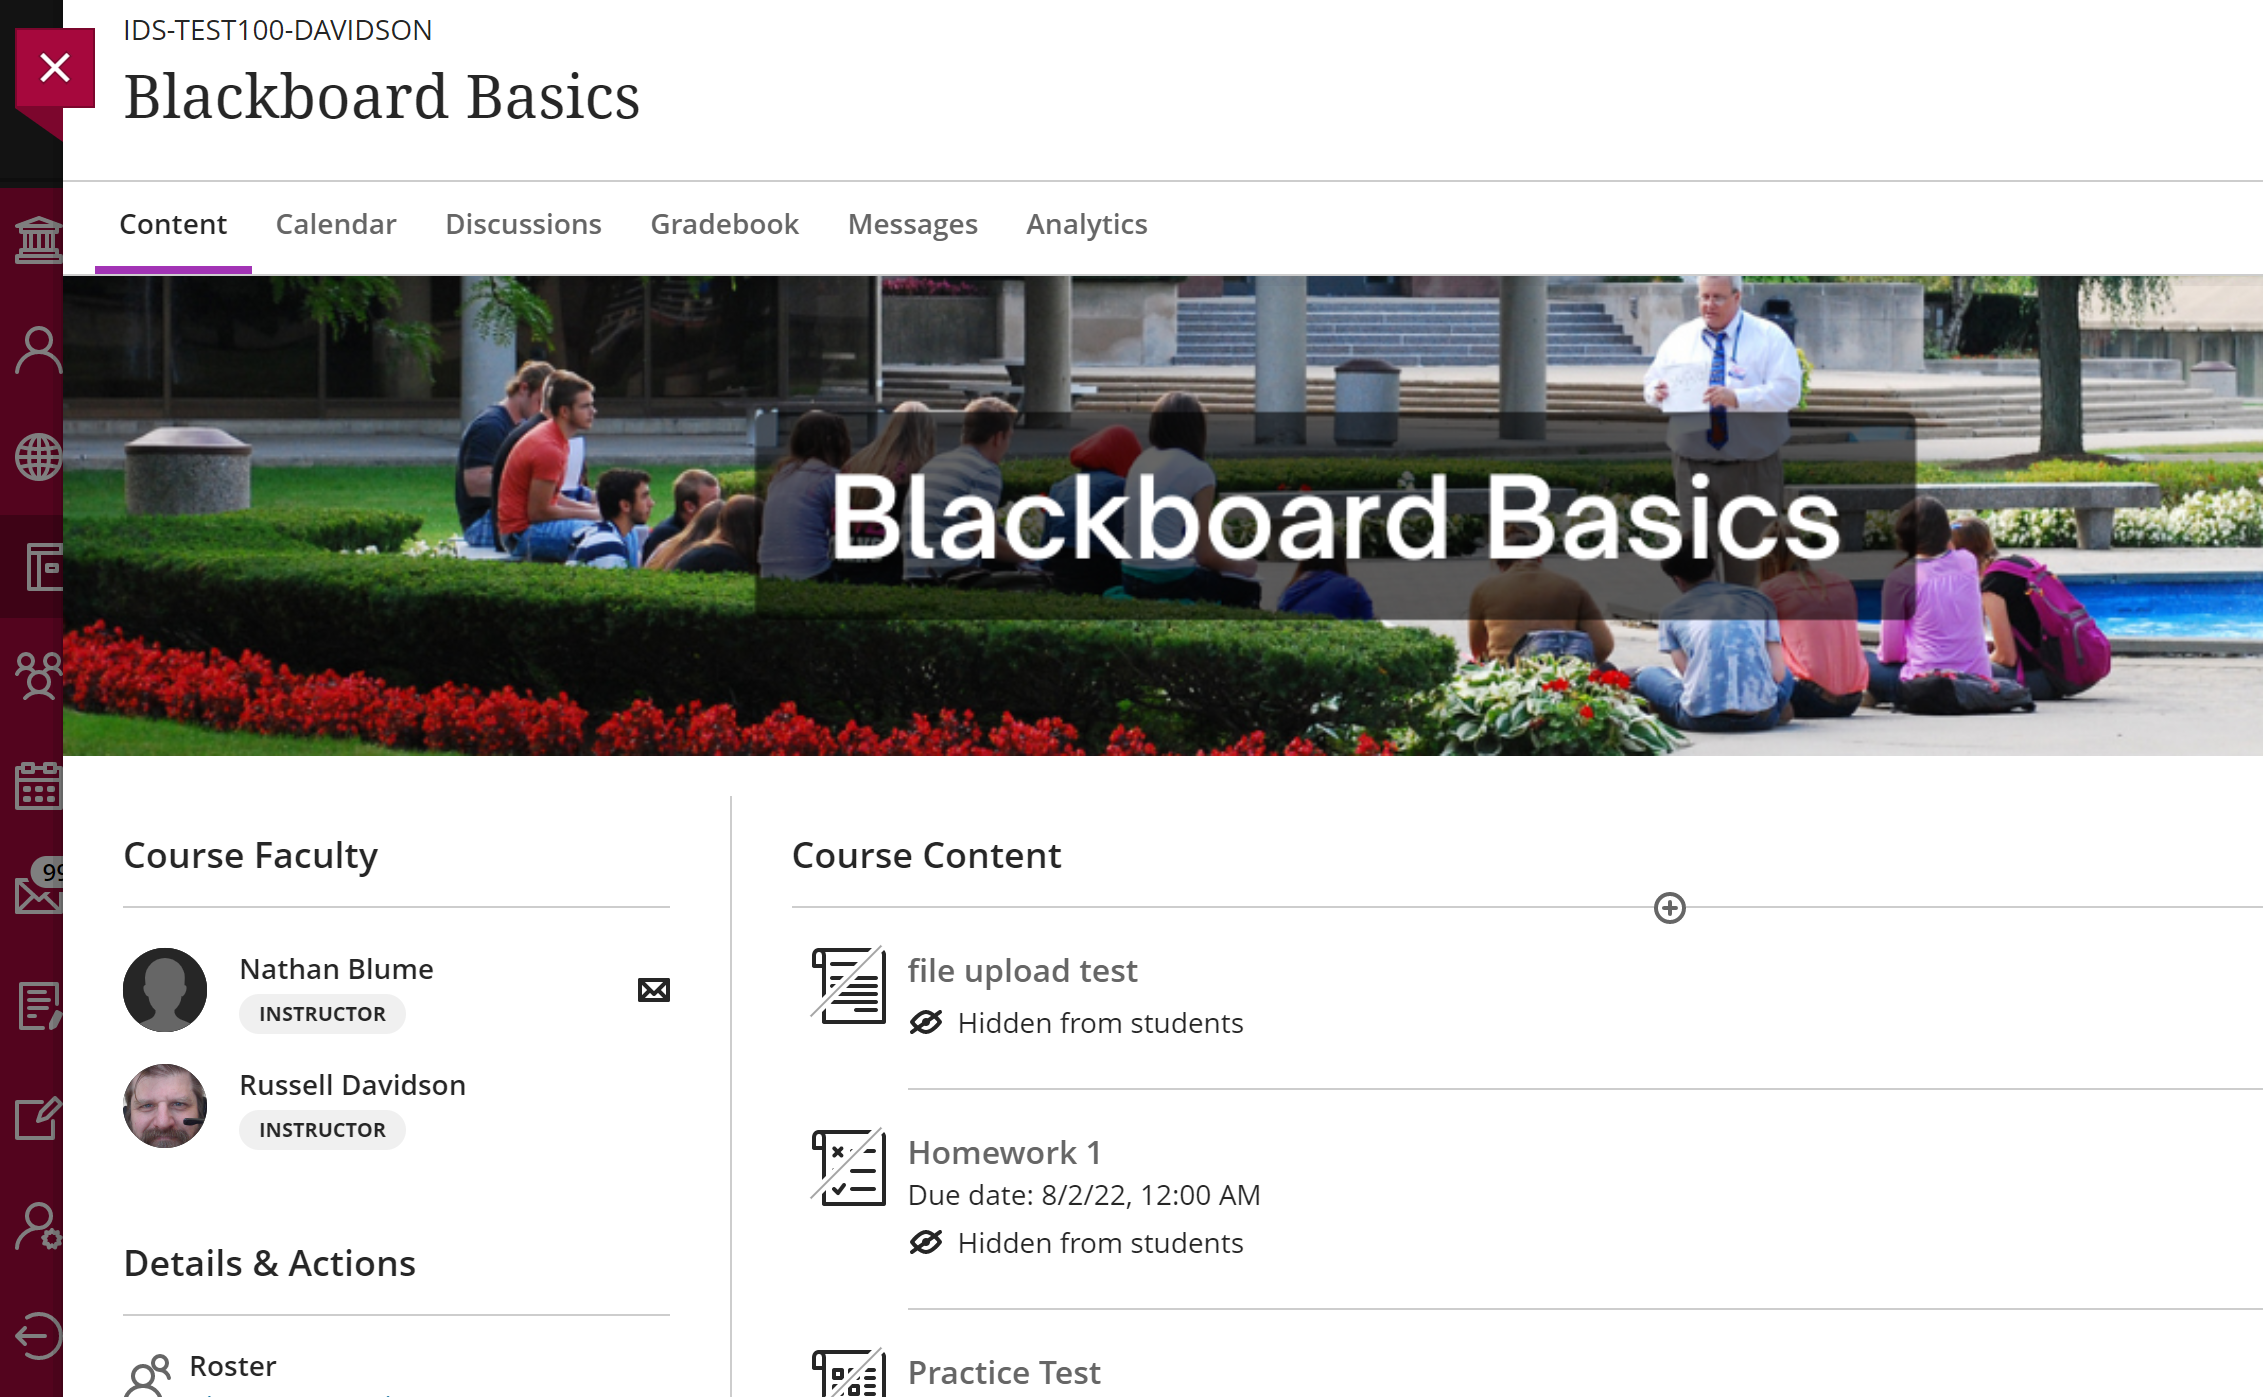
Sample Blackboard banner (the course "card" vs. inside the course).

Add a Basic Element to a Canva Design
The Canva design platform provides many different options. This article focuses on the basic elements options: lines & shapes, graphics, and photos.
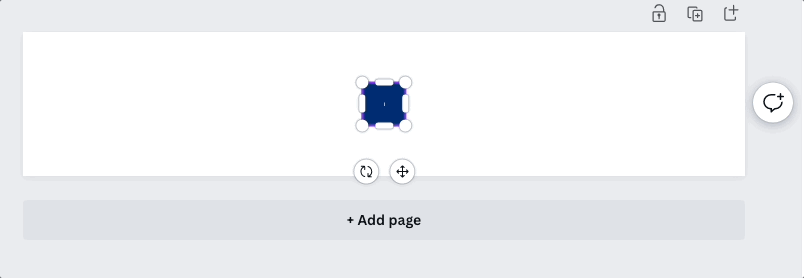
From your design canvas, select the Elements button in the far left, black menu bar. This will expand the menu.
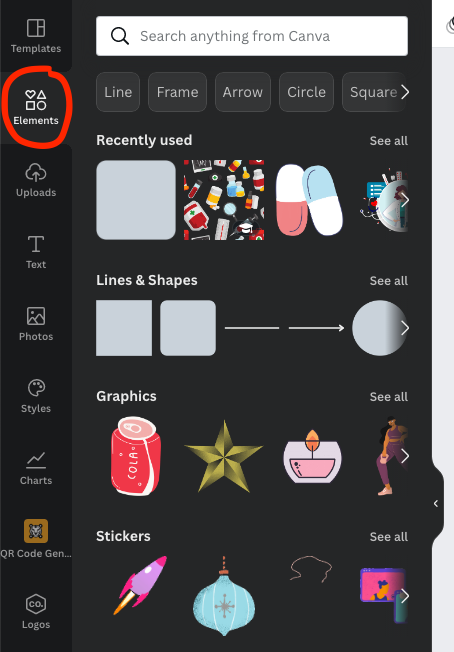
Based on what element you want to use, you click it to add it to your design. You can also choose the “See all” option or the arrow to the right in order to see more choices.
You can then adjust the size and placement of the element.
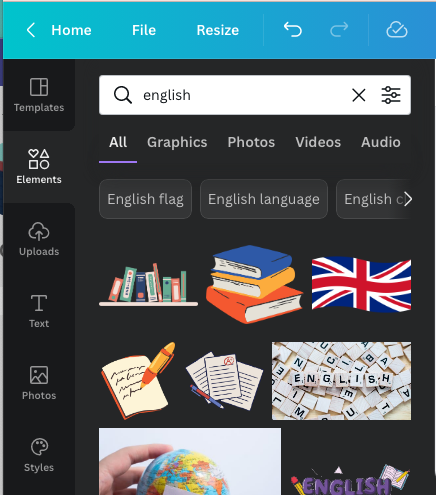
You can also search for elements based on keywords. For example, these, and many more, came up by searching “English.”
Blackboard banner notes:
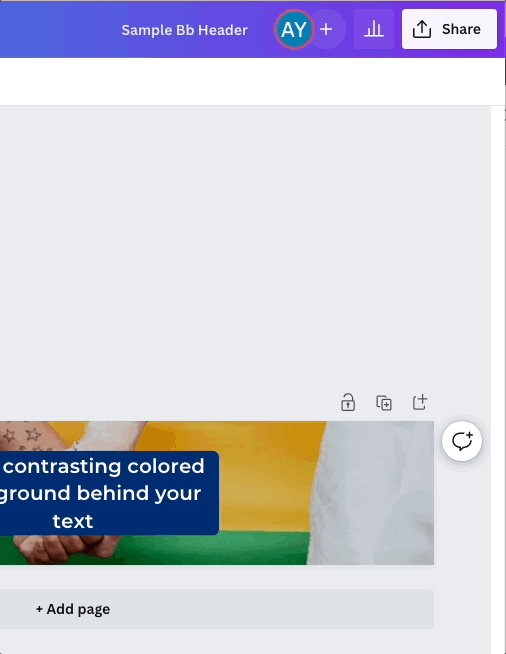
- The full length of the banner will only be visible once the course is open. The course “card” on the main Blackboard Courses page, however, will only show the very center of the banner. Keep this in mind as you design your banner (see below for examples).
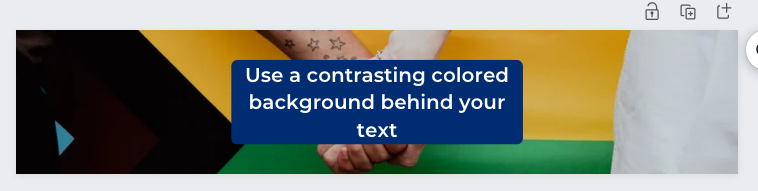
- If you will be adding text to your banner, say, the course name, make sure the text will be clear, legible, and centered. You can use an opaque or semi-transparent shape behind the text so that it stands out (see below for examples).
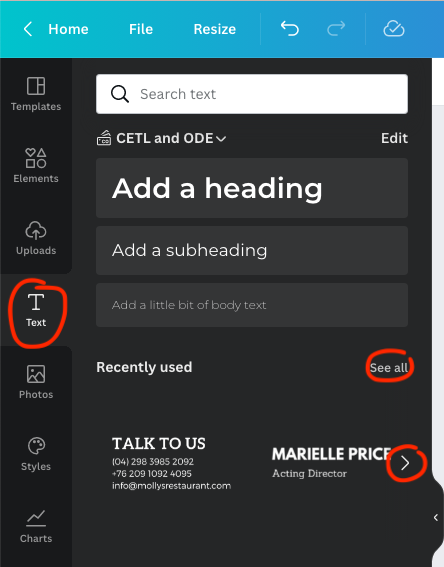
Add Text to a Canva Design
The Canva design platform provides many different options. This article focuses on the Text option.
From your design canvas, select the Text button in the far left, black menu bar. This will expand the menu.
Based on what element you want to use, you click it to add it to your design. You can also choose the “See all” option or the arrow to the right in order to see more choices.
You can then change the font, size, color, etc. of your text.

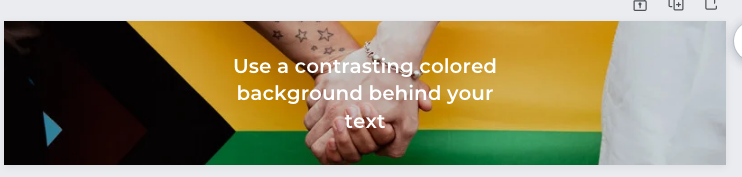
Make sure your text is legible in terms of font and size, but also color: avoid yellow and similar text to background color. For example, the first image below is quite hard to read. The second, with the solid-colored box behind the text is much more legible.
Blackboard banner notes:
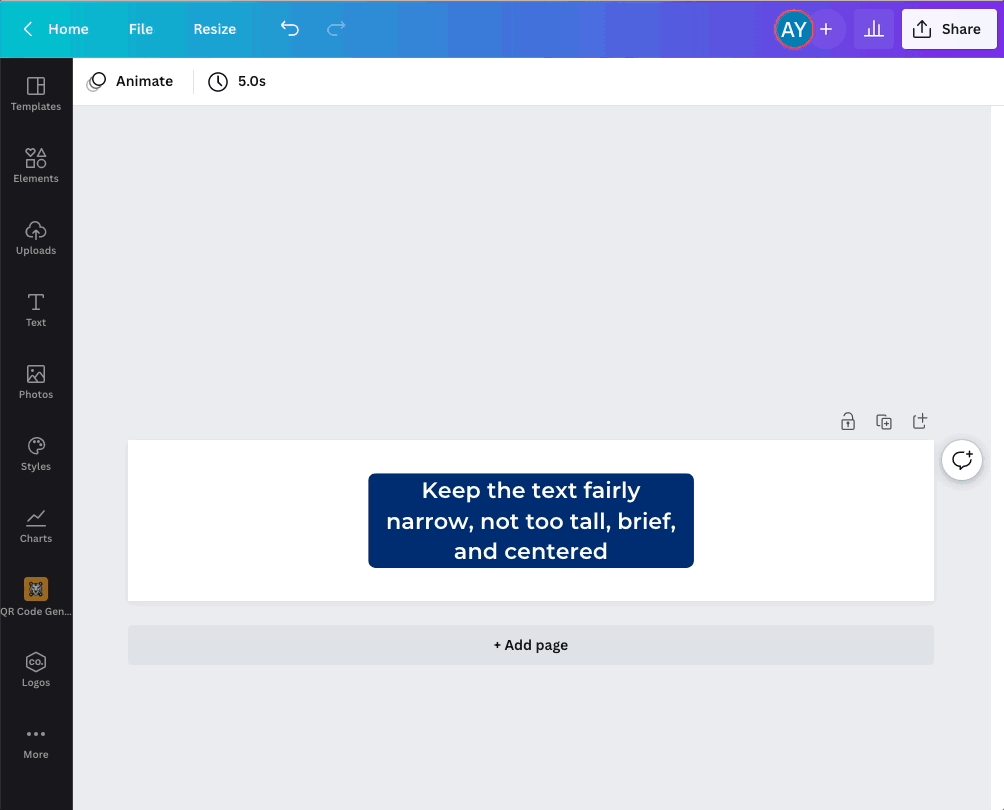
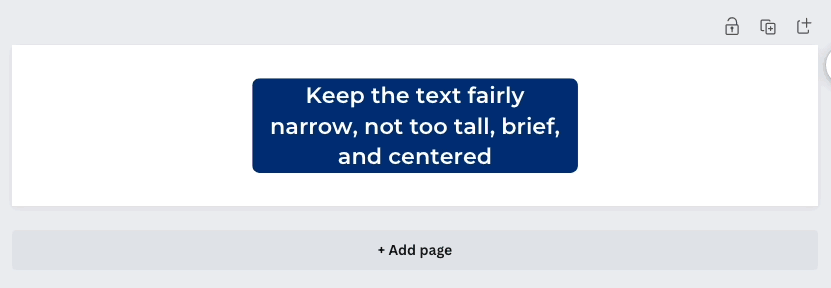
- The text should be fairly narrow, not too tall, brief, and centered (see below).
- The full length of the banner will only be visible once the course is open. The course “card” on the main Blackboard Courses page, however, will only show the very center of the banner. Keep this in mind as you design your banner (see below for examples).
- If you will be adding text to your banner, say, the course name, make sure the text will be clear, legible, and centered. You can use an opaque or semi-transparent shape behind the text so that it stands out (see below for examples).
Download a Canva Design
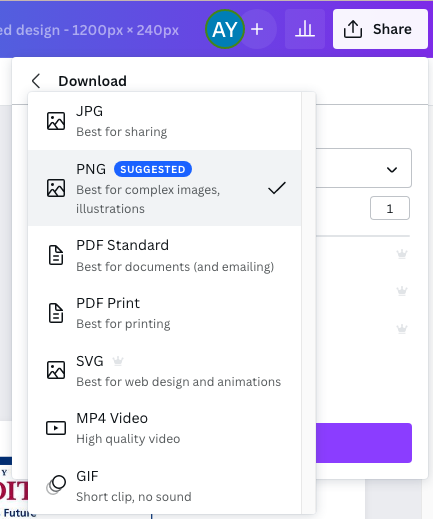
Once you’ve completed your design, you can download it in a number of different formats: image file (PNG, JPEG, SVG, GIF), document file (PDF), or video. For most purposes, PNG, JPEG, or PDF will be the best choice.
From inside the design you wish to download, click the Share button and then click the grey Download button (the first one).
You can leave the file type as the suggested or default option or you can change it by clicking the drop-down arrow.
Generally speaking, you will not check any of the other options.
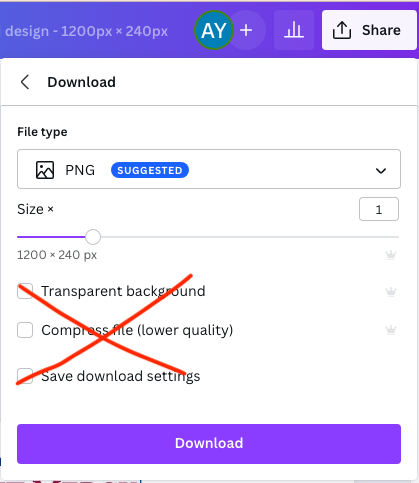
Click the purple Download button.
This will open your local storage (Windows Explorer or Mac Finder). Choose where you’d like to save the file.
Blackboard banner notes:
- Download as either PNG (default) or JPEG.
- Leave the size as 1200 x 240 px (what you should have set it to when initially creating your custom size design).
Add a Course Banner
Course banners appear at the top of the course home page, as well as above the course card in the tile view of Blackboard's Courses page.
Course banners should be 1200 x 240 pixels.

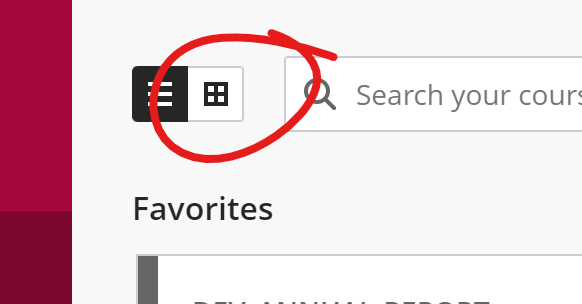
The easiest way to add a banner to your course is to switch your courses page to tile view (if you are not already using tile view) by clicking the grid icon in the upper left of your Courses page.
If you have not set a banner image for the course, Blackboard defaults to a nature scene for the course banner.
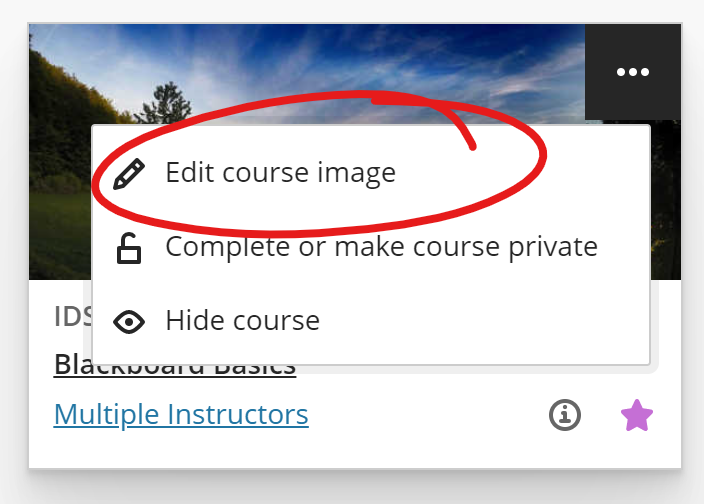
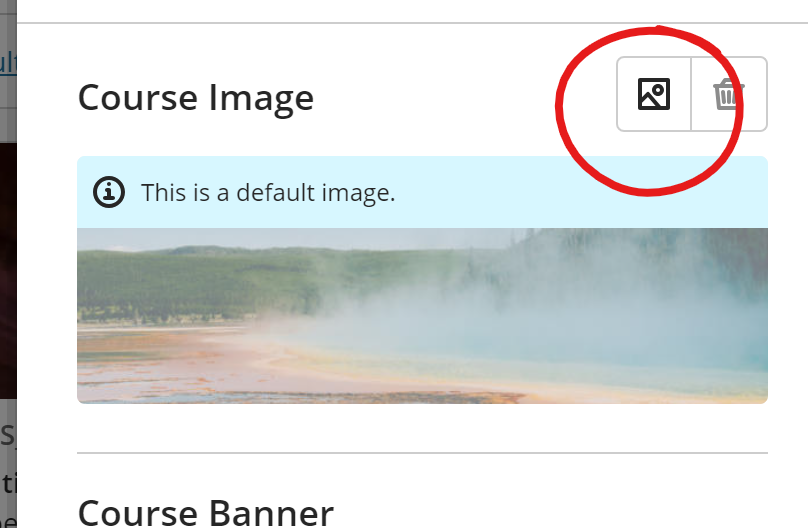
Click the More Options button in the upper right corner of the course tile you want to add a banner to (the button appears when you mouse over the tile). Then choose Edit Course Image.
This will open a DISPLAY SETTINGS panel on the right.
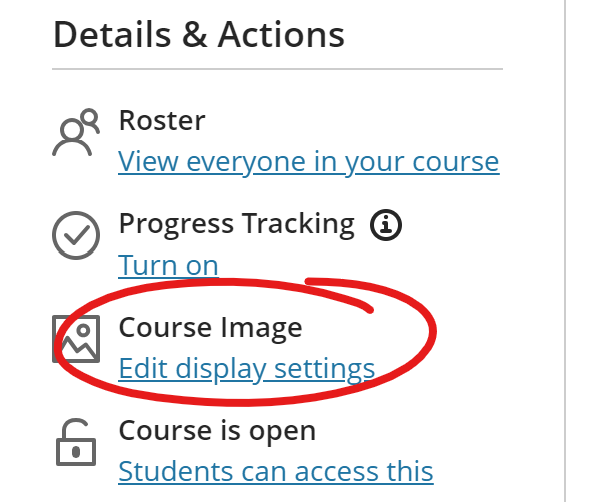
If you're teaching an ultra-style course, you can also access this DISPLAY SETTINGS panel by opening the course and choose EDIT DISPLAY SETTINGS under the Course Image heading in Details & Actions.
To add your own image, click the IMAGE button in the upper right, across from the "Course Image" label.
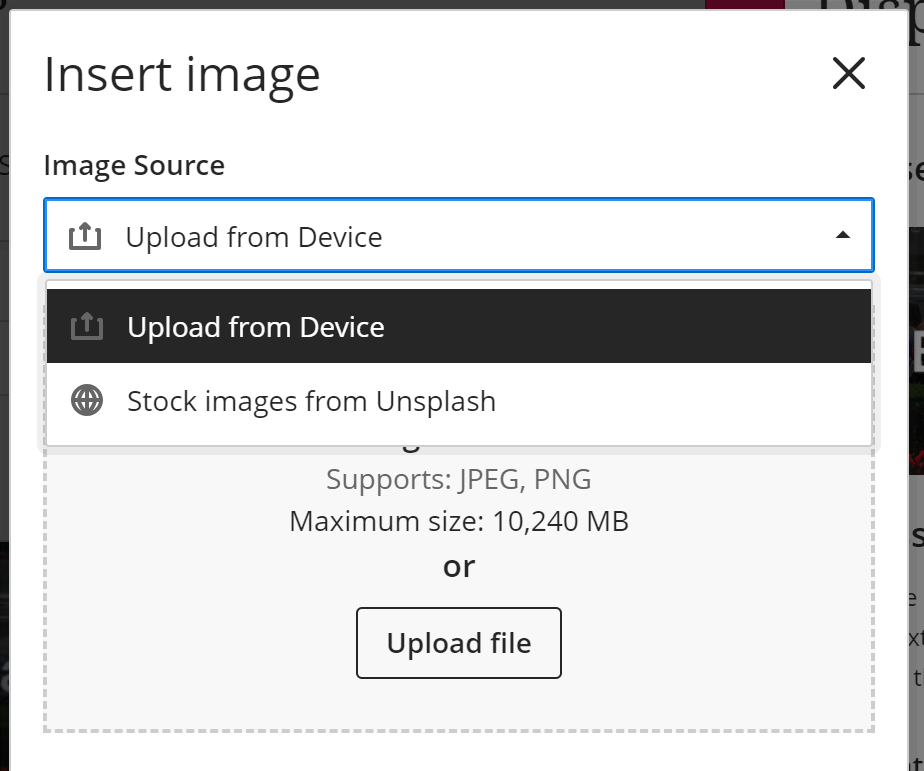
This will open an INSERT IMAGE overlay. From here, you can upload an image from your computer (1200 x 240 pixels are the recommended dimensions).
If you are using an Ultra Style course, you will also have the Image Source option "STOCK IMAGES FROM UNSPLASH," which lets you choose from a library of stock photos.
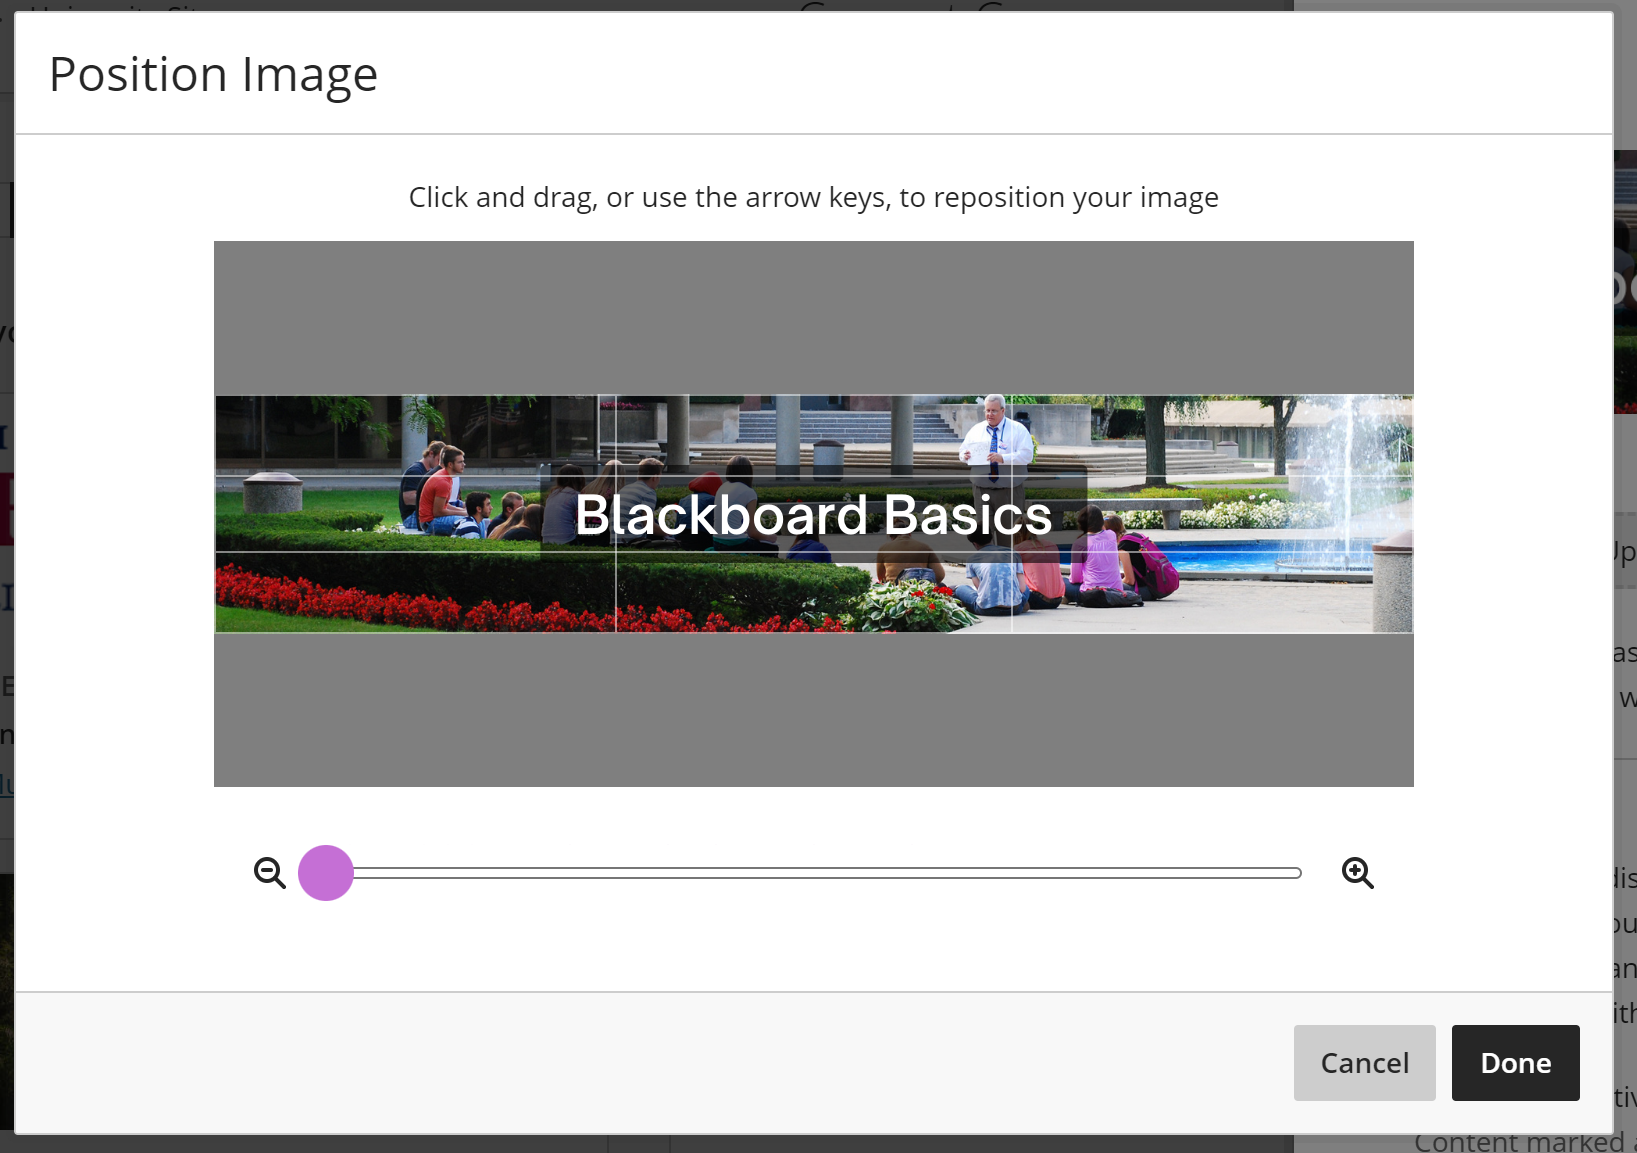
Next you will be prompted to adjust the magnification and position of your image. If your banner image is the recommended 1200 x 240 pixels, no adjustment should be necessary. Click Done.
To use this image as a banner in your course, toggle the gray X on the Course Image line above your image preview so it becomes a green check. This will put the image at the top of your course when students open the course site itself.
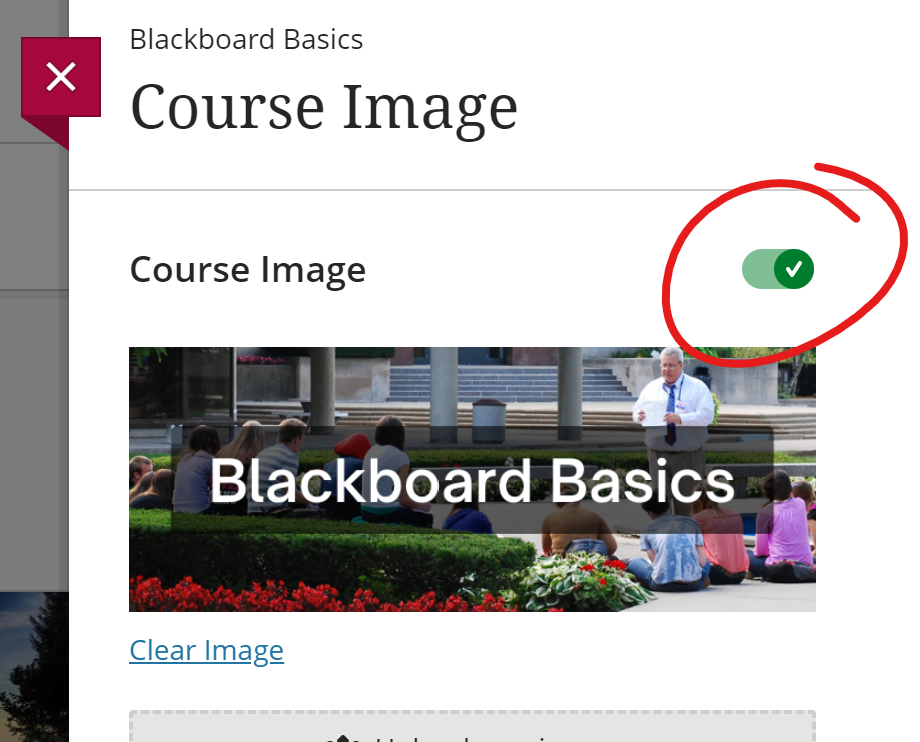
Click SAVE at the bottom of the panel to save your change.
In an ultra-style course, the banner will appear on the Course Content page, below the menu and above the content.
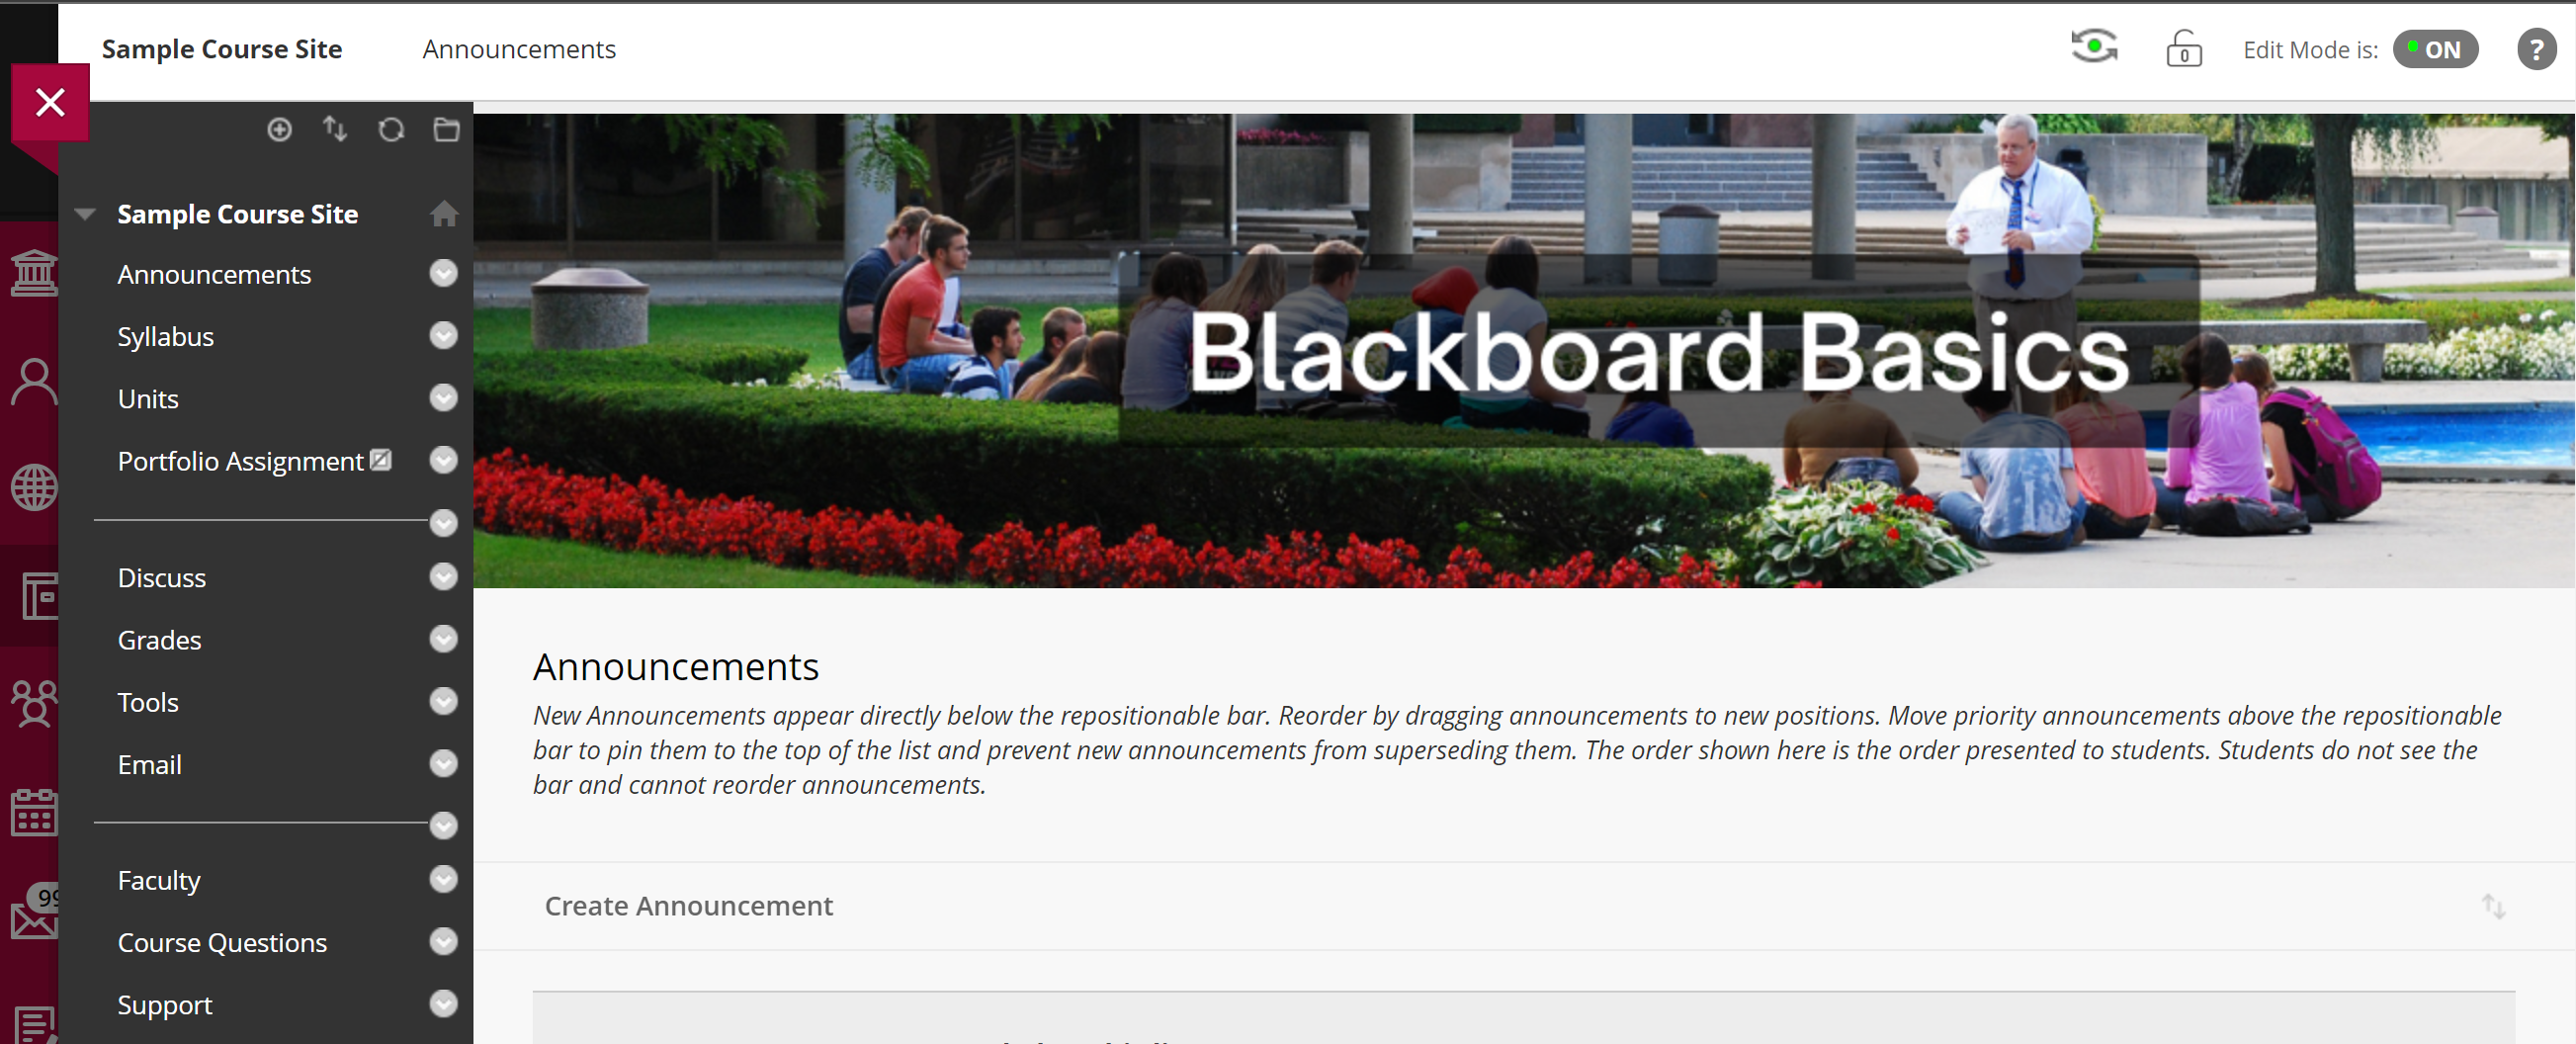
In a classic-style course, the banner appears at the top of the course home page (announcements).