The FILE Tool lets you add file (Powerpoint file, PDF file, Word file, etc) as a stand-alone link to your course site. If you want to add a file and include contextual text, use the Item tool instead.
DO NOT upload video or audio directly into Blackboard. In keeping with the Detroit Mercy Guidelines for Lecturing Online, you should upload your videos to
Media Library (Yuja) or Microsoft Stream instead and link them to your course site.
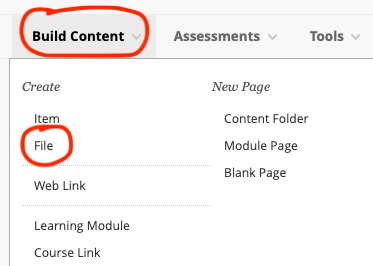
To get started, go to the Content Area in your course where you’d like to add the content, then point to Build Content and choose File under the Create heading.
Enter a name for the file you’re adding. While Blackboard does give you the opportunity to change the file name, we do not recommend doing this. Changing the file name can make it difficult for students to locate the file after they’ve downloaded it to their own computer.
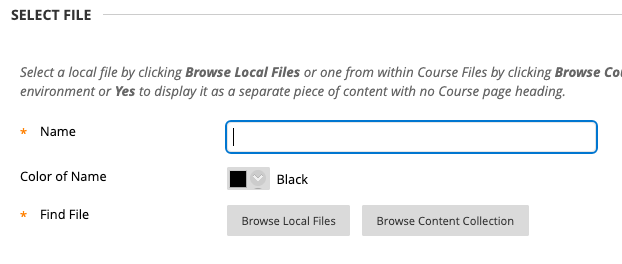
If you’d like to change the color of the file link, click the (default black) color tile, and select a new color. Be sure to consider legibility and accessibility and avoid colors like yellow or pastels.
Click the Browse Local Files button. This will open either Windows Explorer or Mac Finder. Locate and choose the file you wish to add to Blackboard.

Be sure to Submit to save your changes.
Note: the way these files will appear when the link is clicked depends on many factors, including file type and the user’s computer settings. It may open in Blackboard in a PDF viewer, it may open in a new browser window, or it may require download.
The UPLOAD Tool lets you add file (Powerpoint file, PDF file, Word file) as a stand-alone link to your course site. If you want to add a file and include contextual text, use the Document tool instead.
DO NOT upload video or audio directly into Blackboard. In keeping with the Detroit Mercy Guidelines for Lecturing Online, you should upload your videos to
Media Library (Yuja) or Microsoft Stream instead and link them to your course site.
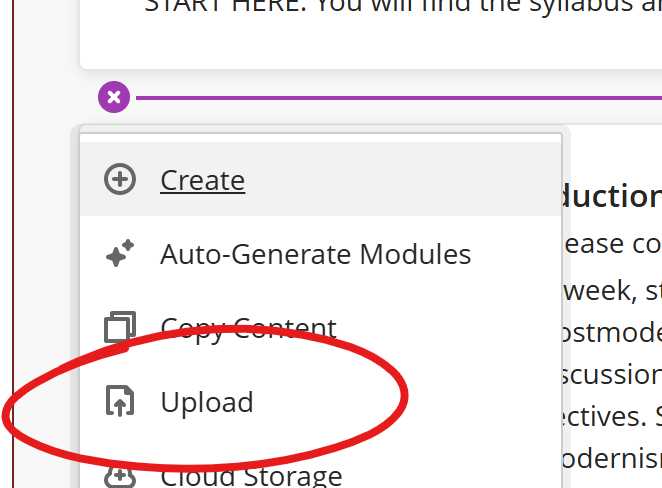
To get started, go to to the main Content Area of your course. Click the add button (+) and choose Upload.
Use the file browser to locate the file or files you wish to upload. Use CTRL + CLICK (CMD + CLICK on Mac) to select more than one file at once.
Files will take a few seconds to upload (depending on the size of the files).

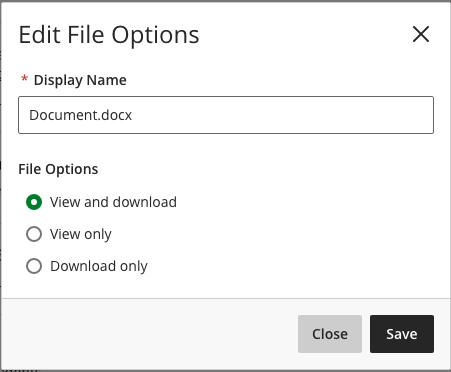
You will receive a popup message asking how you want students to access this file: view, download, or view and download.
View and Download allows users to view the file online OR download it to their computer.
View opens the file in a Blackboard PDF viewer (documents) or a new window (other media).
Download requires users to download the file to their computer.
Once you've added a file (or files) to Blackboard, you should click the file's MORE button and choose Edit to add a description.
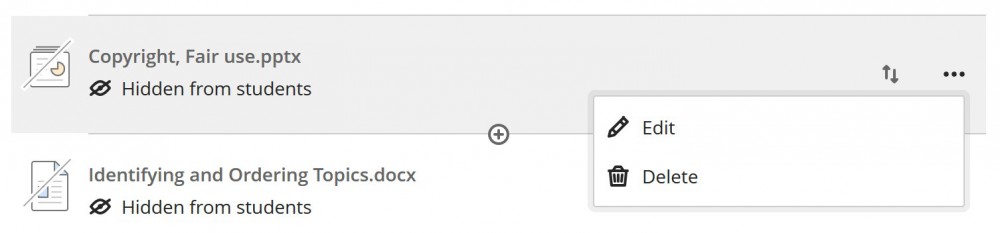
Editing the item lets you add a description (which we strongly encourage -- ideally, you should include information about what the file is, why you are sharing it, and how students should use it). If you choose to replace the file, you will be prompted to replace the file from your local storage.
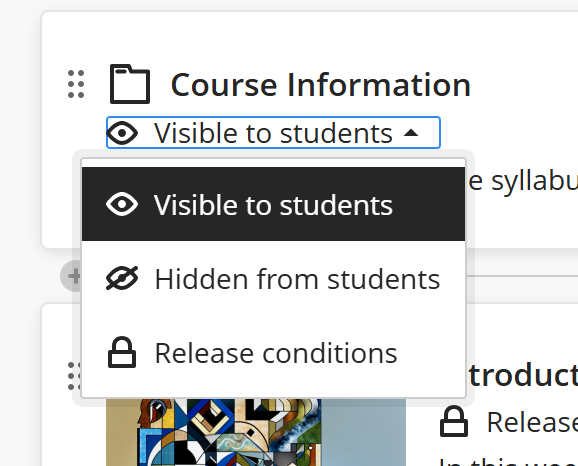
Choose whether you want the material to be immediately available or hidden from students (the drop-down menu). You'll find details on availability options here.
Be sure to Save your changes.
Note: the way these files will appear when the link is clicked depends on many factors, including file type and the user’s computer settings. It may open in Blackboard in a PDF viewer, it may open in a new browser window, or it may require download.