Collaborate recordings are not permanently available for either viewing or downloading. If you wish to keep a recording from term to term (and class to class), you should download these files and utilize other video-sharing options to share videos with students. For example, use Yuja Media Library.
Find Blackboard Collaborate
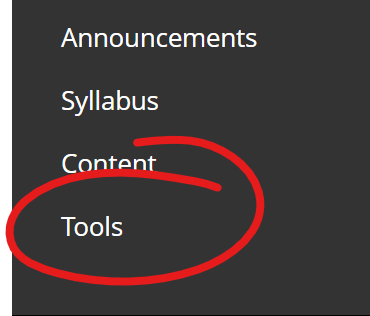
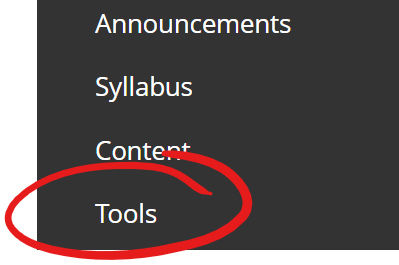
To access Blackboard Collaborate, click TOOLS in the left-hand course navigation menu.
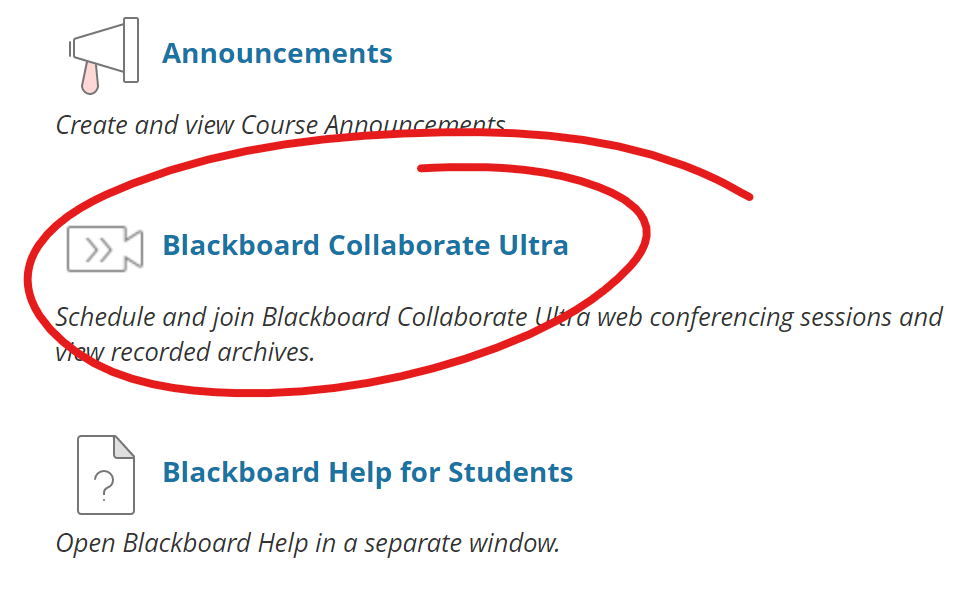
Then choose Blackboard Collaborate Ultra from the Tools list.
Find Collaborate Recordings
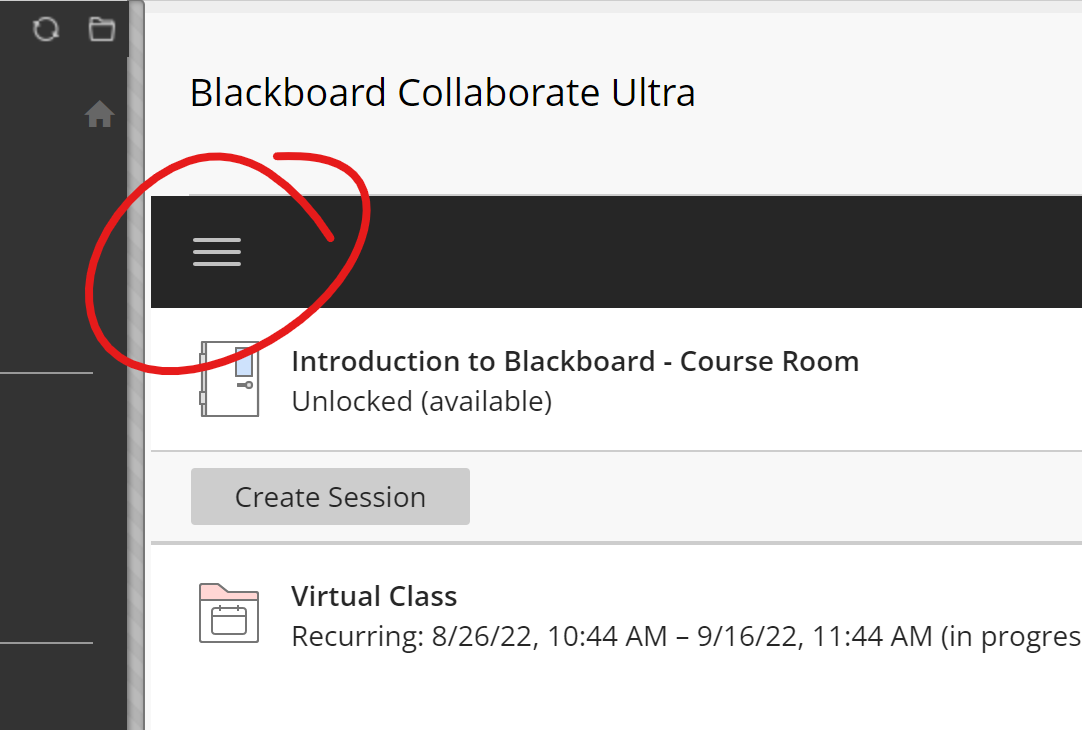
From the Collaborate page, click the (three-line) menu button in the upper left corner.
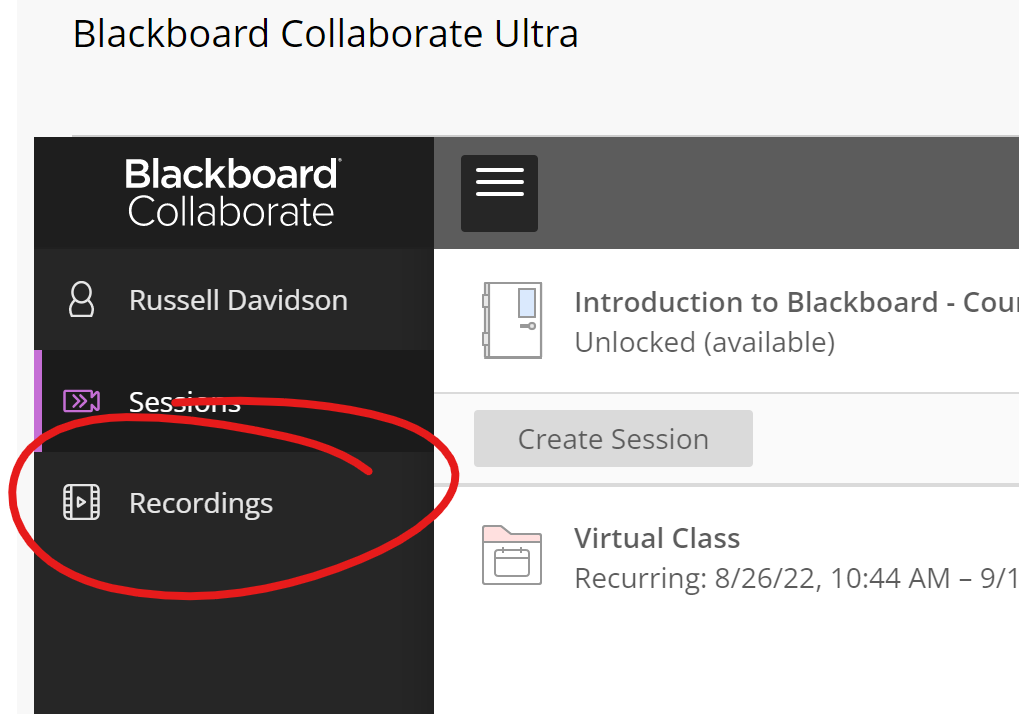
Choose RECORDINGS on the left-side menu.
Download Collaborate Recording
Collaborate recordings are not permanently available for either viewing or downloading. If you wish to keep a recording from term to term (and class to class), you should download these files and utilize other video-sharing options to share videos with students. For example, use
Yuja Media Library.
Within the Collaborate Recordings view, mouse-over the three dots to the right of the video you wish to download.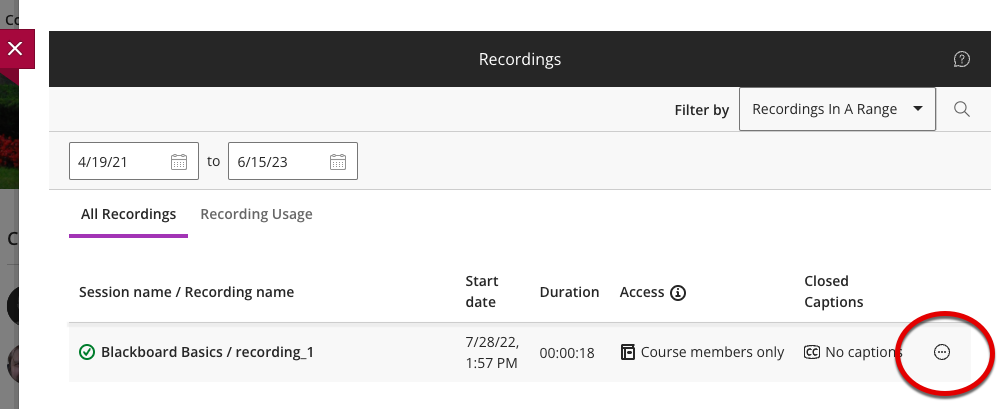
Choose download.

This will open your downloads or documents file (Finder on Mac and Windows Explorer on PC). Save the file with a unique title and in a place you can later find. The file will save as mp4, which is compatible with most video sharing and viewing platforms.
Find Media Library [YuJa] Link
The Media Library is the starting point for managing your media collection on YuJa. You can use this page to upload and create media, view comments and analytics, and add videos to course-based channels.
When faculty access their Media Library from a link inside a course, they'll be presented with their media collection. When students access the media library from inside a course, they'll be presented with the course's media channel -- a list of videos published to the course channel by the instructor.
Access the Media Library by clicking Tools in the course menu.
Then choose Media Library [YuJa] from the alphabetically sorted Tools list
![Media Library [YuJa] item highlighted in tools list](http://cetl.udmercy.edu/knowledge/fileman_data/uploads/support/add-and-organize-content/media-library-yuja/find-media-library-yuja-link/image-20221116125559-1.png)
Upload Media to Media Library [YuJa]
To upload media (video, audio, documents) to your Media Library, you can:
Drag and Drop Method
Navigate to the appropriate folder in your media library, then drag and drop you media file onto the area of the screen where thumbnails for other media appear.
Depending on the size of your upload, it may take some time for the upload to finish. You can track the upload progress using the queue overlay that appears at the bottom of the window.
File Browse Method
If drag and drop isn't convenient, click the upload button in the upper middle of the screen. NOTE: on narrower windows, the "UPLOAD" text may not appear -- look for the up-arrow icon.

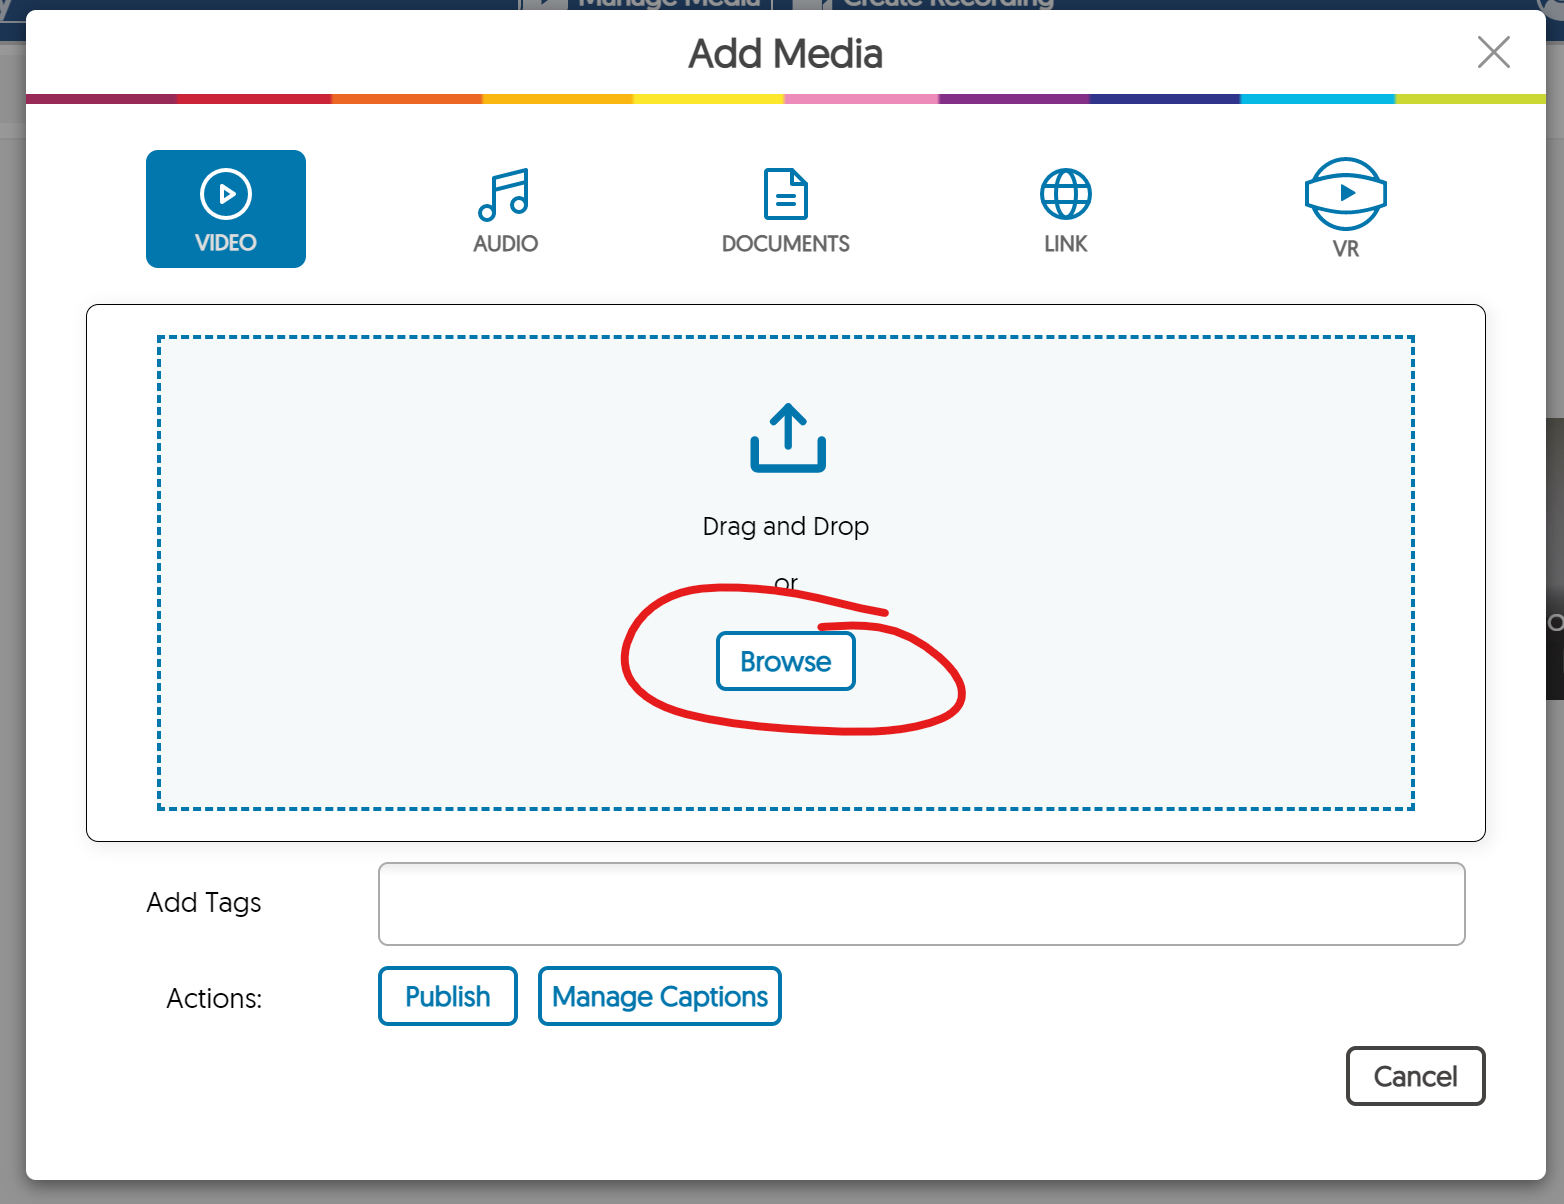
This opens the Add Media window. Click the BROWSE button in the center of the screen to open a file browser. Once you have selected a file, the upload process will begin automatically.
Formats Supported Include: wmv, .asf, .flv, .f4v, .f4a, .avi, .mp3, .mpg, .mpeg, .mps, .ps, .mp2, .m2v, .m2a,.ts, .tsv, .tsa, .mts, .m2ts, .tod, .mp4, .m4a, .m4v, .3gp, .mov, .mts (AVCHD), Flash video, .webm, .mxf, .dv., .docx, .pdf., .srt, .vtt, .txt, .csv, .xlsx, .pptx, .psd.
Launch YuJa Video Editor
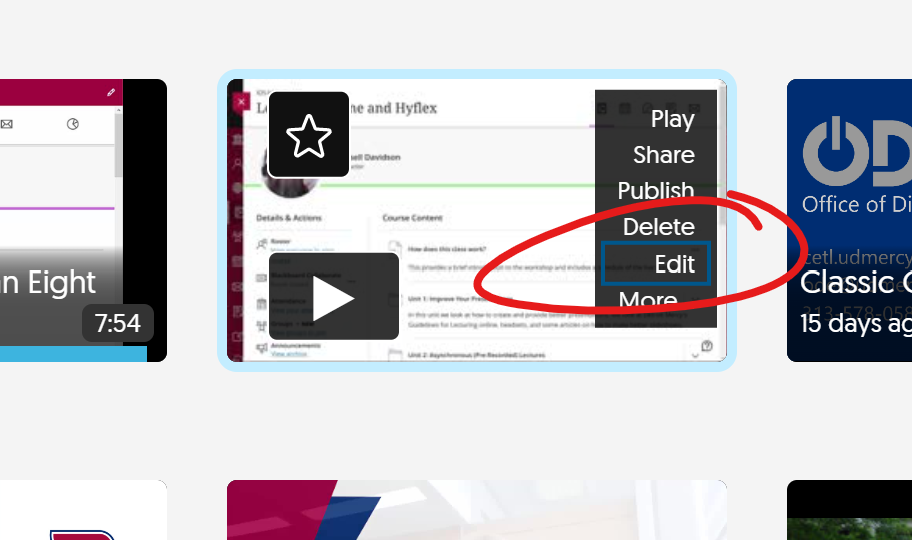
From the Media Library [YuJa], locate the media you want to get views information on.
Mouse over the preview thumbnail. Choose EDIT.
Cut Media from Video
From the Video Editor, position the play pointer at the beginning or end of the part of your video you wish to cut.
To make your cut, click the Scissor button, then click the point in the timeline where you want the cut to end (if you placed the play head at the start of the cut) or start (if you placed the playhead at the end of the cut).
They grayed-out area will be cut from your video on playback.
You'll notice captions after the cut appear in yellow and orange. This indicates these captions are out of sync with the video. They will be resynchronized automatically when you save your changes.
If you would like to fine-tune your cut by entering exact start and end times, double-click in the gray cut area to access additional options.
Save Your Video Edits
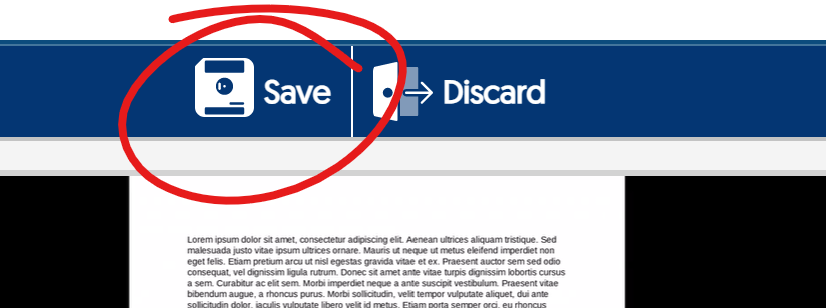
The SAVE button appears at the top-center of the video editor.
If you would like to overwrite your existing video with the edited version, choose REPLACE EXISTING VIDEO.
Otherwise, enter a revised title in the Title space that will help you distinguish the revised version from the original and still be a reasonable title for students ("Hegel's Critique of Kant pt 1" is much better than "Week 1 Lecture 1"), then click SAVE AS NEW VIDEO.
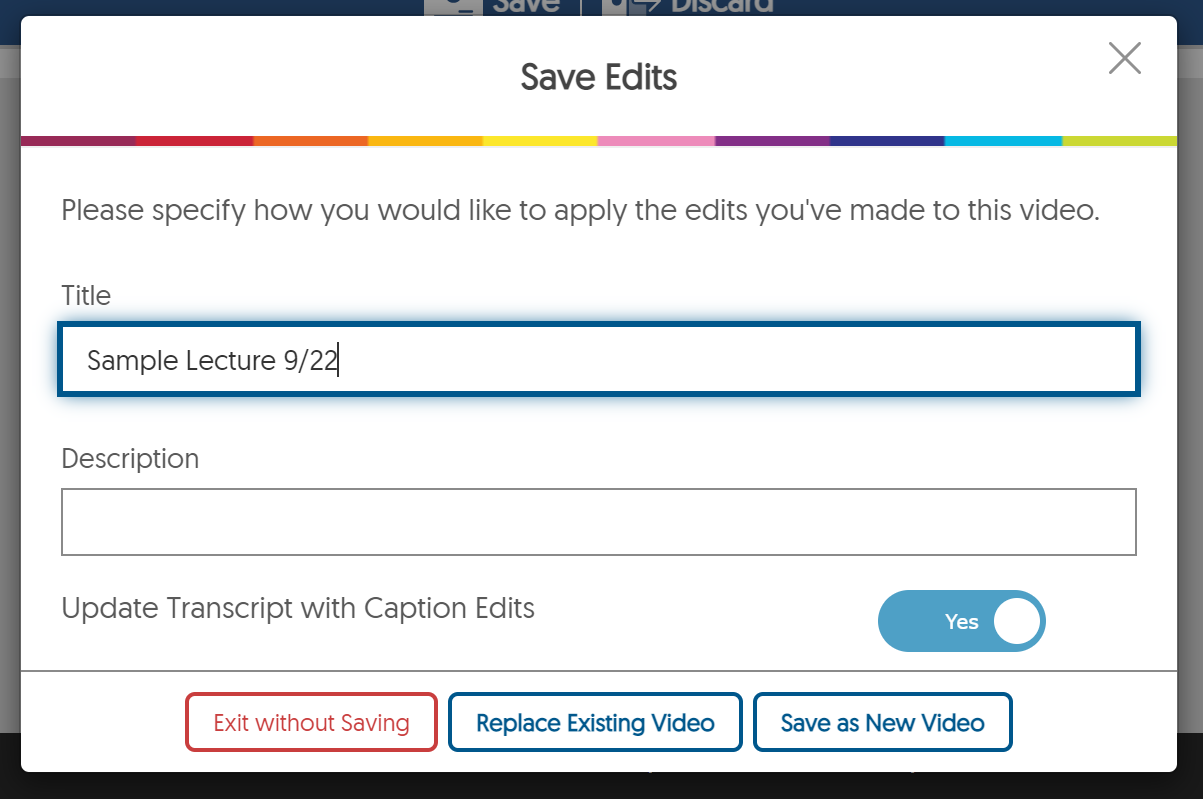
Be sure Update Transcript with Caption Edits is set to YES, as this will ensure your transcript file is corrected, if you made any caption changes (there is no harm to leaving this on if no changes were made that impact captions).
Find Media Chooser [YuJa] Content Link
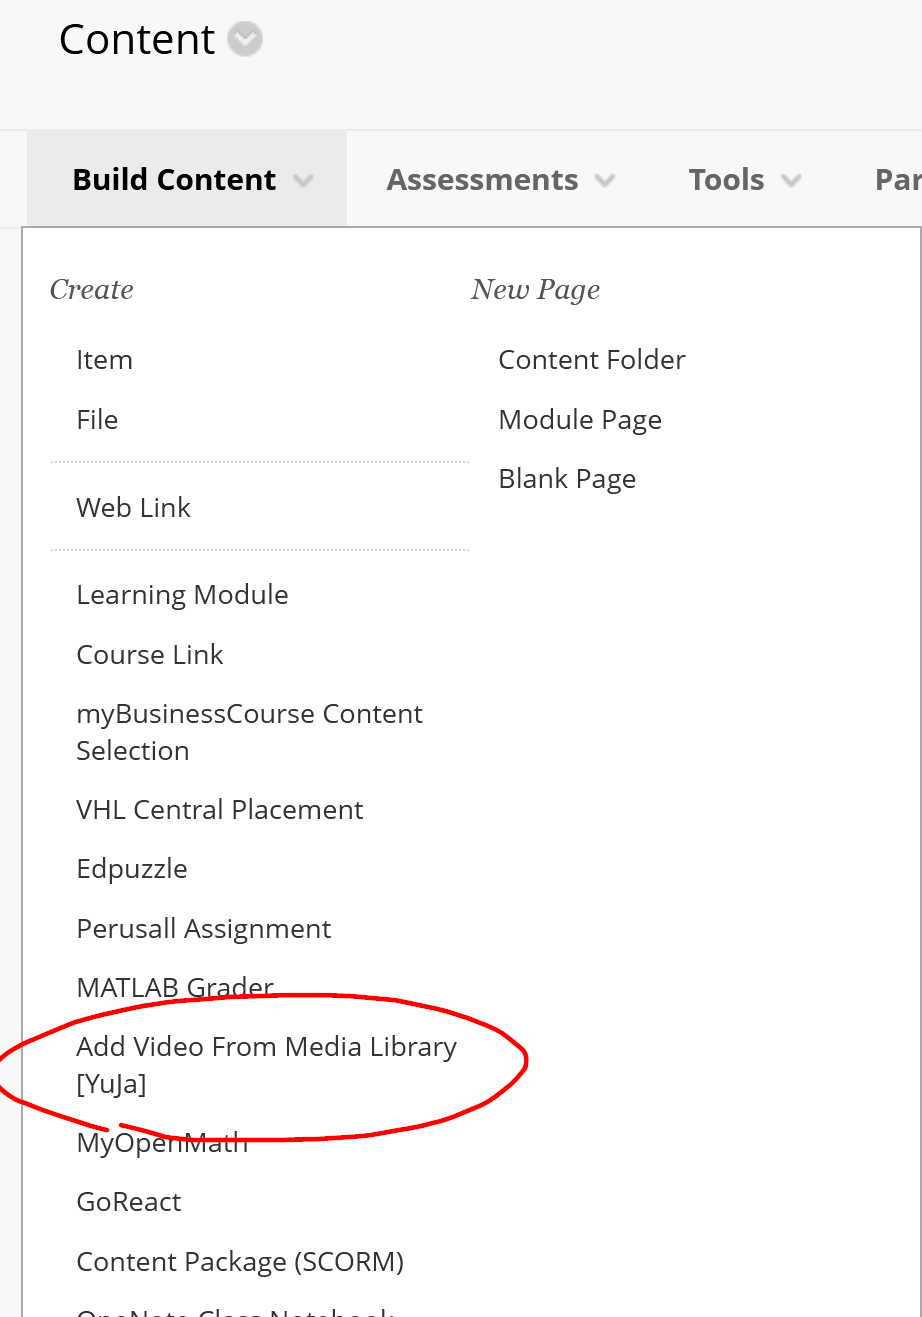
Hover over the Build Content menu in any Content folder and select Add Video From Media Library [YuJa].
Insert Media From Media Chooser
From the Media Chooser, locate the media you wish to embed in the textbox and click on it to select.
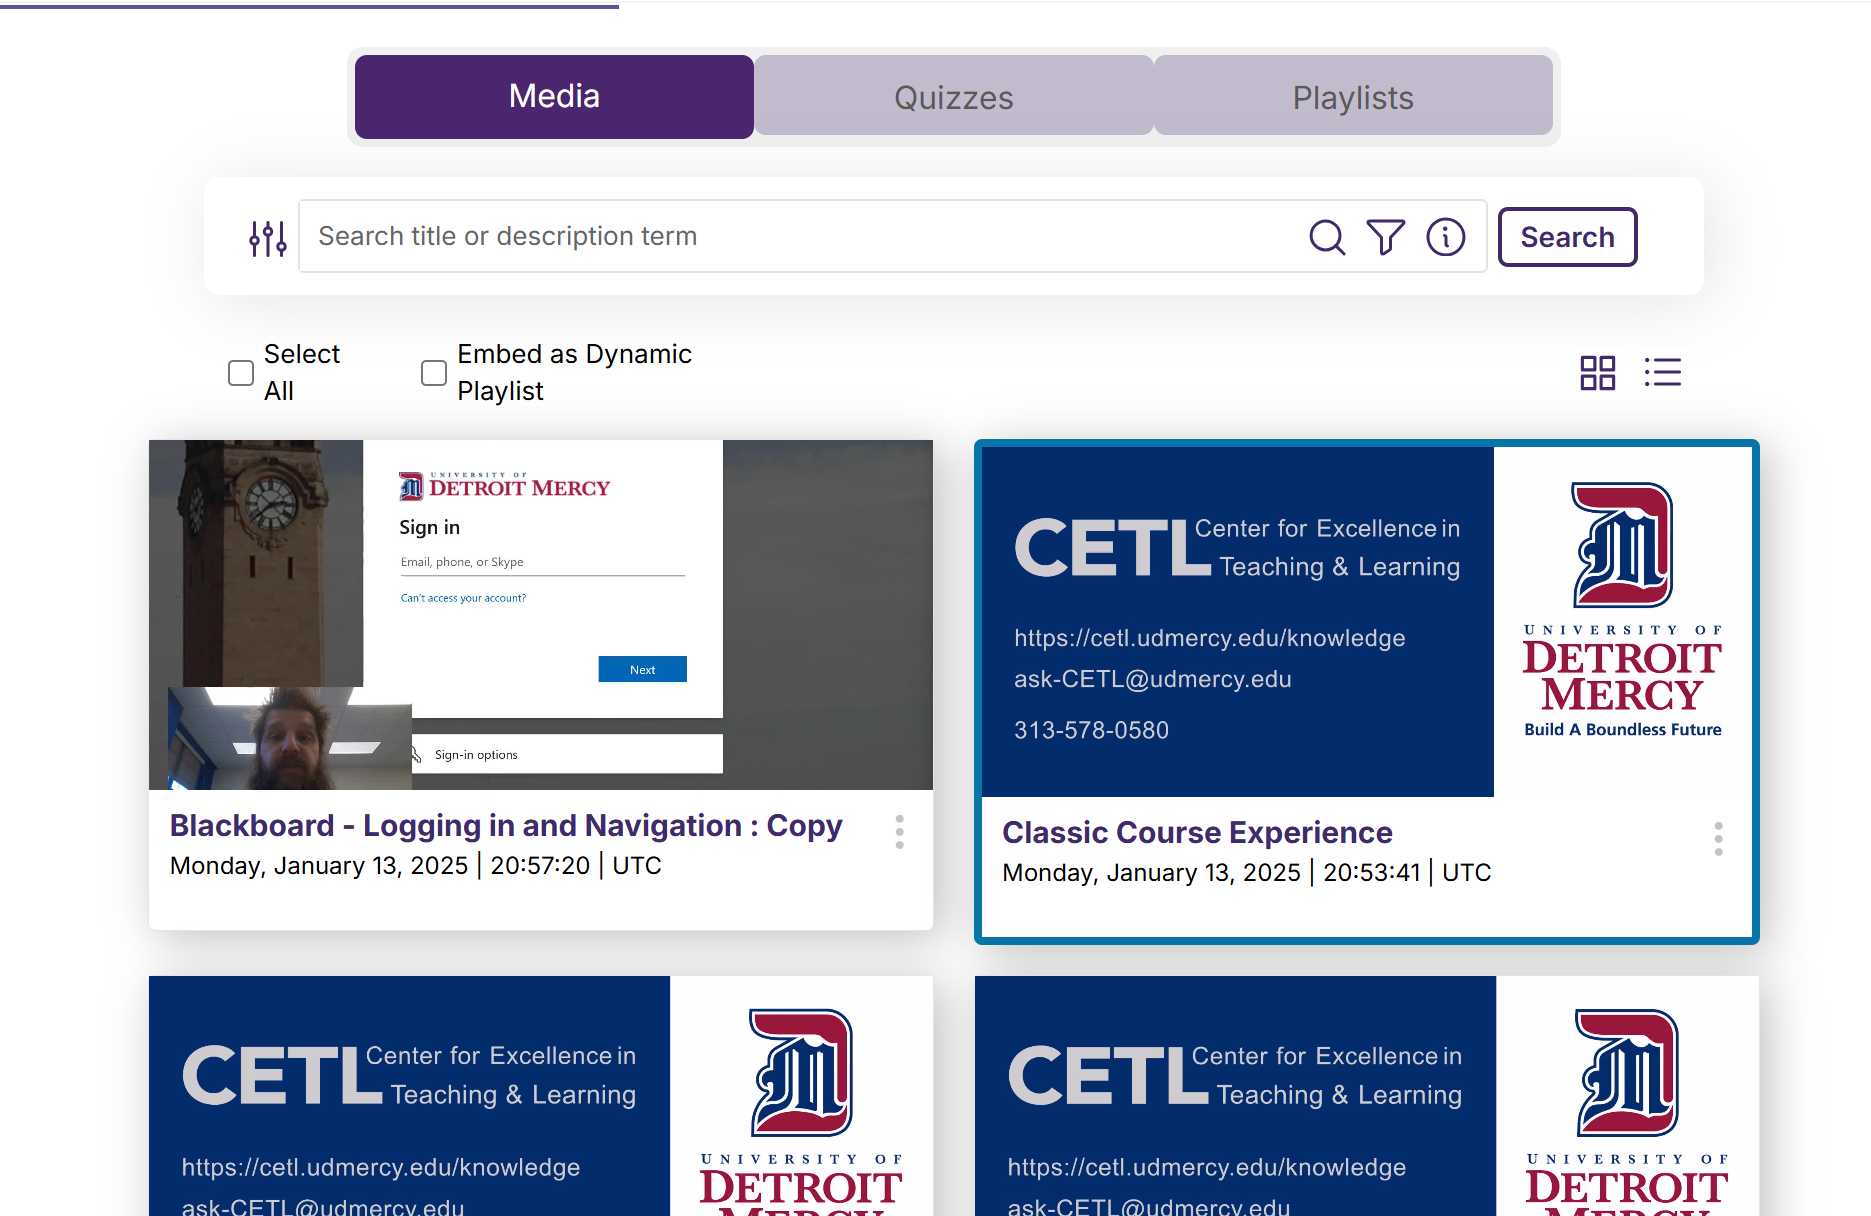
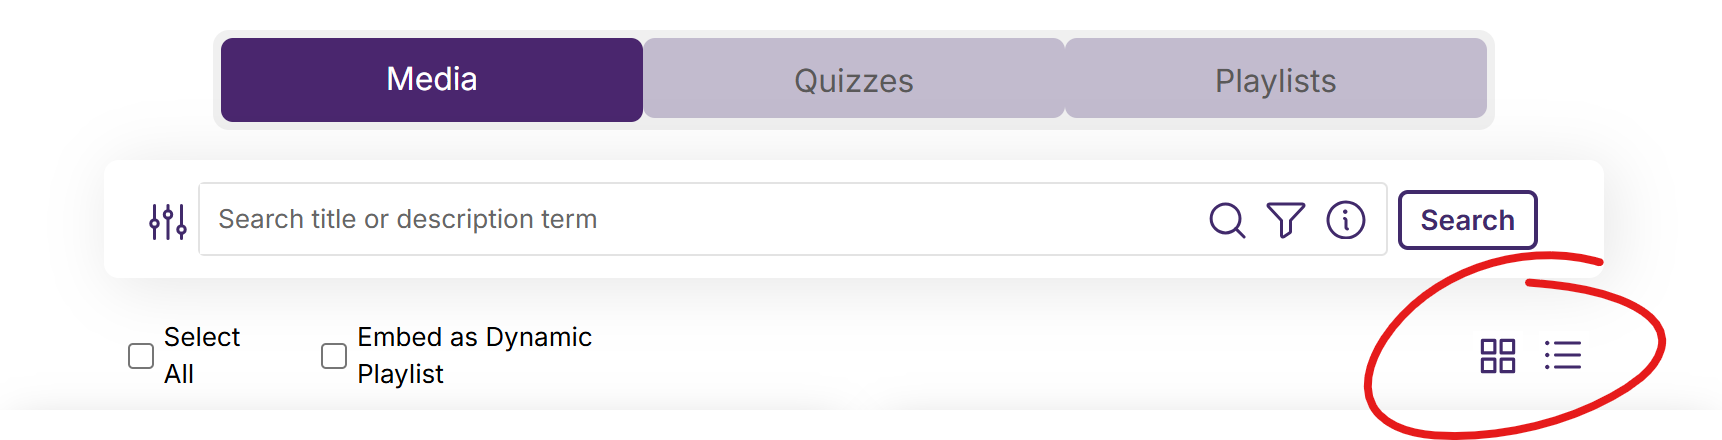
If you have a lot of videos in your Media Library, you may want to use the search box to locate the a file. Switching from thumbnail view to list view may also help.
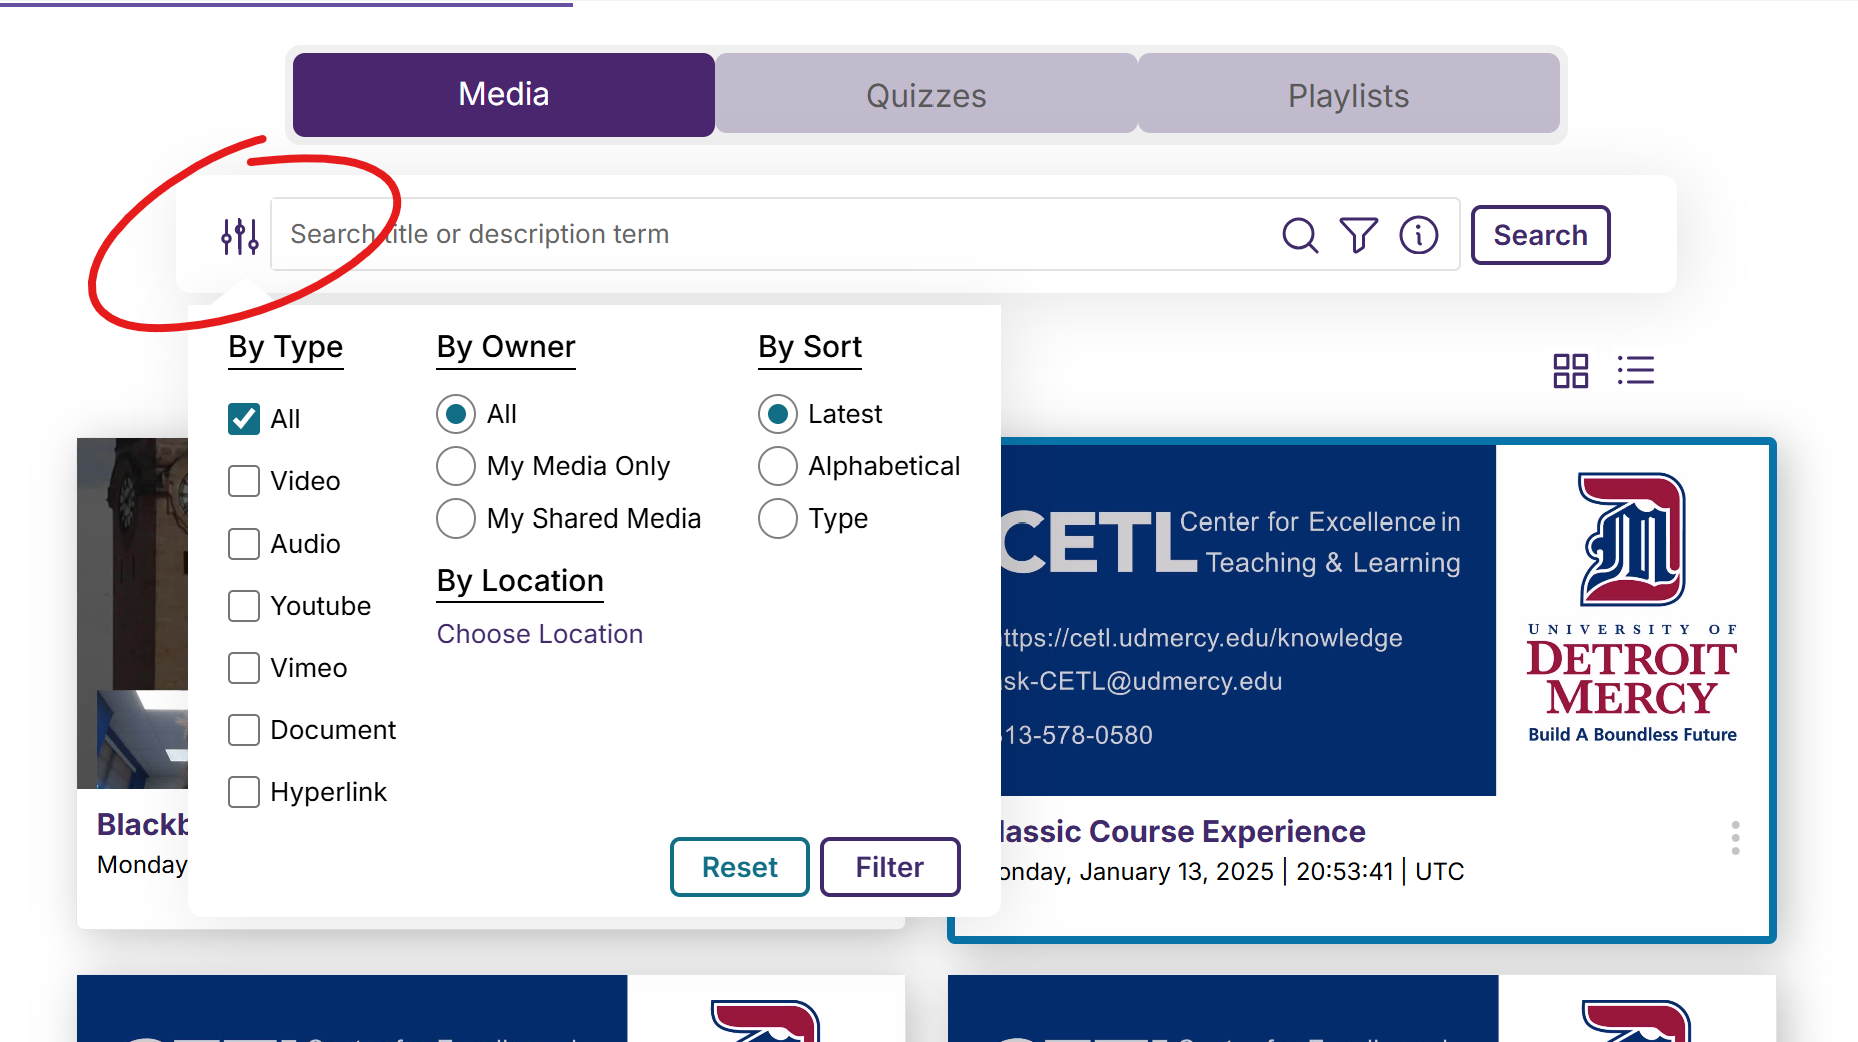
The filters button can also help you narrow the contents that appears in the Media Chooser. Click the filter button (left of the search box), select appropriate filters, then click FILTER to narrow the items displayed.
Scroll the Media Chooser window down and click the Insert Content button.
When you click Insert Content, your media will be added to your page.
Participants who click on embedded images and files will be prompted to download the files.
Collaborate recordings are not permanently available for either viewing or downloading. If you wish to keep a recording from term to term (and class to class), you should download these files and utilize other video-sharing options to share videos with students. For example, use Yuja Media Library.
Find Blackboard Collaborate
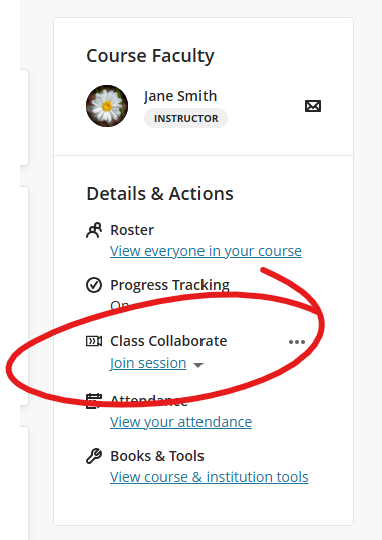
Blackboard Collaborate is located in the Details & Actions list on the left side of the Content section of a course.
Find Collaborate Recordings
Click the More (three-dot) button right of the Blackboard Collaborate heading under Details & Actions (on the right side of the page),
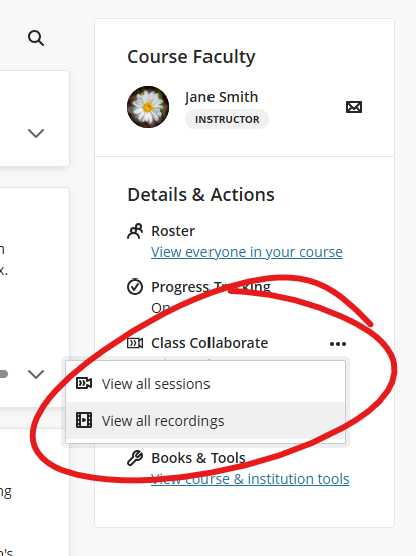
Choose VIEW ALL RECORDINGS.
Note: Due to limited storage space, Collaborate recordings are only maintained for a single year. If you would like to re-use recordings in a previous term, they should be moved to your YuJa media library.
Download Collaborate Recording
Collaborate recordings are not permanently available for either viewing or downloading. If you wish to keep a recording from term to term (and class to class), you should download these files and utilize other video-sharing options to share videos with students. For example, use
Yuja Media Library.
Within the Collaborate Recordings view, mouse-over the three dots to the right of the video you wish to download.
Choose download.
This will open your downloads or documents file (Finder on Mac and Windows Explorer on PC). Save the file with a unique title and in a place you can later find. The file will save as mp4, which is compatible with most video sharing and viewing platforms.
Find Media Library [YuJa] Link
The Media Library is the starting point for managing your media collection on YuJa. You can use this page to upload and create media, view comments and analytics, and add videos to course-based channels.
When faculty access their Media Library from a link inside a course, they'll be presented with their media collection. When students access the media library from inside a course, they'll be presented with the course's media channel -- a list of videos published to the course channel by the instructor.
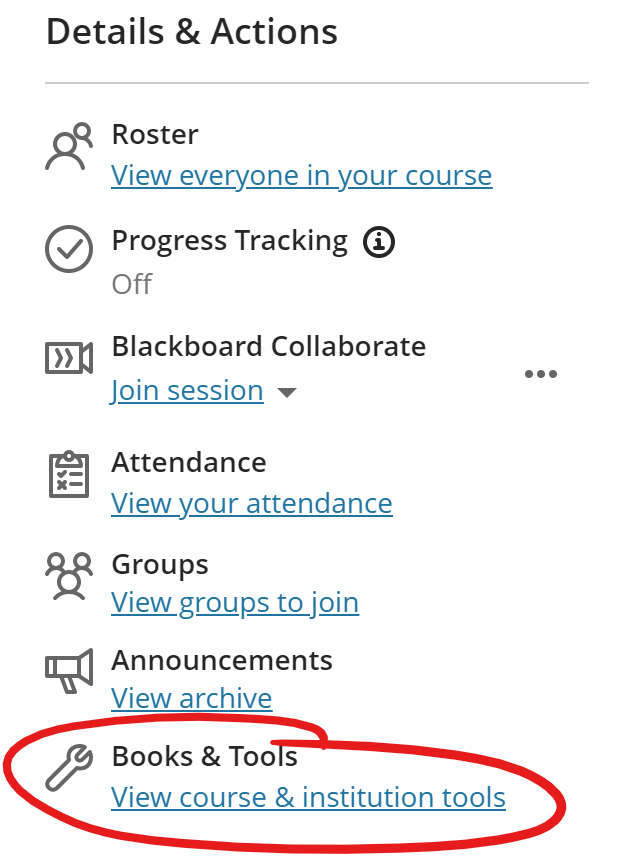
To access the Media Library, locate the Details & Actions menu (on the left or at top of the Course Content page, depending on the width of your screen). Choose "View course & institution tools" under Books & Tools.
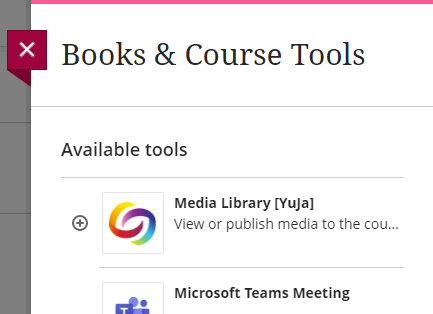
Select Media Library [YuJa] from the Available Tools list.
Upload Media to Media Library [YuJa]
To upload media (video, audio, documents) to your Media Library, you can:
Drag and Drop Method
Navigate to the appropriate folder in your media library, then drag and drop you media file onto the area of the screen where thumbnails for other media appear.
Depending on the size of your upload, it may take some time for the upload to finish. You can track the upload progress using the queue overlay that appears at the bottom of the window.
File Browse Method
If drag and drop isn't convenient, click the upload button in the upper middle of the screen. NOTE: on narrower windows, the "UPLOAD" text may not appear -- look for the up-arrow icon.
This opens the Add Media window. Click the BROWSE button in the center of the screen to open a file browser. Once you have selected a file, the upload process will begin automatically.
Formats Supported Include: wmv, .asf, .flv, .f4v, .f4a, .avi, .mp3, .mpg, .mpeg, .mps, .ps, .mp2, .m2v, .m2a,.ts, .tsv, .tsa, .mts, .m2ts, .tod, .mp4, .m4a, .m4v, .3gp, .mov, .mts (AVCHD), Flash video, .webm, .mxf, .dv., .docx, .pdf., .srt, .vtt, .txt, .csv, .xlsx, .pptx, .psd.
Launch YuJa Video Editor
From the Media Library [YuJa], locate the media you want to get views information on.
Mouse over the preview thumbnail. Choose EDIT.
Cut Media from Video
From the Video Editor, position the play pointer at the beginning or end of the part of your video you wish to cut.
To make your cut, click the Scissor button, then click the point in the timeline where you want the cut to end (if you placed the play head at the start of the cut) or start (if you placed the playhead at the end of the cut).
They grayed-out area will be cut from your video on playback.
You'll notice captions after the cut appear in yellow and orange. This indicates these captions are out of sync with the video. They will be resynchronized automatically when you save your changes.
If you would like to fine-tune your cut by entering exact start and end times, double-click in the gray cut area to access additional options.
Save Your Video Edits
The SAVE button appears at the top-center of the video editor.
If you would like to overwrite your existing video with the edited version, choose REPLACE EXISTING VIDEO.
Otherwise, enter a revised title in the Title space that will help you distinguish the revised version from the original and still be a reasonable title for students ("Hegel's Critique of Kant pt 1" is much better than "Week 1 Lecture 1"), then click SAVE AS NEW VIDEO.
Be sure Update Transcript with Caption Edits is set to YES, as this will ensure your transcript file is corrected, if you made any caption changes (there is no harm to leaving this on if no changes were made that impact captions).
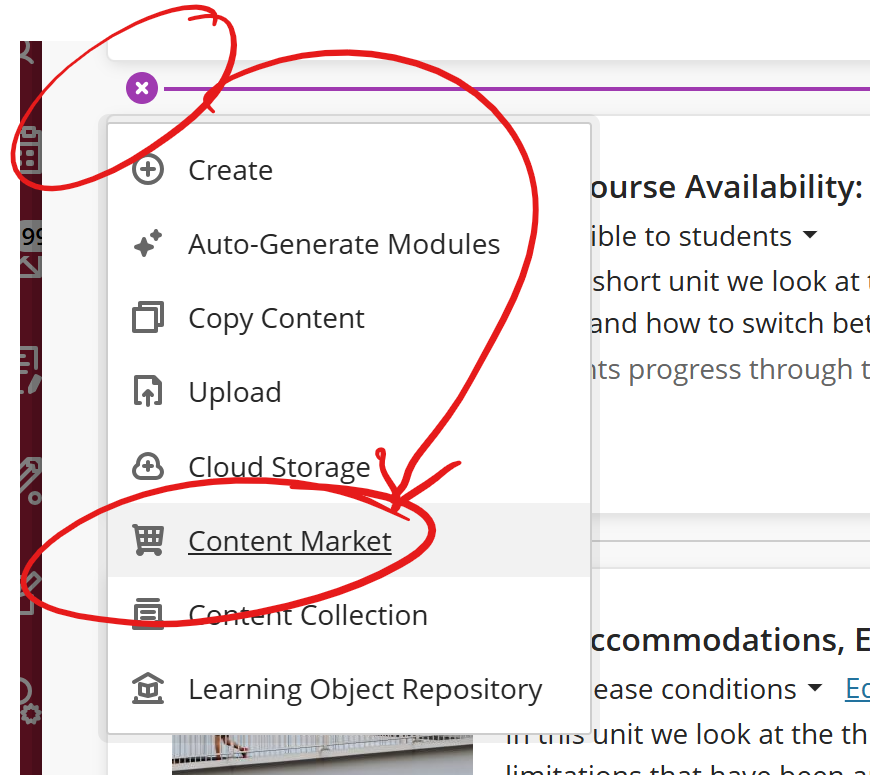
Find Media Chooser [YuJa] Content Link
To get started, go to the main Content Area of your course, click the Add button (+), choose Content Market, then choose "Add Video From Media Library [YuJa]"
Insert Media From Media Chooser
From the Media Chooser, locate the media you wish to embed in the textbox and click on it to select.
If you have a lot of videos in your Media Library, you may want to use the search box to locate the a file. Switching from thumbnail view to list view may also help.
The filters button can also help you narrow the contents that appears in the Media Chooser. Click the filter button (left of the search box), select appropriate filters, then click FILTER to narrow the items displayed.
Scroll the Media Chooser window down and click the Insert Content button.
When you click Insert Content, your media will be added to your page.
Participants who click on embedded images and files will be prompted to download the files.