These are the basic steps needed to send and receive Blackboard messages, a two-way communication tool intended to serve a function similar to email and / or text messaging.
Note for faculty: Messages are only sent to users who are enrolled in a course at the time of sending. If you send a message to "everyone" and someone adds to the course later, they won't get that message. If you want to post something that everyone will see regardless of when they enroll in the course, consider using an Announcement or Document page.
Add a Message
To start, first go into your class then choose tools from the course menu.
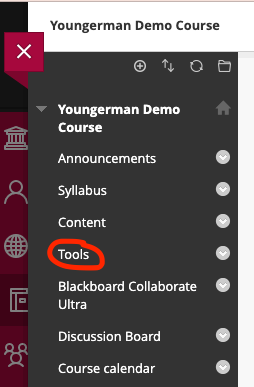
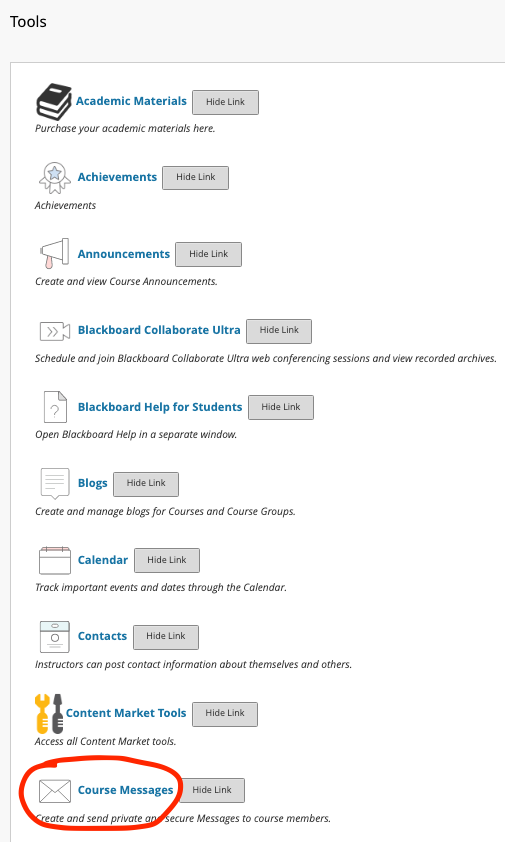
From the list of available tools, select Course Messages.
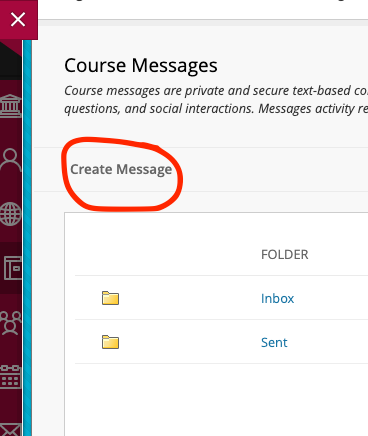
Select Create Message.
To open the recipient fields, click either To, Cc (Carbon copy), Bcc (Blind carbon copy), or all of them. Select the name of the recipient/s in your course based on how you wish to send them the message. Click the > button to add the recipient/s to your message. You can choose any number from one person to the whole roster.
Then type your Subject line and Body message.
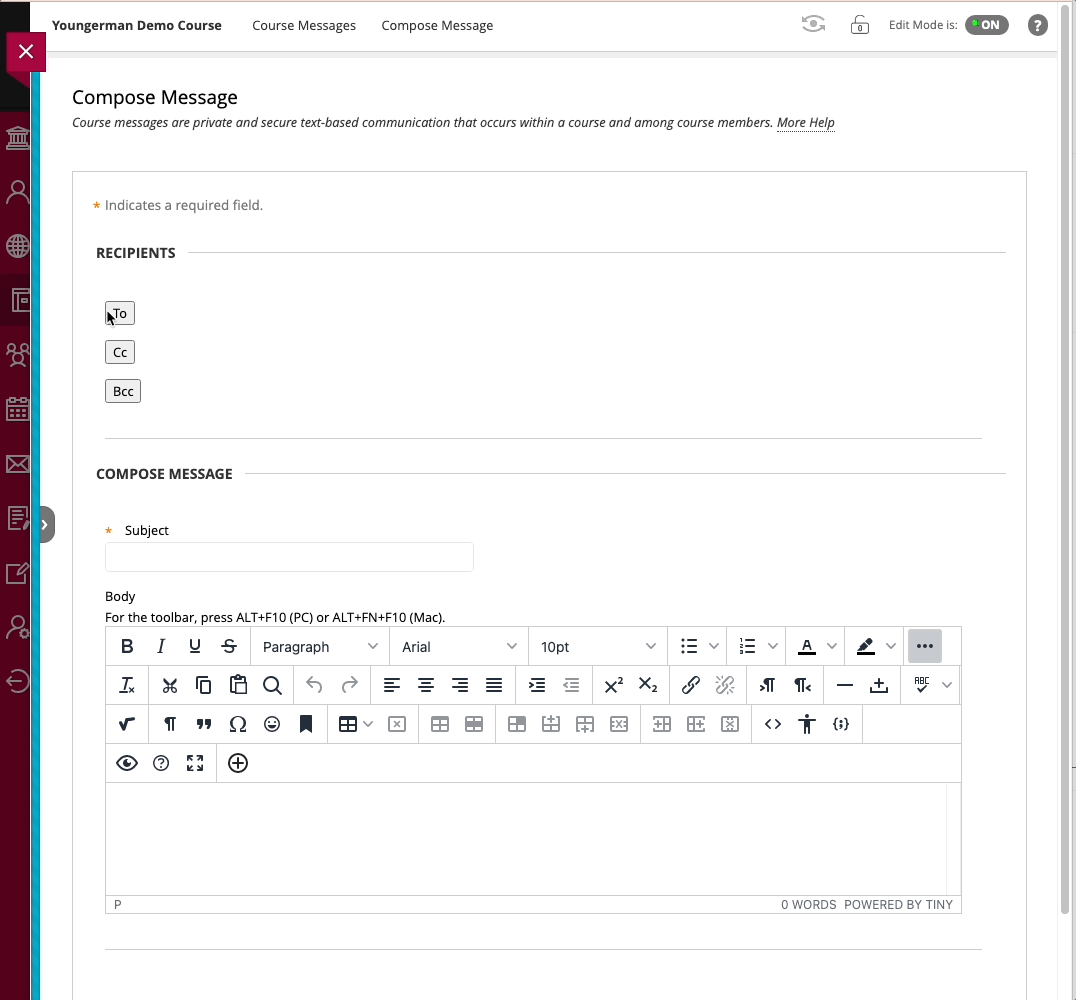
Be sure to click Submit when you are finished.
Note: Recipients will be notified of their messages when opening Blackboard. They may also receive an automated notification depending on their Blackboard settings.
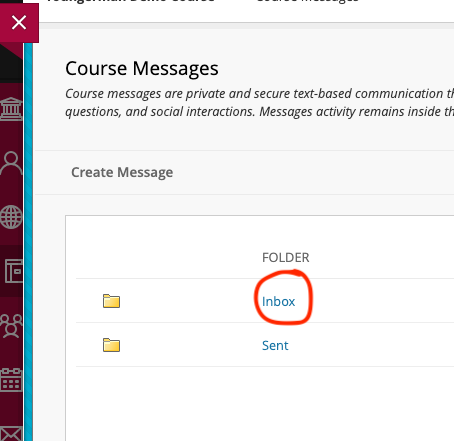
Access Messages
There are two ways to view messages:
- Messages can be viewed from and replied to within the course.
- Messages can be viewed and replied to in the Blackboard menu (this collects all messages from all courses).
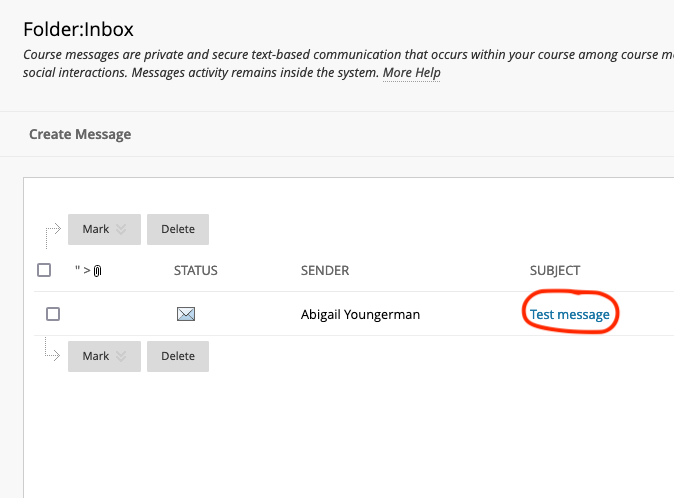
From any of these options, you should then see any messages you’ve sent or received.
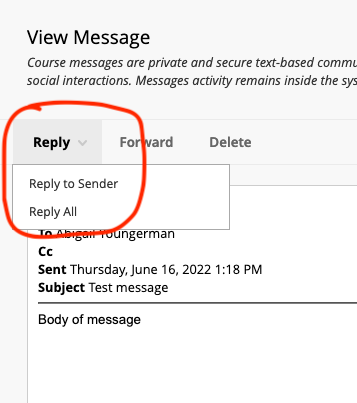
Reply to Messages
To reply to a message, open your Inbox from within your Blackboard Course Messages.
Click on the subject of the message to which you wish to reply.
Hover over the word Reply. Choose Reply to Sender or Reply All (just like in an email).
To open the recipient fields, click either To, Cc (Carbon copy), Bcc (Blind carbon copy), or all of them. Select the name of the recipient/s in your course based on how you wish to send them the message. Click the > button to add the recipient/s to your message. You can choose any number from one person to the whole roster.
Then type your Subject line and Body message.

Be sure to click Submit when you are finished.
Note: Recipients will be notified of their messages when opening Blackboard. They may also receive an automated notification depending on their Blackboard settings.
These are the basic steps needed to send and receive Blackboard messages, a two-way communication tool intended to serve a function similar to email and / or text messaging. When you're done with all settings, be sure to click send.
Note for faculty: Messages are only sent to users who are enrolled in a course at the time of sending. If you send a message to "everyone" and someone adds to the course later, they won't get that message. If you want to post something that everyone will see regardless of when they enroll in the course, consider using an Announcement or Document page.
Add a Message
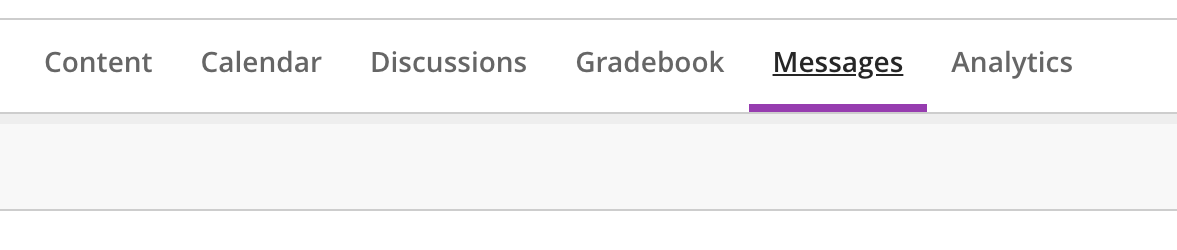
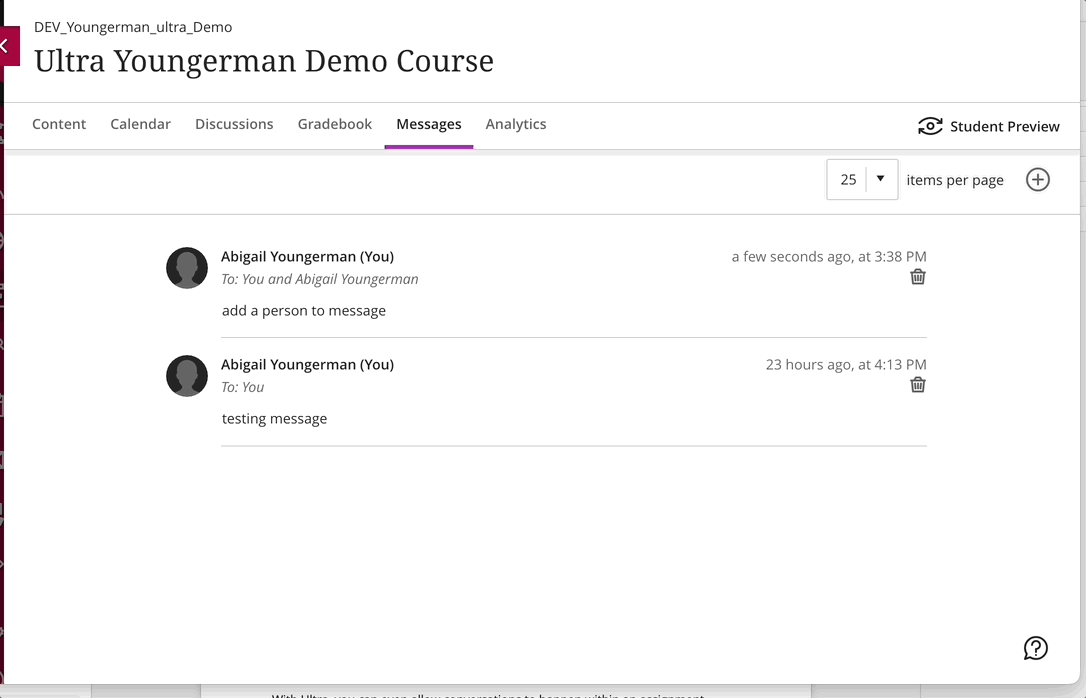
To start, first go into your class then choose messages in the top menu bar
The "plus" icon will appear just below and to the right. (Note: from this screen you can also see all messages you’ve sent or received.)

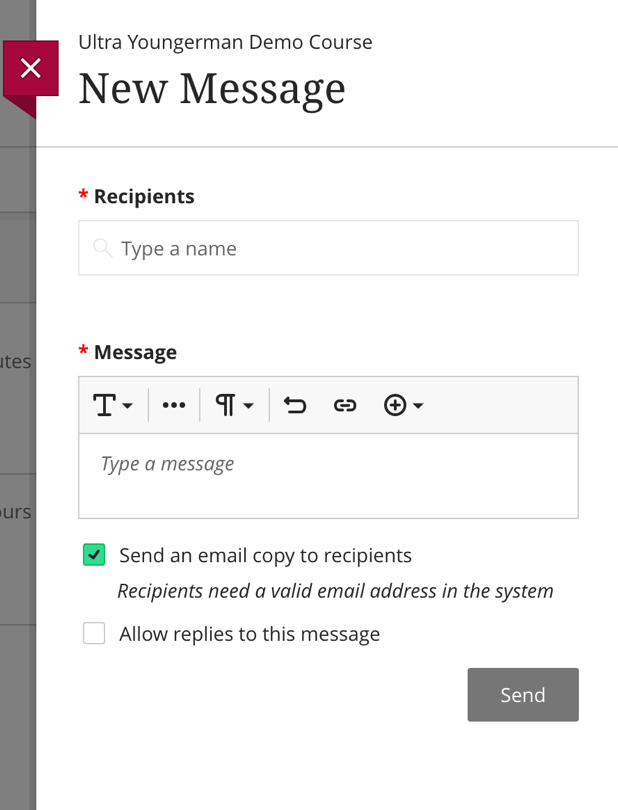
A pop-out window will appear to the right of your screen.
Type in the name of the recipient in your course. You can choose any number of recipients from one person to the whole course roster.
Then type your message.

When you're done with all settings, be sure to click send.
Notes:
- Messages cannot be edited once sent.
- Course must be open to students in order to send messages.
- If you send a message to "everyone" and someone adds to your course later, they won't get that message. A message to "everyone" is a message to everyone enrolled in the course at that time. So if you want to post something that everyone will see regardless of when they enroll in your course, you want it to be an announcement or a "Document.”
Email a Message (Ultra)
When sending a message, you may wish to have the recipient/s receive an email alerting them to the message. At the bottom of the New Message pop-out window are two checkbox options. Select “Send an email copy to recipients.”
Allow Replies to a Message
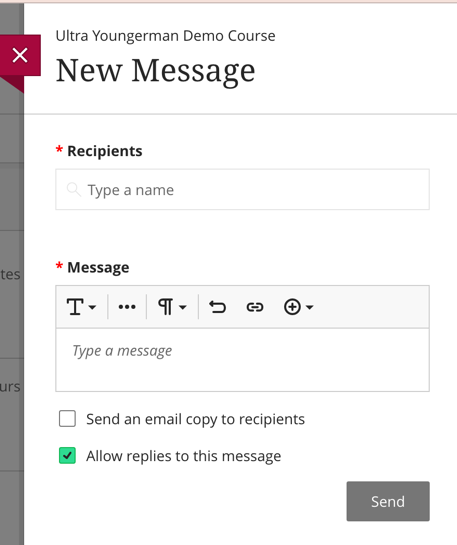
When sending a message, you may wish to allow the recipient/s to reply to your message. At the bottom of the New Message pop-out window are two checkbox options. Select “Allow replies to this message.” This makes the message more like a conversation or a text chat.
Access Messages
There are two-three ways to view messages:
- If the sender chooses, an email alert will be sent.
- Messages can be viewed from within the course.

- Messages can also be viewed in the Blackboard menu (this collects all messages from all courses).

From any of these options, you should see any message you’ve sent or received. You can also reply.
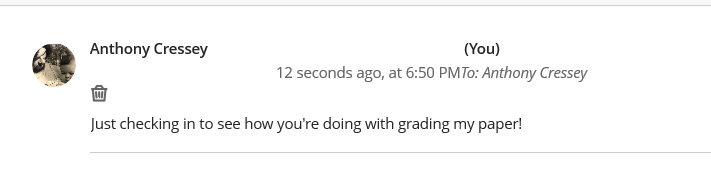
Reply to Messages
To reply to a message, click on the person’s name, and a dialog box will show on the right side of the page. From there, type in your reply and click send. Note: this will only work if the original message allowed for replies.
Add Someone to a Message (Ultra)
After sending an original message, you may want to add another person/s to the message conversation.
To do this, click on the person’s name from the original message, and a dialog box will show on the right side of the page.
From there, choose the plus button in the upper right.

Type your recipient’s name.
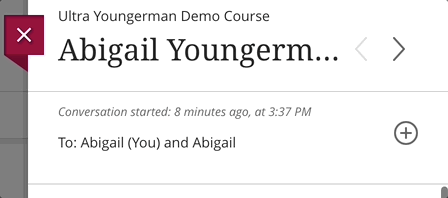
You can add an additional message, if you choose, and send.