The process of posting an announcement to your course site is fairly simple and straightforward. Here, we run through the full posting process and include a note about editing a posted announcement, should it be necessary.
Add an Announcement
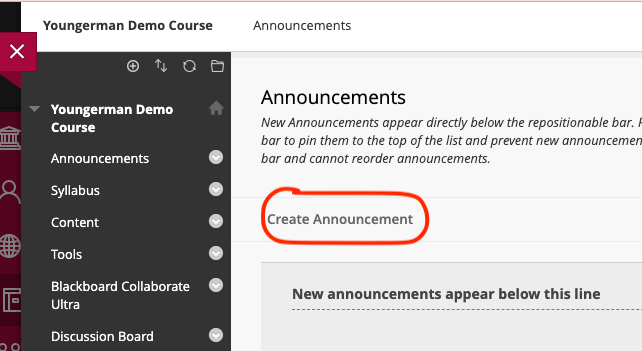
To get started, first go into your course. Your course should open automatically to the Announcements page. Click Create Announcement.
Write a Subject (title) for your announcement.
Then fill in your “message.”
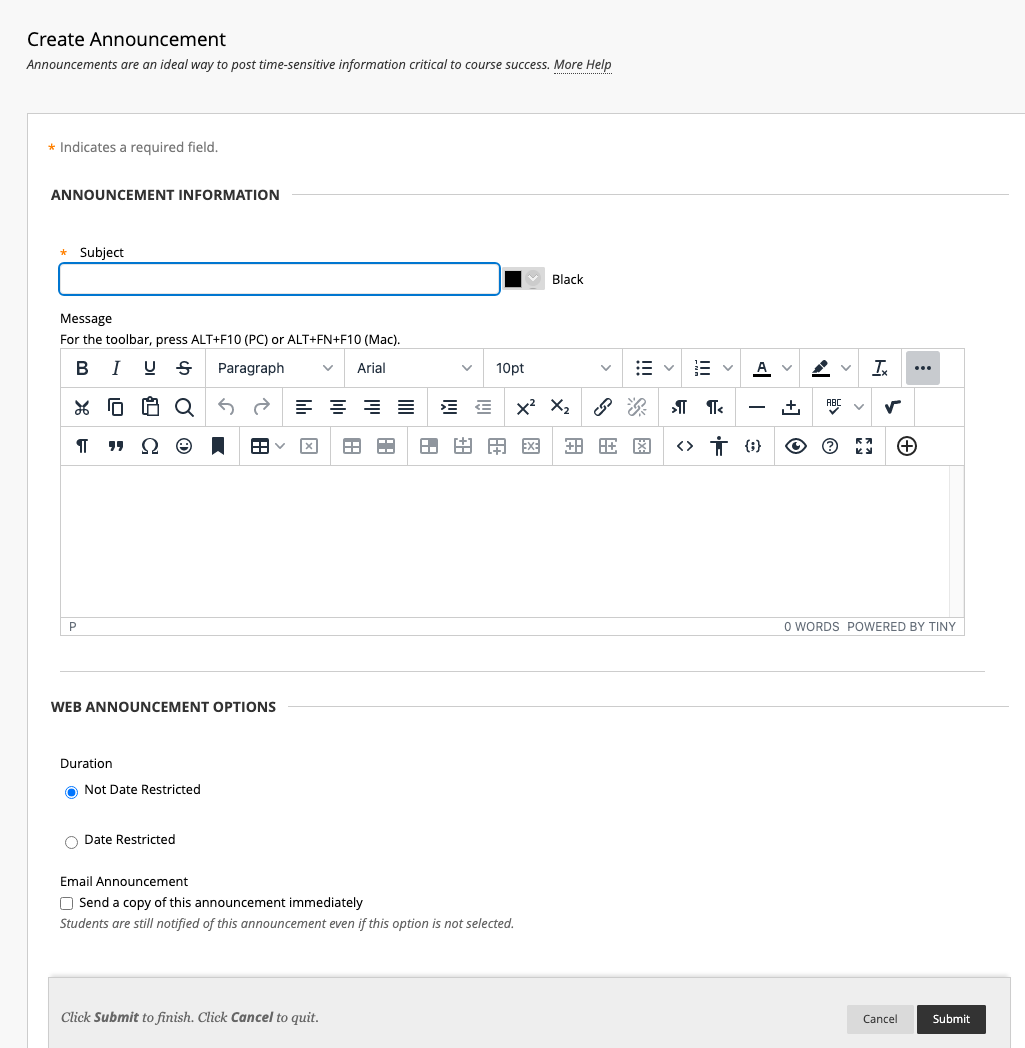
Note: You can only send an announcement to the entire course roster. If you wish to send information to only a select group, use the Messages feature.
Email an Announcement
Announcements will automatically appear for students when they open your course.
If you want students to receive your announcement immediately, without having to open your course, select the option seen below (Send an email copy to recipients).
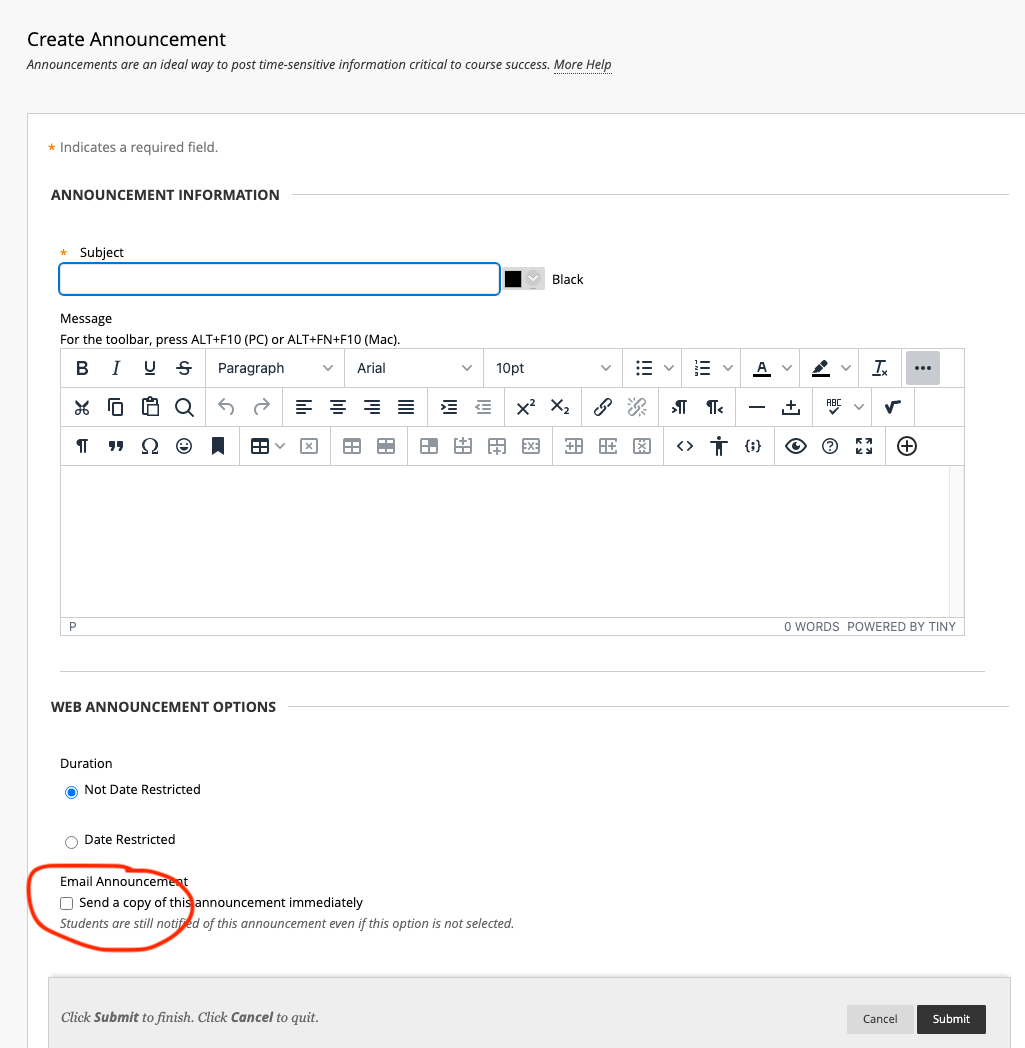
When you're finished, click the Submit button.
Schedule an Announcement
You can schedule your announcement by clicking the radial button next to Date Restricted.
Pick your days/times you wish to show and/or hide your announcement.
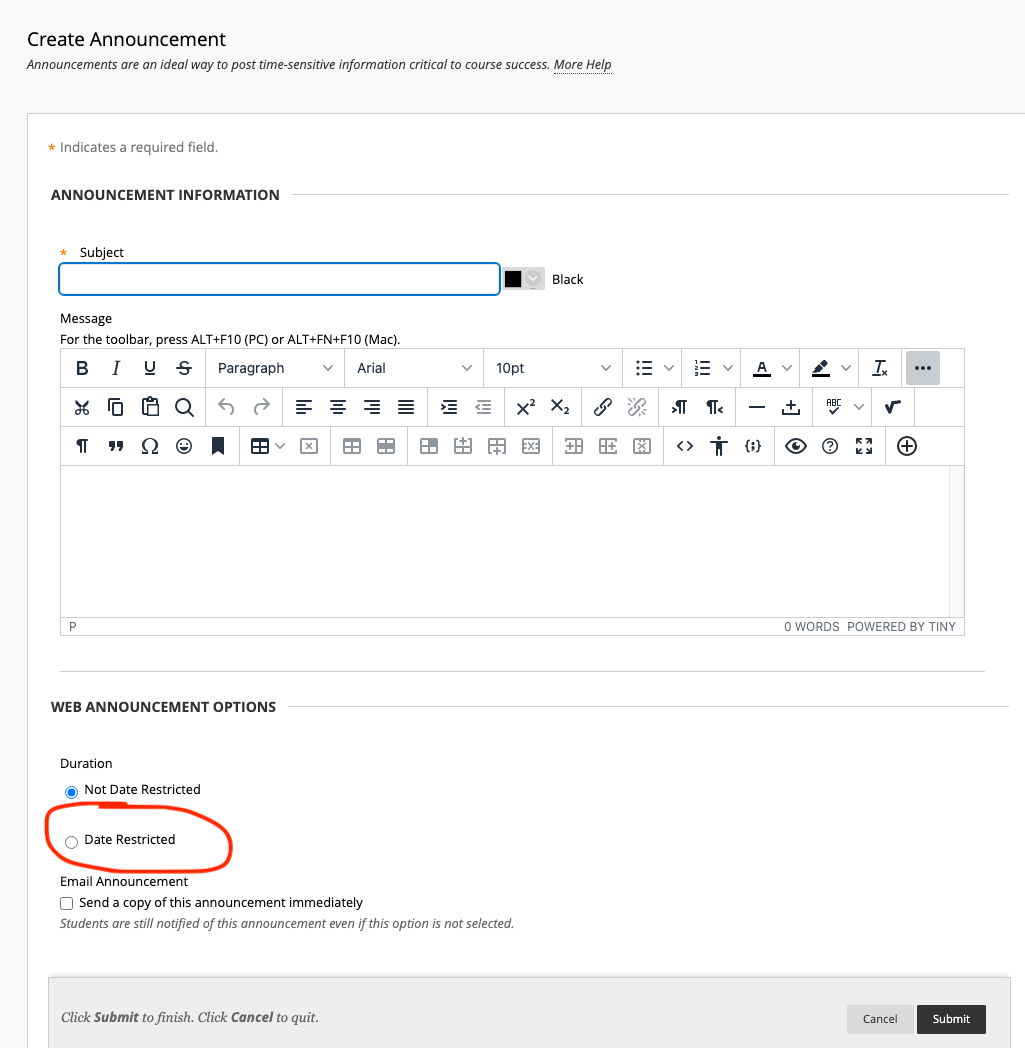
When you're finished, click the Submit button.
Edit an Announcement
In order to edit an announcement, choose the drop-dow arrow to the right of the announcement and Edit.
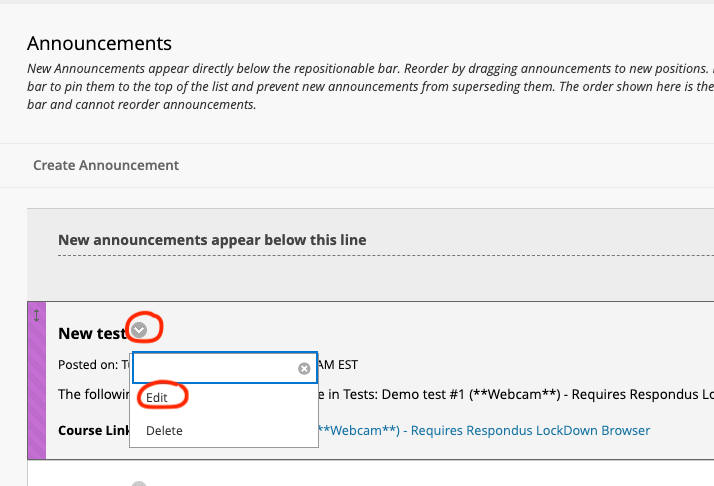
Make any changes you wish, and then Submit.
The process of posting an announcement to your course site is fairly simple and straightforward. Here, we run through the full posting process and include a note about editing a posted announcement, should it be necessary.
Add an Announcement
To get started, first go into your course, and click on the link below "Announcements" in the "Details and Actions" menu.
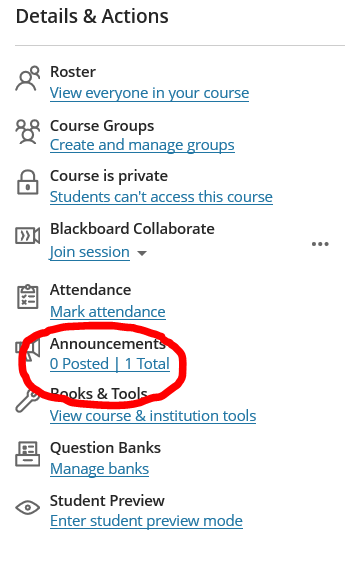
Note: If this is your first announcement in this course, the page will automatically open to create a new announcement. If this is NOT your first announcement, the following page will open first:

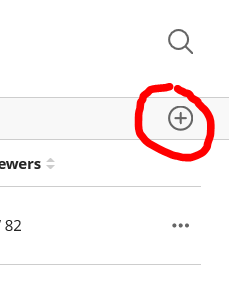
Click on the plus sign in the upper right corner on the course announcements page, which will open the "new announcement" page.
Write a title for your announcement.

Note: You can only send an announcement to the entire course roster. If you wish to send information to only a select group, use the Messages feature.
Then fill in your “message.”
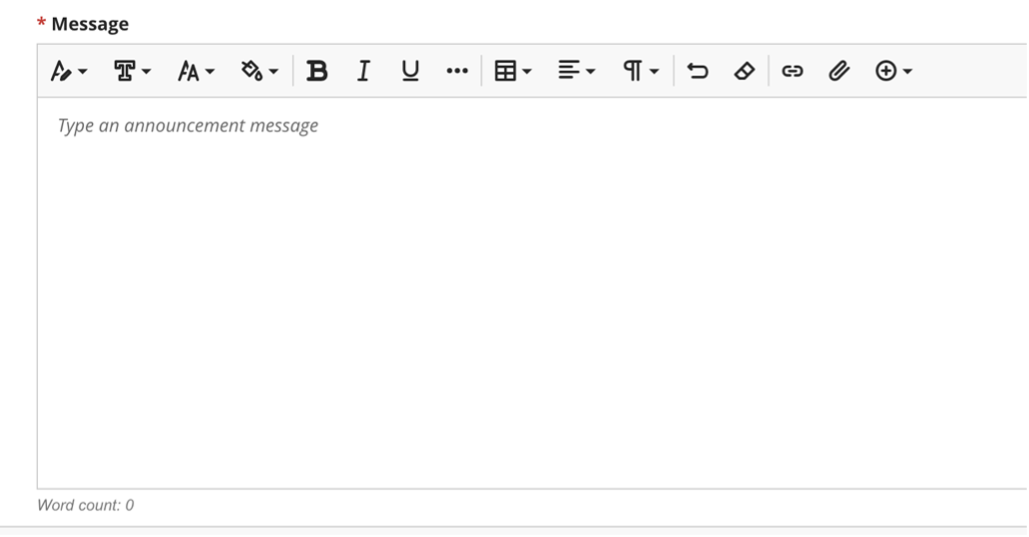
Be sure to save your changes.
Email an Announcement
Announcements will automatically appear for students when they open your course. It will also appear in the students' Activity Stream and in their Daily Notifications email.
If you want students to receive an email containing the full text of your announcement immediately, without having to open your course, check the box beside the text "Send an email copy to recipients."
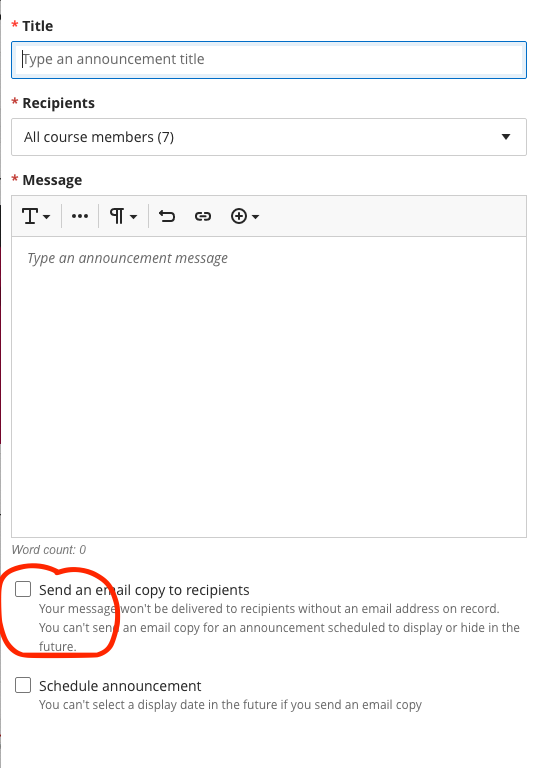
Note: You cannot schedule an announcement for automatic future release and send an email copy. You must choose one or the other.
When you are finished, click the save button.
Schedule an Announcement
You can schedule your announcement by simply clicking the box next to schedule announcement.


Pick your days/times you wish to show and/or hide your announcement.
Scheduled announcements are posted automatically on the date / time selected.
When you're finished, click the save button.
Scheduling Notes
If you only set a HIDE ON date / time (without a SHOW ON date / time), the announcement will be posted immediately upon saving the announcement.
You cannot email users the text of your announcement AND schedule the announcement.
Post an Announcement (Ultra)
If you did not schedule your announcement for posting, you will need to click the POST NOW button to make your announcement visible (and email it, if you chose that option) to students.

Until you click the POST NOW button, your announcement will be marked DRAFT and not be visible to students.
Edit an Announcement
In order to edit an announcement (either one in draft or posted), choose the three dots on the right of the announcement and Edit.

Make any changes you wish, and then save.
Reminder: unless the announcement is scheduled, it won’t be released to students until you click Post Now.
