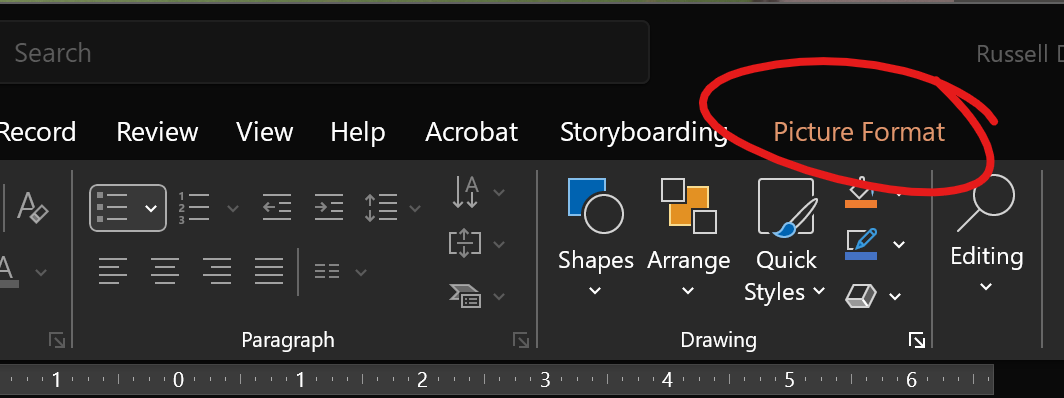
Compressing the pictures in a PowerPoint presentation can do a great deal to reduce the presentation's overall file size. To compress pictures, first click on any high-resolution picture you've included in the presentation. This will add a highlighted PICTURE FORMAT tab to the far right of your top-of-screen toolbar.
Click PICTURE FORMAT.
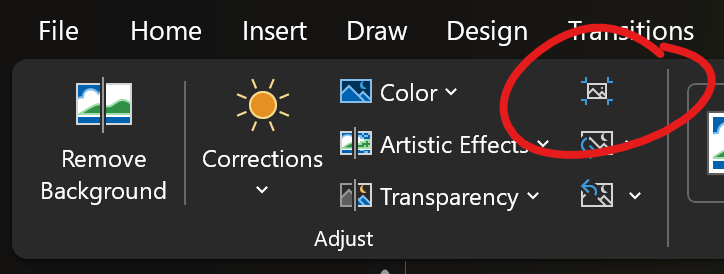
In the ADJUST group, on the left side of the Picture Format toolbar, click the Compress Pictures button. The button is an image icon with inward-pointing arrows at the corners.
This will open the Compress Pictures dialog box.
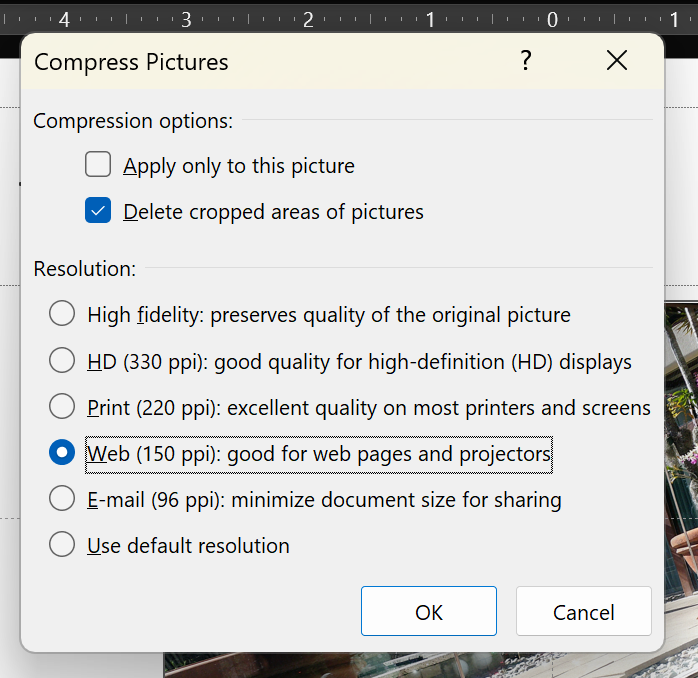
To optimize all the pictures in your presentation, first uncheck the "Apply only to this picture" box.
Next, you'll want to choose a resolution. Choosing a resolution that is lower on the list (e.g., Web or E-mail) will result in a smaller file. Choosing a resolution higher on the list (High fidelity or HD) will result in a larger file size. For posting to Blackboard, we recommend choosing Web resolution.
If only the Use default resolution option is available, then the image you selected is too small to compress. Cancel the Compress Pictures dialog box and choose a higher resolution image instead.
Once this is done, save your optimized presentation. If keeping a high resolution version of the presentation is important, you may to choose SAVE AS from the file menu to save the optimized version of your presentation with a different name.