You can add and save personalized geofence locations to Engage from the settings panel.
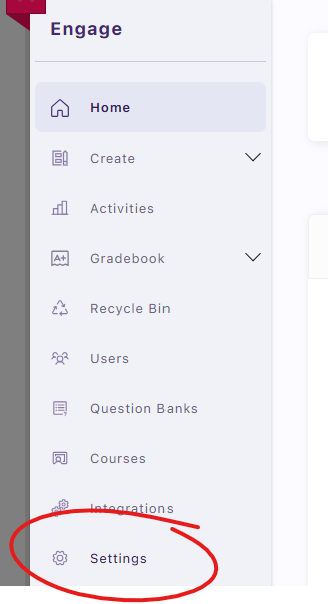
From the Engage home page (Create and Manage Polls Tool), find and click SETTINGS in the left-hand menu.
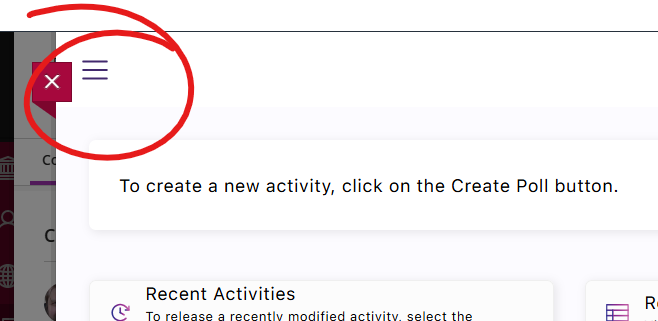
If you don't see a menu on the left, look for a menu (3-line) button in the upper left. Click that to expand the menu.
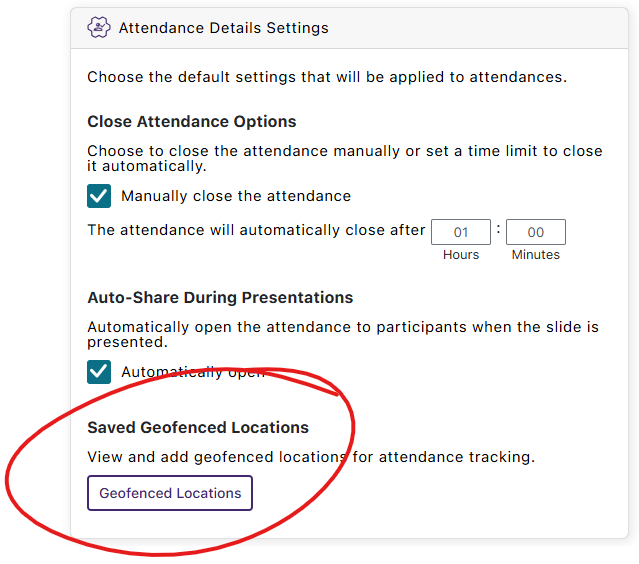
In the upper right quadrant, you'll see Attendance Details Settings. Click the GEOFENCED LOCATIONS button at the bottom of that box.
Click the ADD LOCATION button to create a new location

To set the location of your new geofence, click the map to drop the location marker in that new spot. You can move the map via click-and-drag (click down on your mouse's left-button and continue to hold it down while you move your mouse). The scroll-wheel on your mouse (or the equivalent gesture on a laptop touchpad) will allow you to zoom in or out. Use the radius slider or enter numbers in the Meters space directly to make the appropriate area larger or smaller.
Enter a name for your new location in the LOCATION NAME box. Then click SAVE.
When you click SAVE, the Geofenced Locations overlay will close. Now, click SAVE ALL CHANGES in the upper right corner of the settings page to finish the process (if you exit this page without clicking SAVE ALL CHANGE, your changes will not be saved).
