The Media Library (YuJa) is the preferred way to provide students with pre-recorded video. It can also be used by students to share video, either in online discussion or assignment submission. This walkthrough shows how to locate the Media Library, add media items to the library, embed that content into a Blackboard text box.
Find Media Chooser [YuJa] Content Link
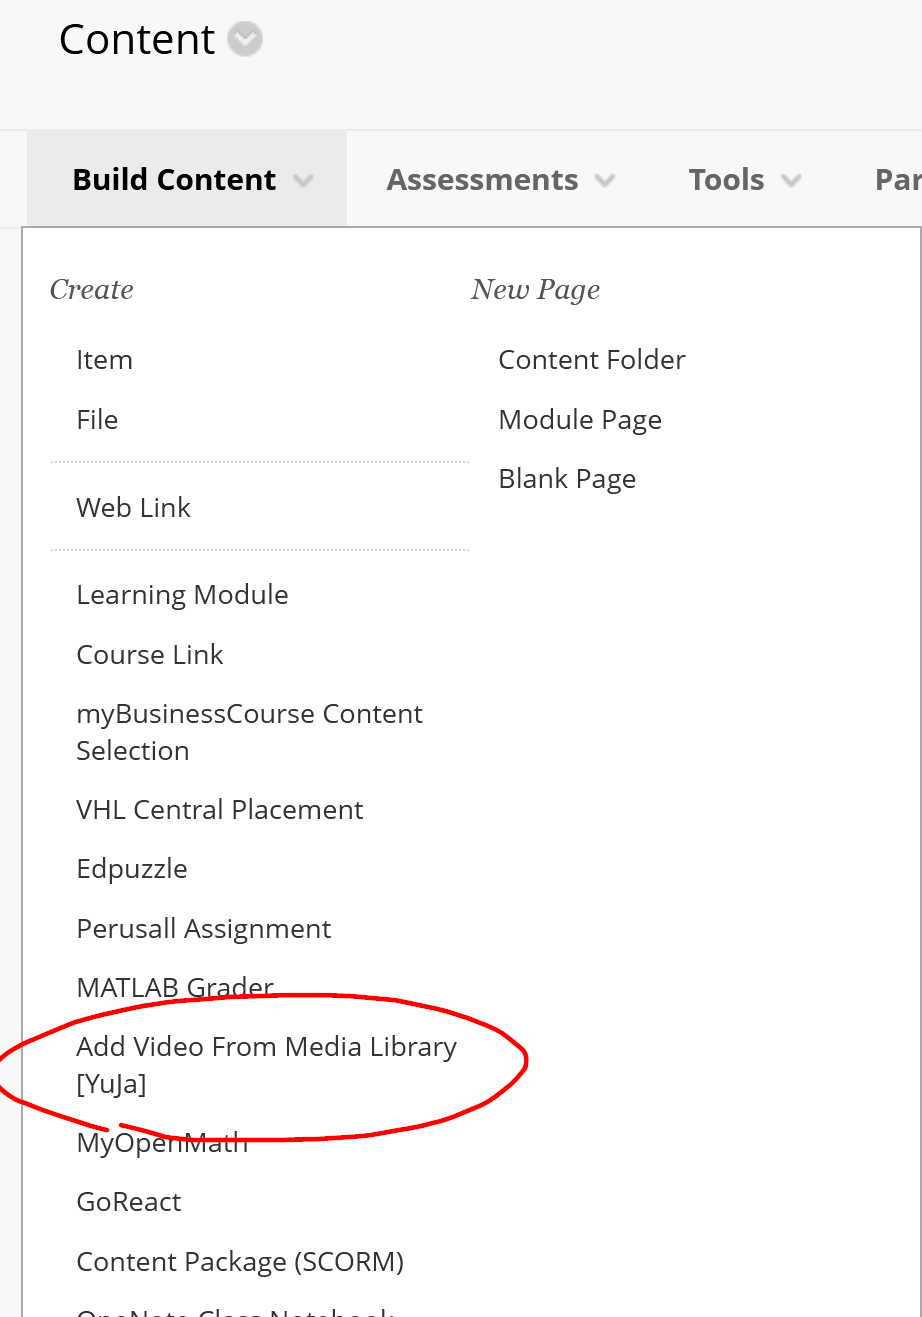
Hover over the Build Content menu in any Content folder and select Add Video From Media Library [YuJa].
Upload Media to Media Library [YuJa]
Do not upload video directly to Blackboard. You'll upload your video to the Media Library instead.
To upload media (video, audio, documents) to your Media Library, you can:
Drag and Drop Method
Navigate to the appropriate folder in your media library, then drag and drop you media file onto the area of the screen where thumbnails for other media appear.
Depending on the size of your upload, it may take some time for the upload to finish. You can track the upload progress using the queue overlay that appears at the bottom of the window.
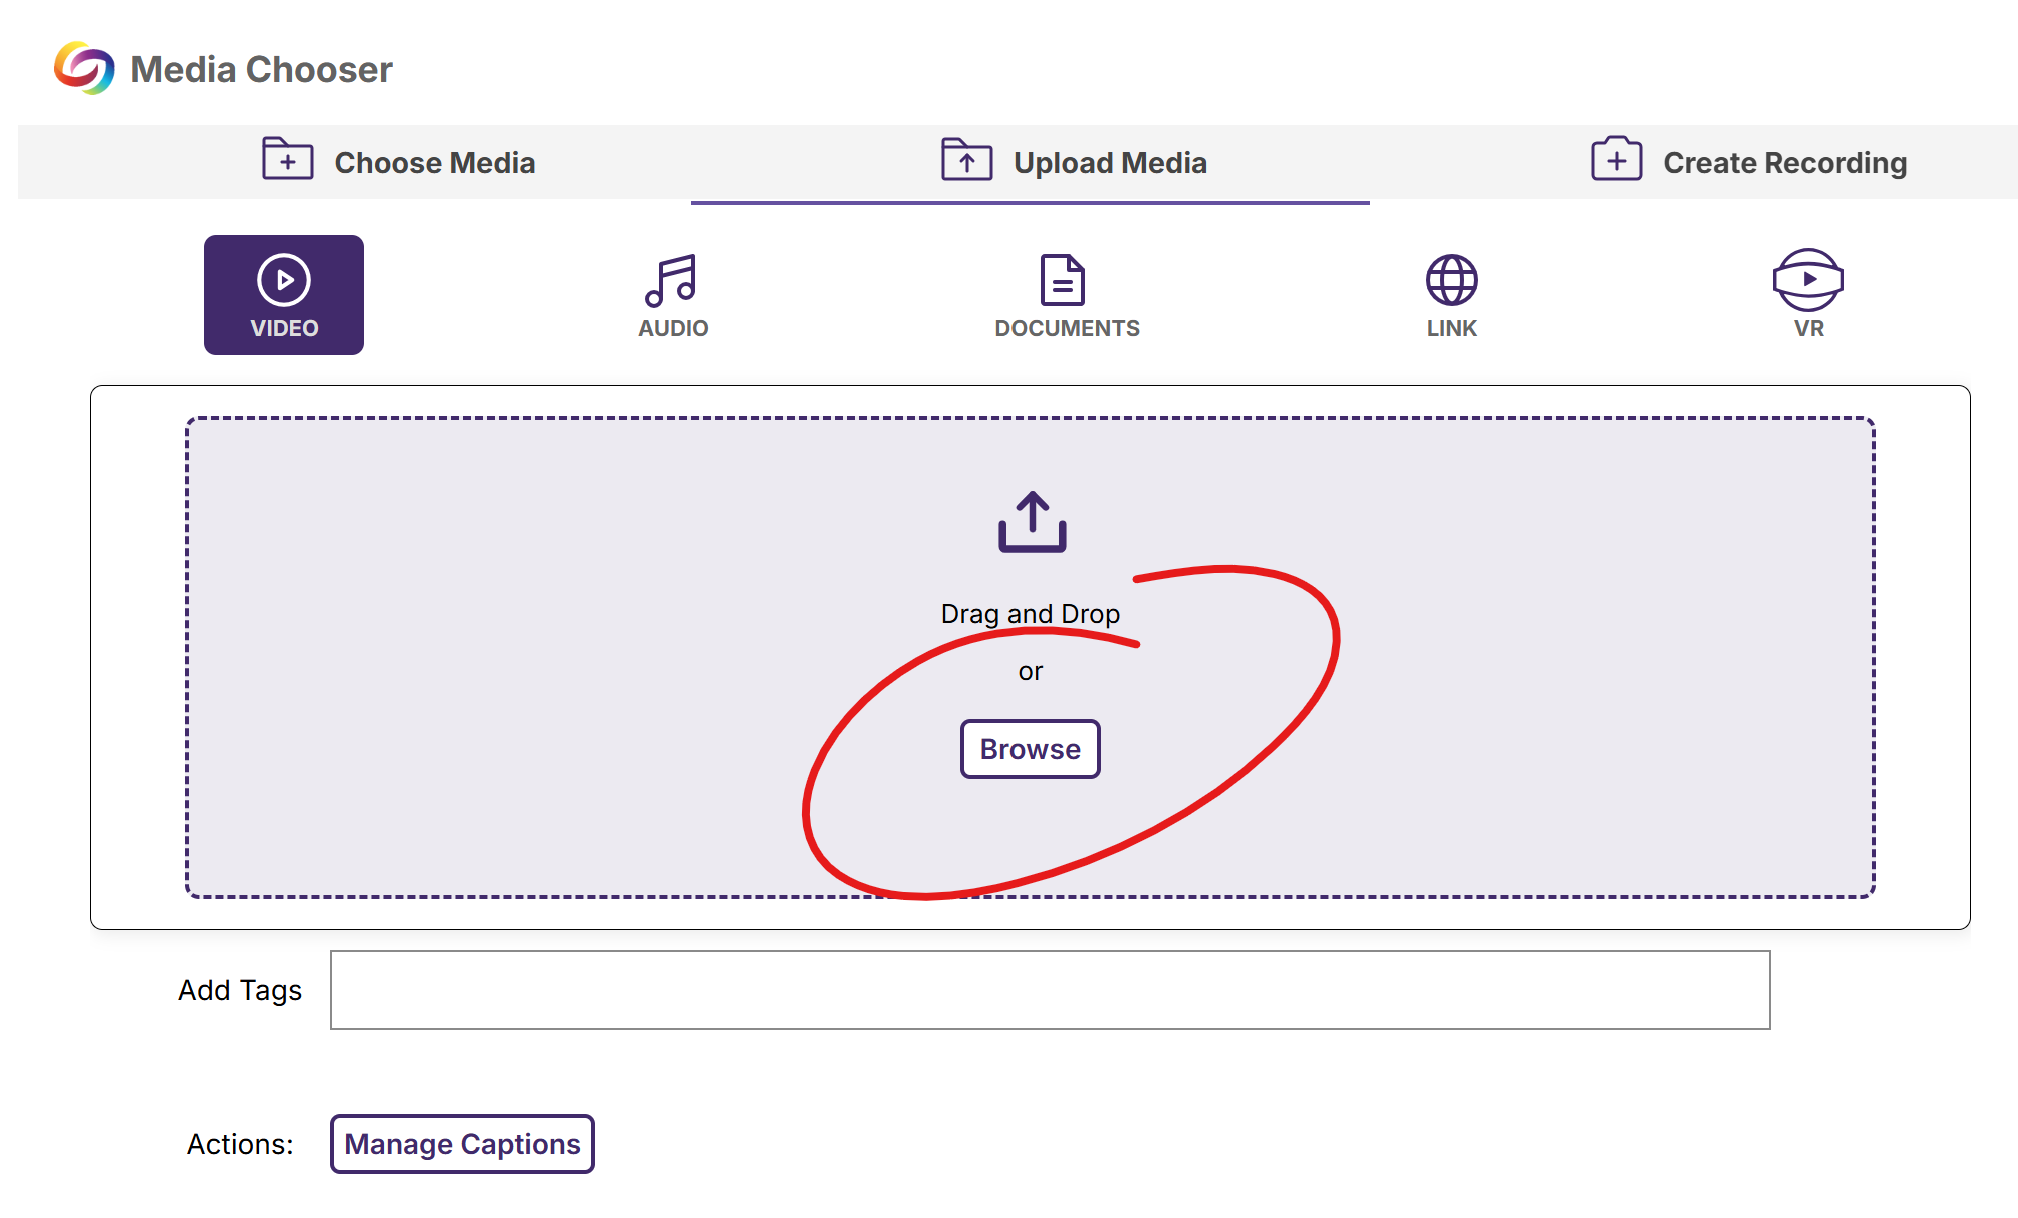
File Browse Method
If drag and drop isn't convenient, click the upload button in the upper middle of the screen. NOTE: on narrower windows, the "UPLOAD" text may not appear -- look for the up-arrow icon.

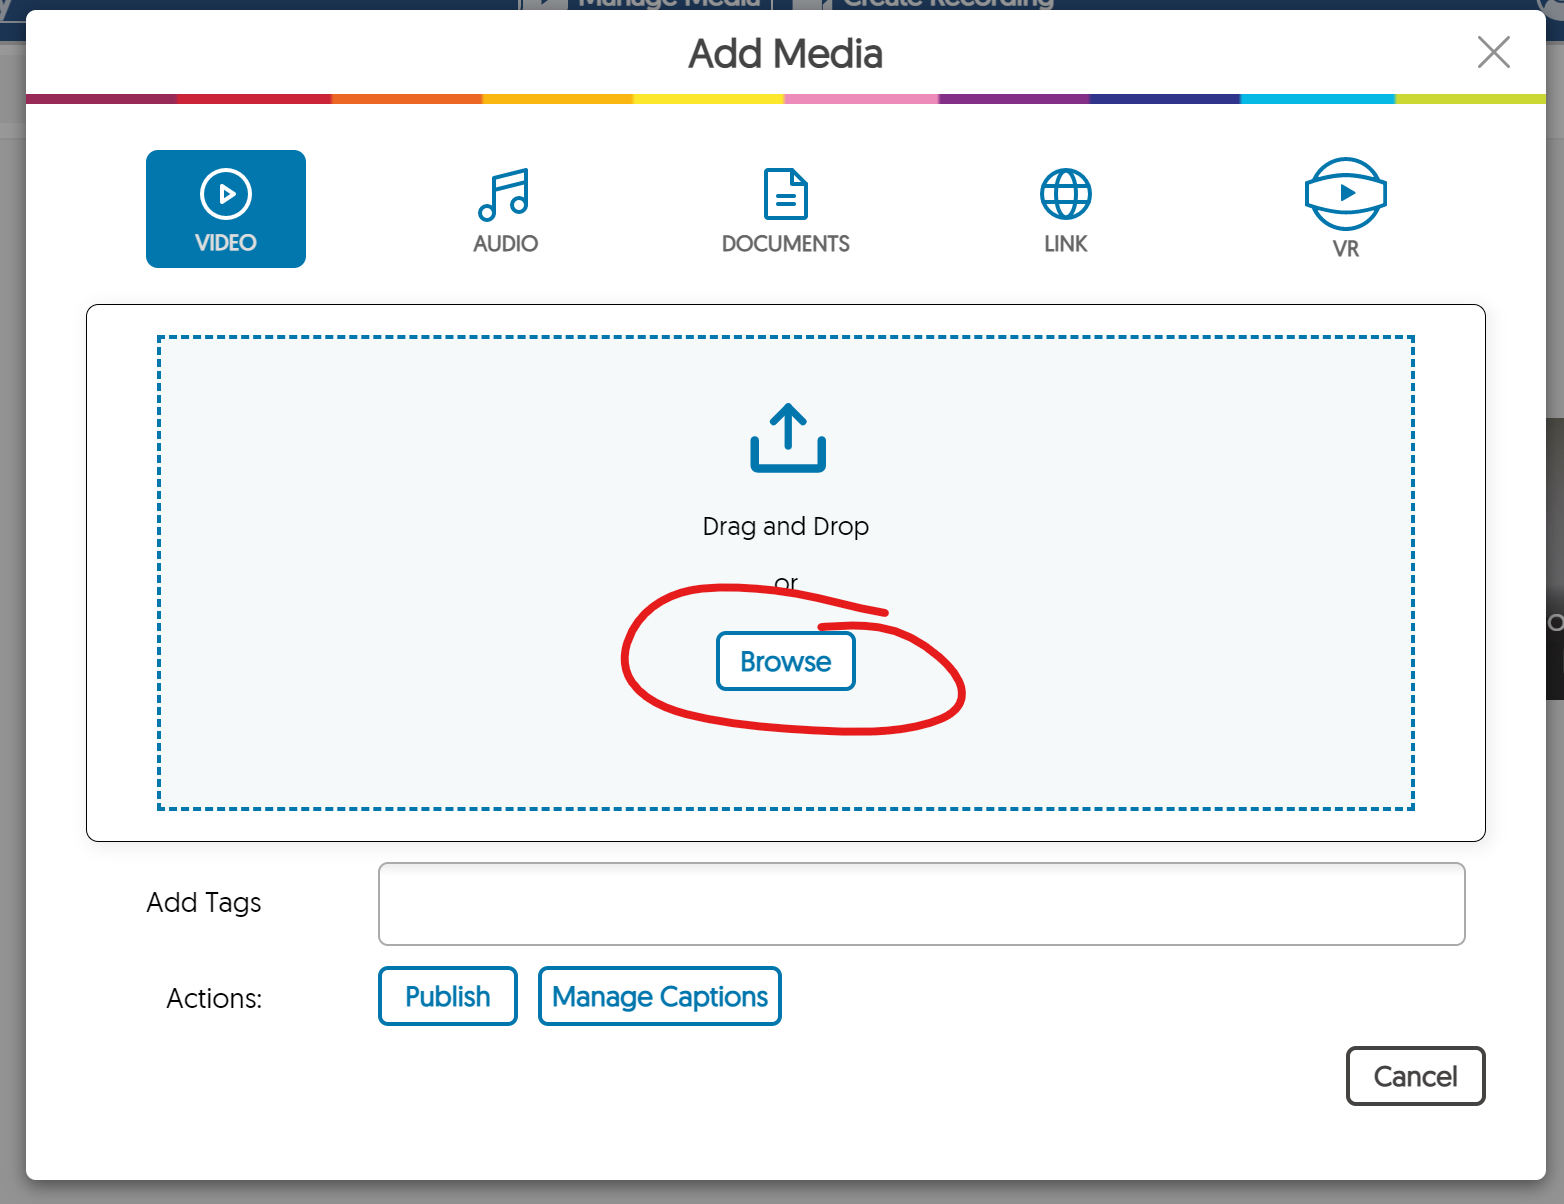
This opens the Add Media window. Click the BROWSE button in the center of the screen to open a file browser. Once you have selected a file, the upload process will begin automatically.
Formats Supported Include: wmv, .asf, .flv, .f4v, .f4a, .avi, .mp3, .mpg, .mpeg, .mps, .ps, .mp2, .m2v, .m2a,.ts, .tsv, .tsa, .mts, .m2ts, .tod, .mp4, .m4a, .m4v, .3gp, .mov, .mts (AVCHD), Flash video, .webm, .mxf, .dv., .docx, .pdf., .srt, .vtt, .txt, .csv, .xlsx, .pptx, .psd.
Find Media Chooser [YuJa] Textbox Link
Next, you'll want to navigate to the spot in your course where you want to embed a video. Create an item, and locate the Add Media from Media Library link
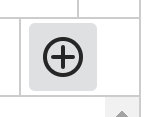
Click the Add Content + button on any textbox toolbar in Blackboard.
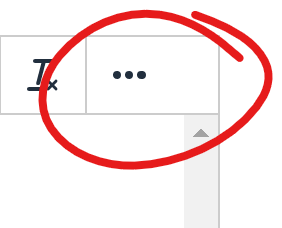
If you do not see this button (the last item on the textbox toolbar), you may need to expand the toolbar by clicking the ellipsis MORE button.
Next, click the Add Video From Media Library [YuJa] option under Additional Tools.
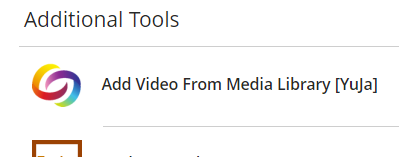
Although the button text reads "Add Video," you can use this tool to add audio, images, or files as well as video.
Insert Media From Media Chooser
Finally, you'll select the video and add it to your textbox.
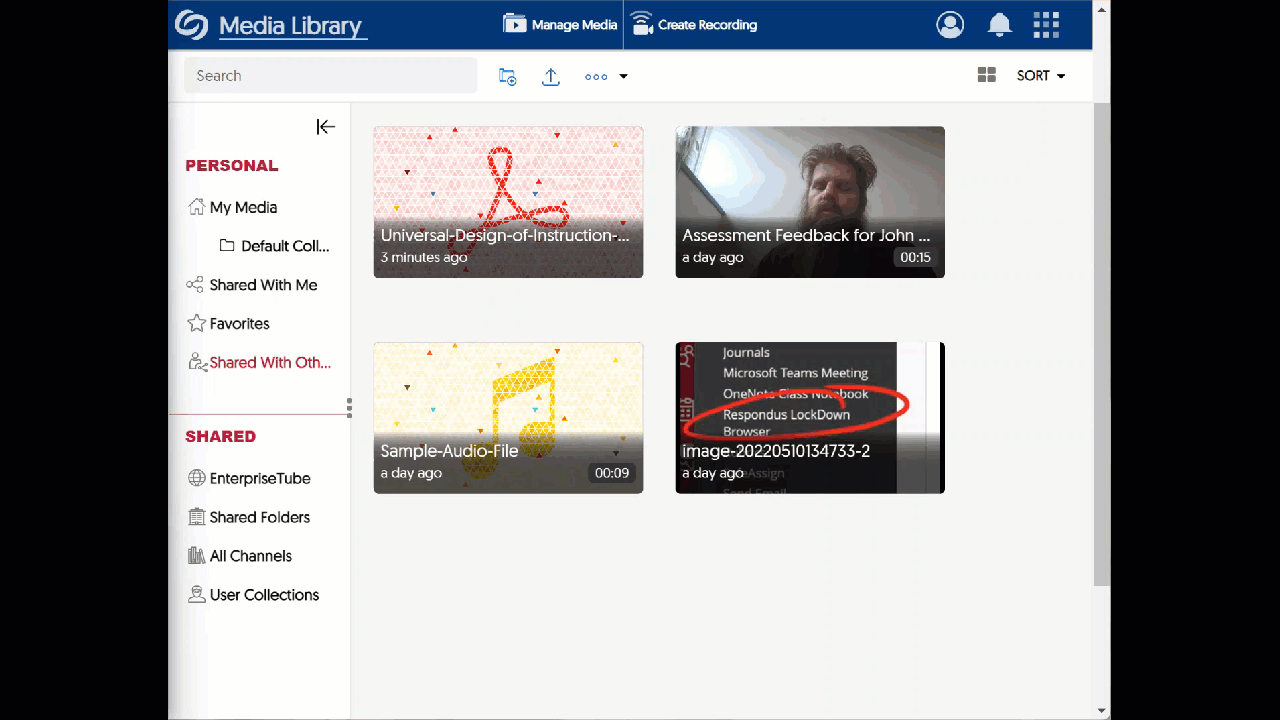
From the Media Chooser, locate the media you wish to embed in the textbox and click on it to select.
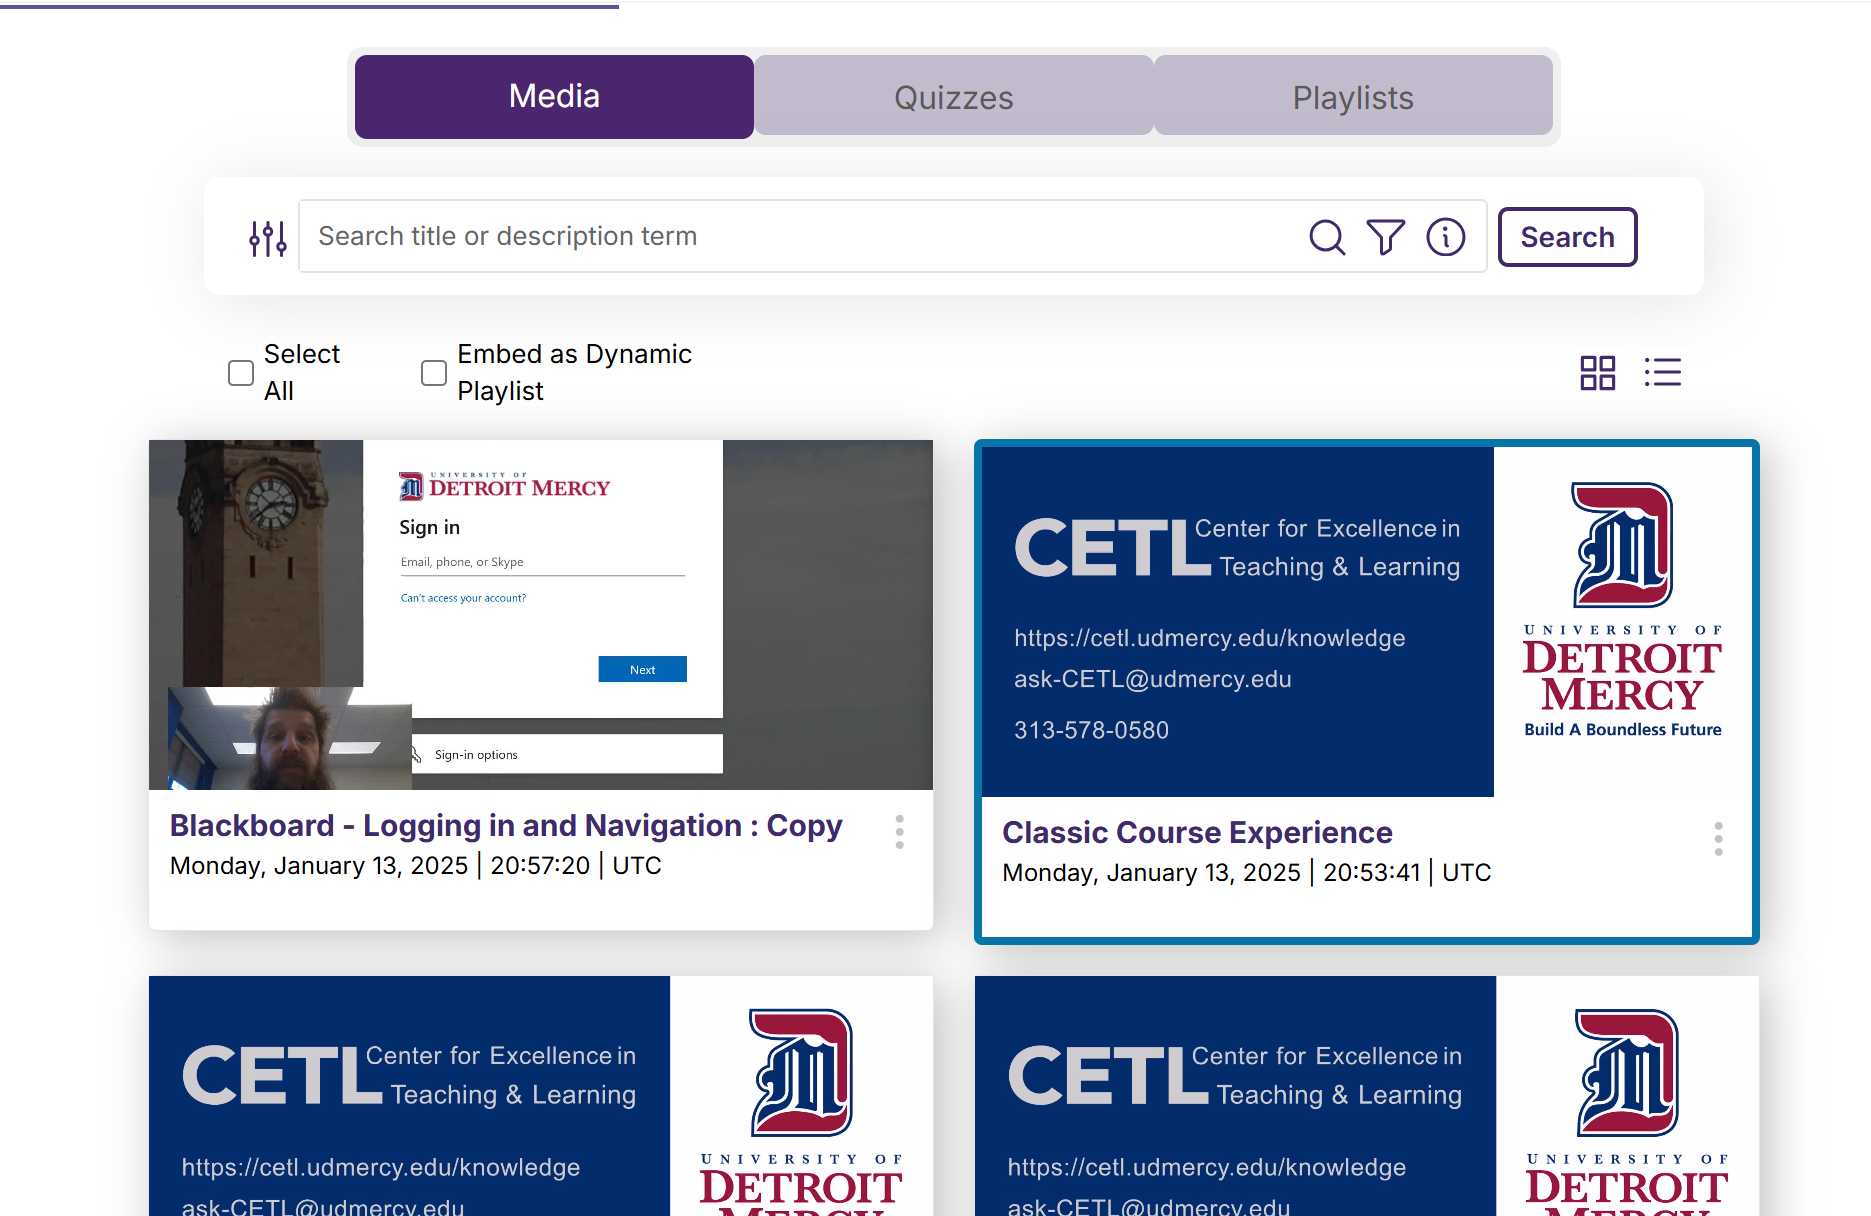
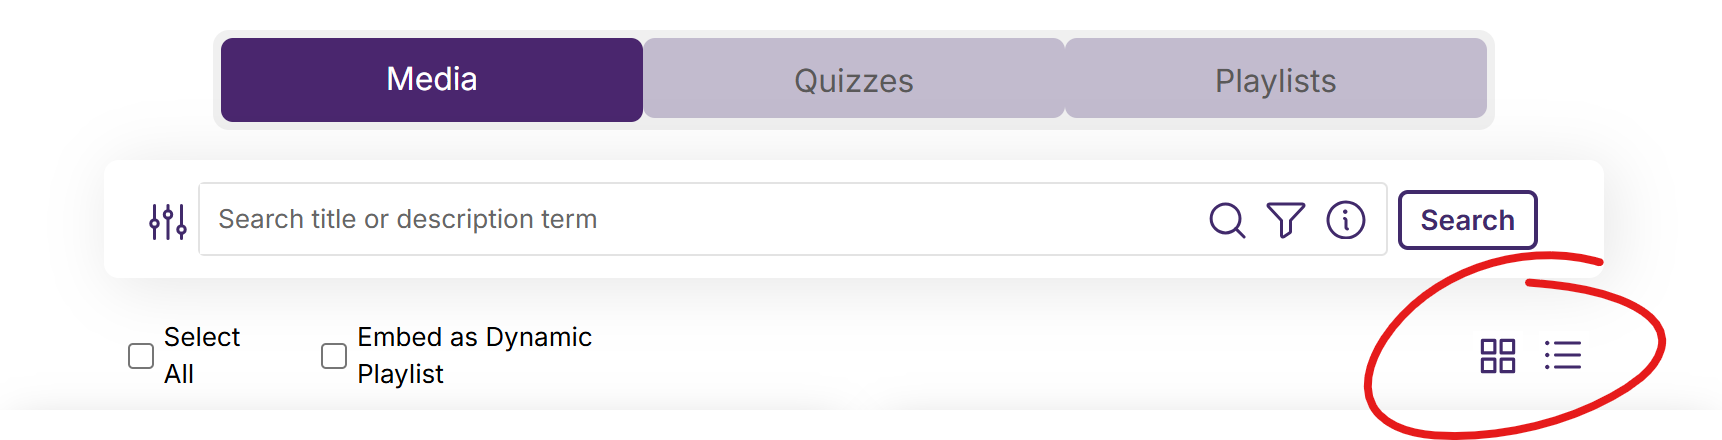
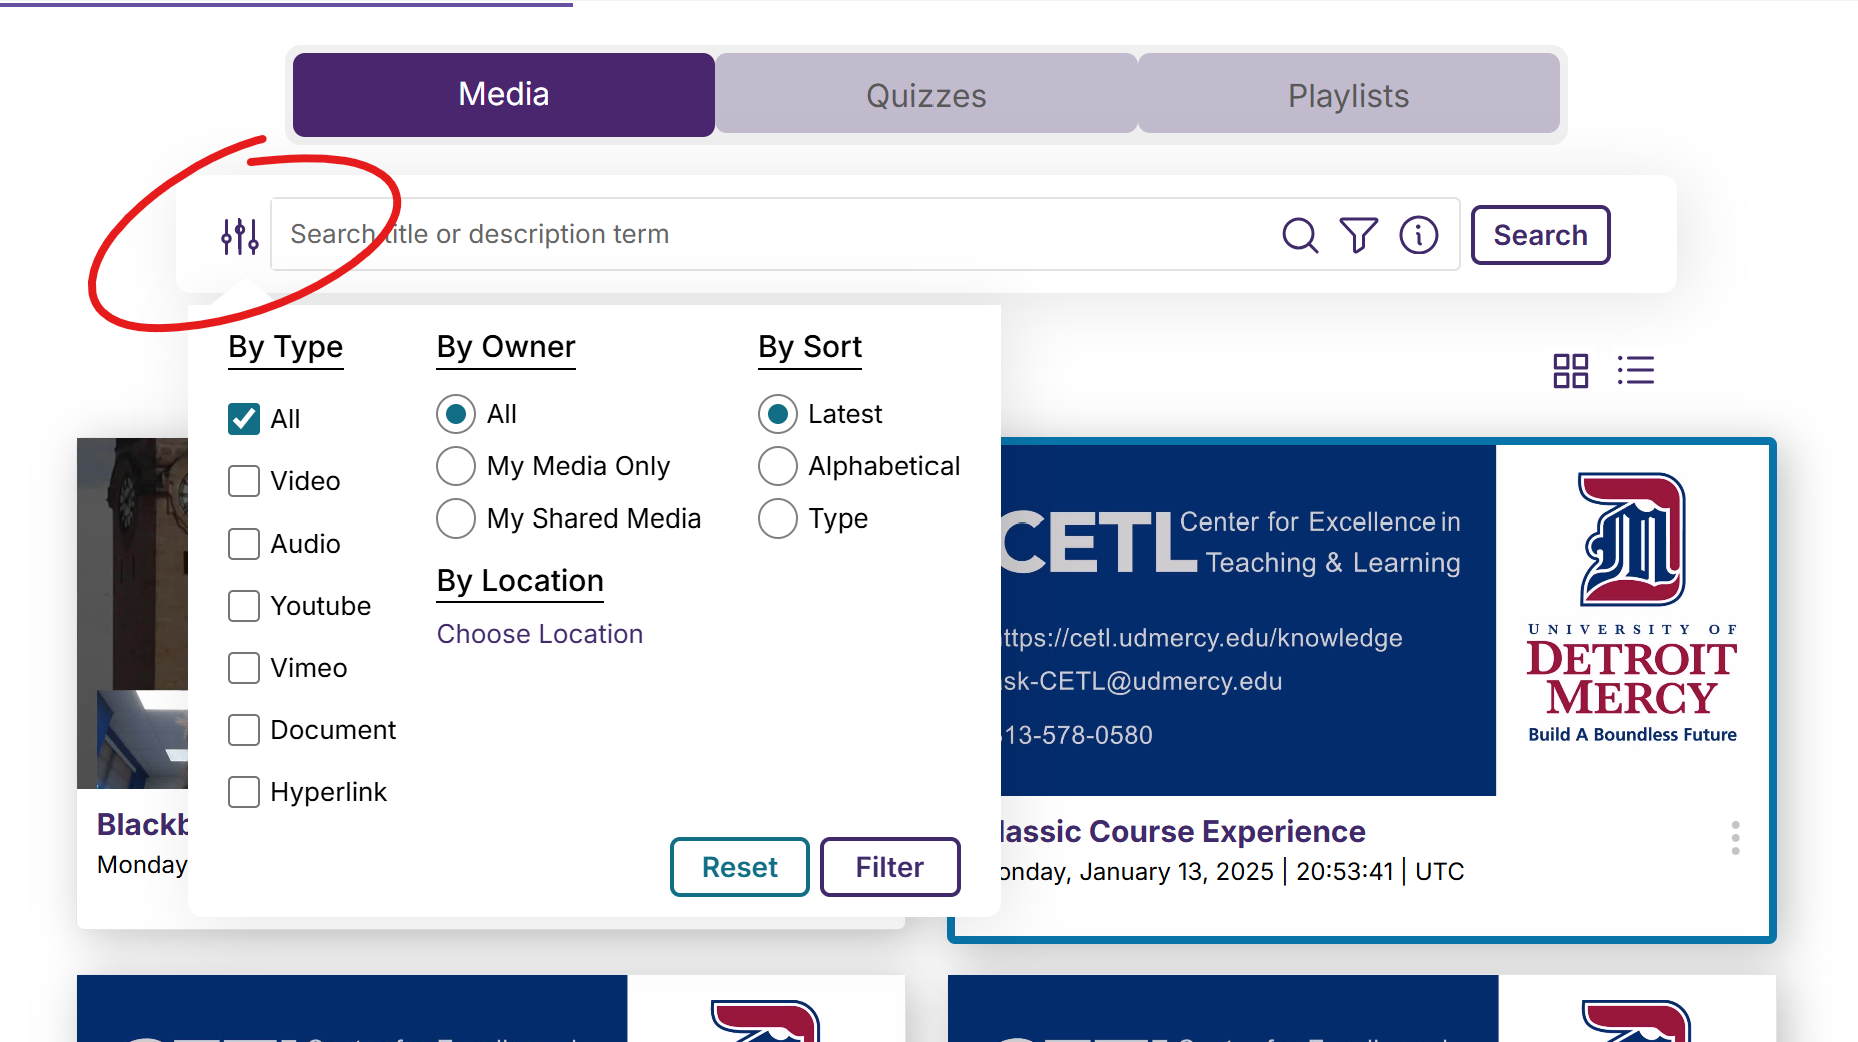
If you have a lot of videos in your Media Library, you may want to use the search box to locate the a file. Switching from thumbnail view to list view may also help.
The filters button can also help you narrow the contents that appears in the Media Chooser. Click the filter button (left of the search box), select appropriate filters, then click FILTER to narrow the items displayed.
Scroll the Media Chooser window down and click the Insert Content button.
When you click Insert Content, your media will be added to your page.
Participants who click on embedded images and files will be prompted to download the files.
The Media Library (YuJa) is the preferred way to provide students with pre-recorded video. It can also be used by students to share video, either in online discussion or assignment submission. This walkthrough shows how to locate the Media Library, add media to the library, then link or embed that uploaded content into a Blackboard text box.
First, navigate to the spot where you want to add your media and open the media chooser.
Find Media Chooser [YuJa] Content Link
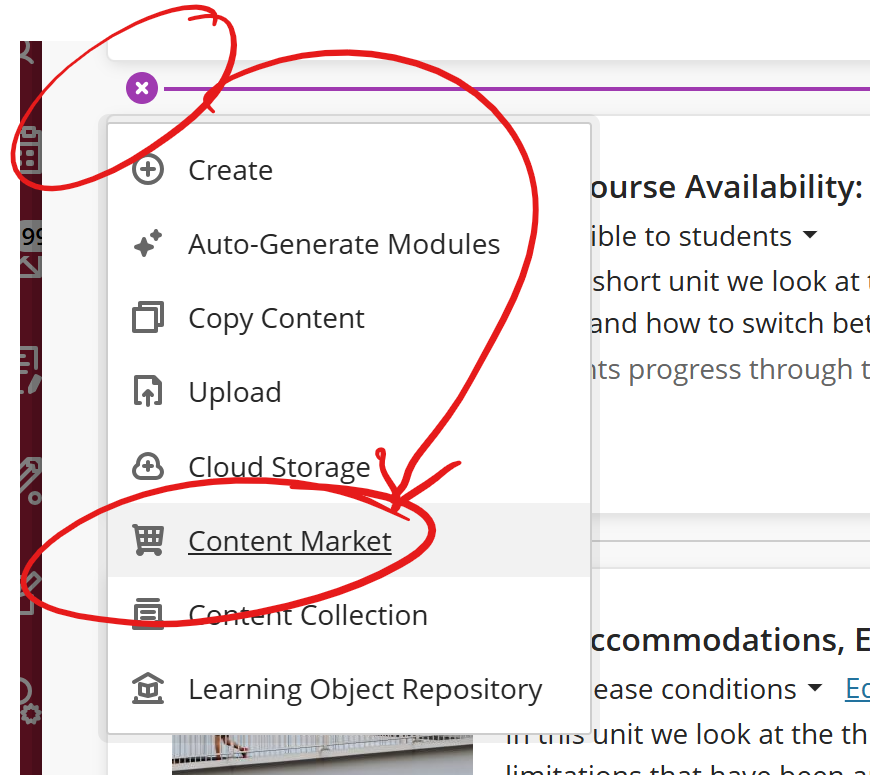
To get started, go to the main Content Area of your course, click the Add button (+), choose Content Market, then choose "Add Video From Media Library [YuJa]"
Upload Media From Media Chooser
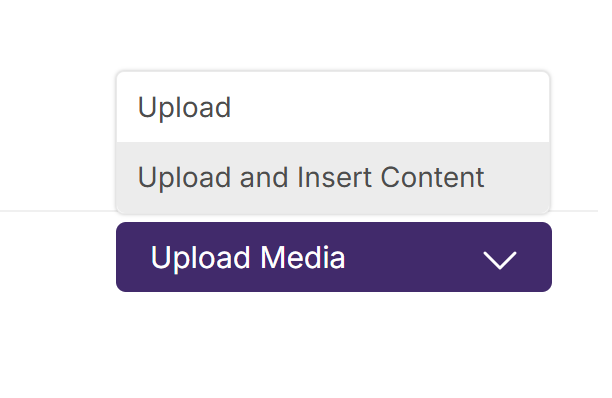
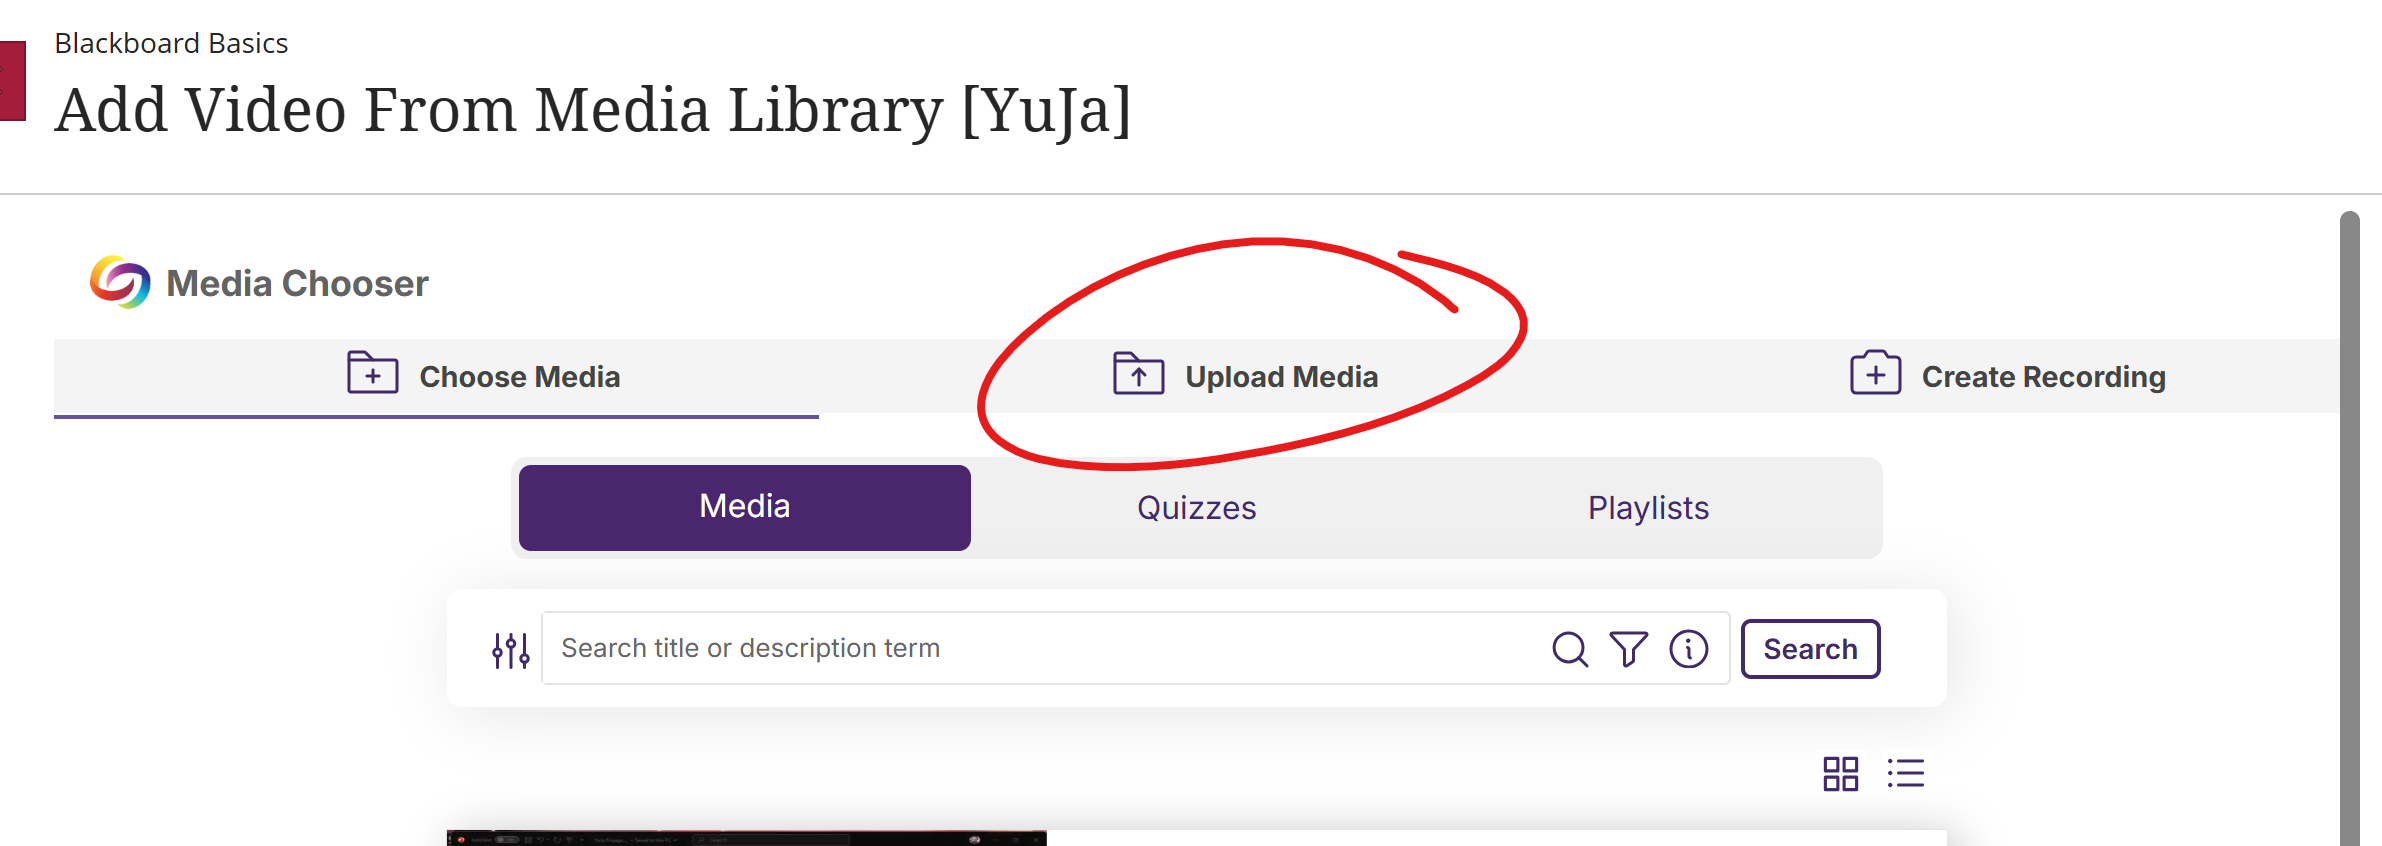
The Media Chooser is opened when the Add Video From Media Library [YuJa] tool is selected in a Blackboard course site. If you have not previously uploaded the video you wish to add to the course, select Upload Media in the upper center of the Media Chooser window.
You can then either drag and drop your file onto the blue-tinted box in the center of the window or click the Browse button to open your computer's file explorer.
Once you have selected one or more files, Click he UPLOAD MEDIA button at the bottom right of the window and choose UPLOAD AND INSERT CONTENT to add your media to your course site.