By Russell Davidson; Associate Director for Digital Education
By design, Blackboard’s Ultra style course sites limit some of the customization found in the classic-style sites. Consistent navigation among course sites means students don’t have to re-learn how to locate resources and tools in every course. Adherence to a black-and-white color scheme avoids potential usability issues that can sometimes come with brighter colors. The downside is that ultra-style courses can sometimes be lacking in personality. This can be particularly true for faculty, who might be teaching two (or more) sections of the same course, with the same folders and items in the course’s content area.
Fortunately, the addition of a course image can help with this.
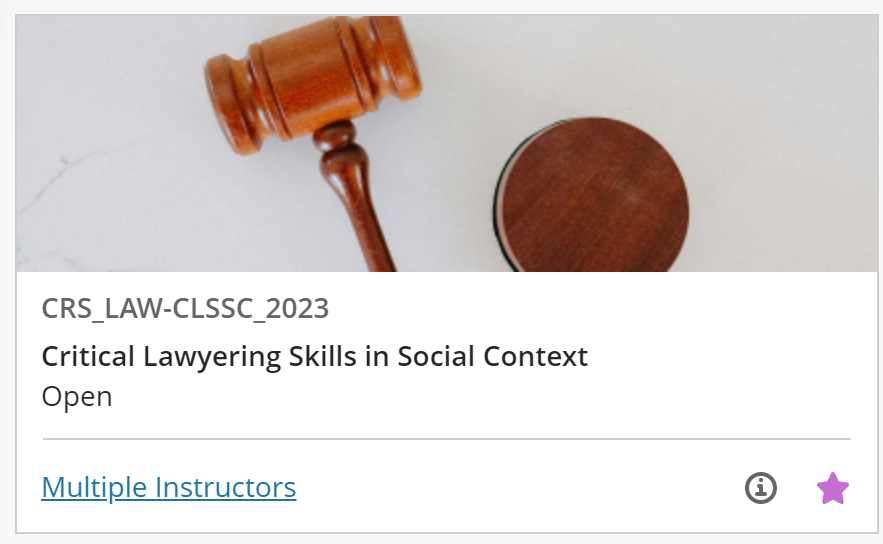
A course image appears as a banner across the top of your course site. Folks who use grid view on Blackboard’s Courses list will also see the image at the top of a course’s info card (if no course image is added, Blackboard will fill this space with a randomly selected nature photo).
The process for adding an image is fairly simple.
First, you will need a fairly large image – at least 1200 pixels wide by 240 pixels tall – that you have copyright permission to use (public domain, Creative Commons, etc). If you’re feeling inspired, you can even add some text to your image using an editing tool like Canva, just make sure to center your text, least it gets cut off in one or another view (see our Create a Course Banner with Canva walkthrough if you’d like to learn more).
If you don’t have an image on hand and don’t want to go to the trouble of finding and editing one, Blackboard now provides easy access to the Unsplash free image library, letting you pick an image rather than upload one (note: the Unsplash image library search is only available to ultra-style course site users).
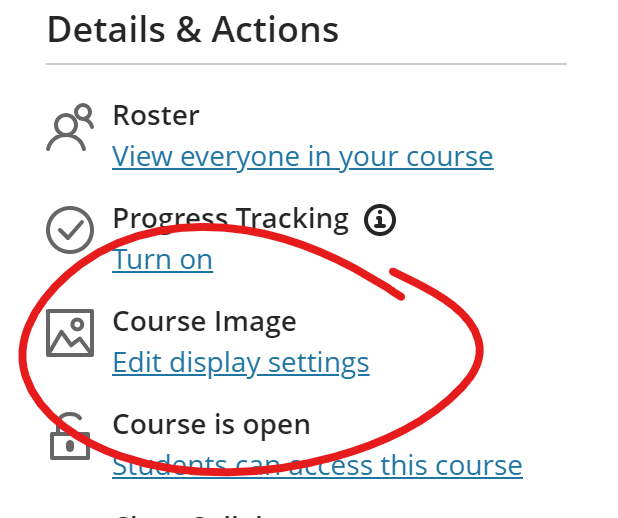
Once you have your image (or have decided to choose one from the built-in the free library instead), open your course site, then click “Edit display settings” under the Course Image header on the left-hand Details & Actions list.
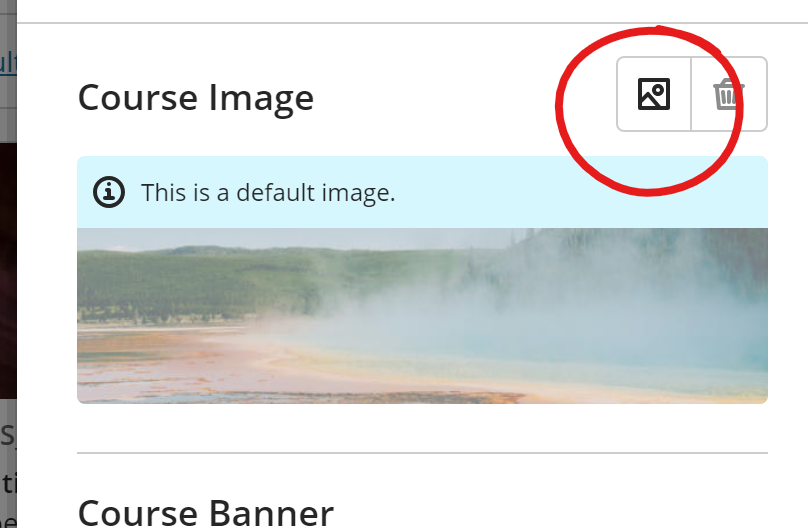
This will open the Display Settings panel on the right. To add or select your own image, click the IMAGE button in the upper right, across from the “Course Image” label.
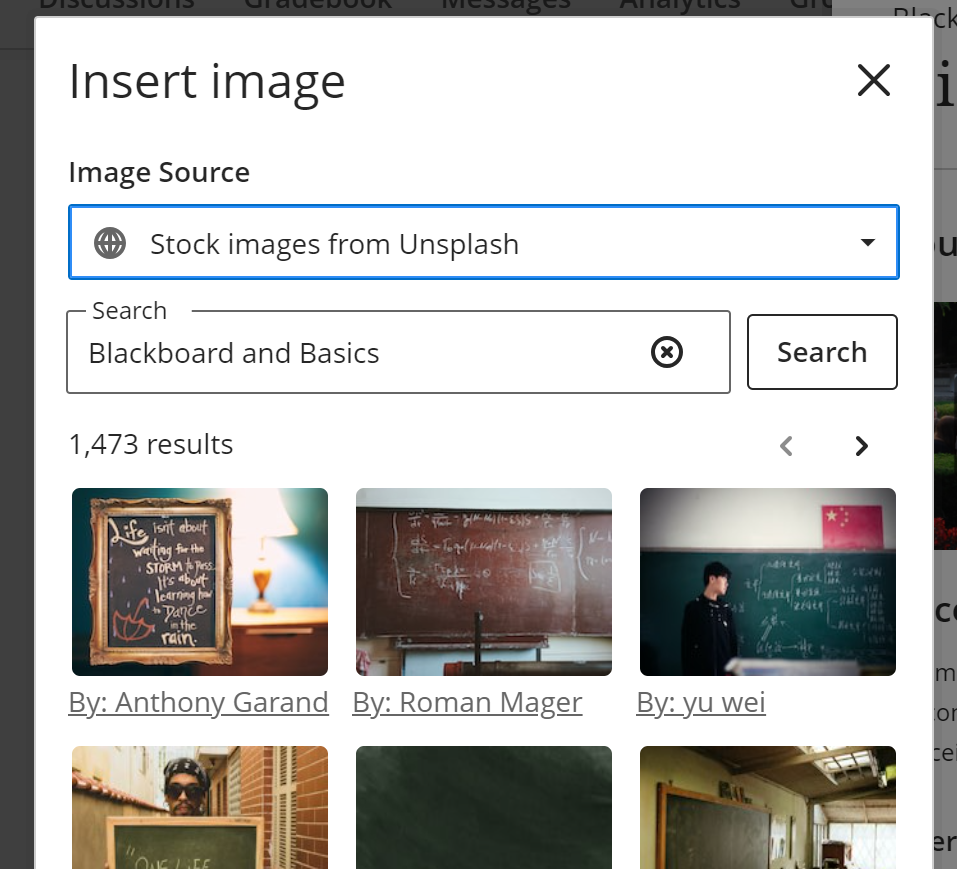
This will open an INSERT IMAGE overlay. From here, you can upload an image from your computer or choose “STOCK IMAGES FROM UNSPLASH” from the image source pulldown.

When using the Stock Images option, Blackboard will run an initial image search using key words pulled from your course title. Use the arrows under the SEARCH button to view more results, and add or revise search terms to edit the results. To choose an image, select it, then hit NEXT at the bottom of the INSERT IMAGE panel.
Next, you will be prompted to adjust the magnification and position of your image. If your banner image is the recommended 1200 x 240 pixels, no adjustment should be necessary. If you’ve selected a stock image, or you’re using an image that is larger than 1200 x 240 pixels, you may want to zoom the image and or adjust its position, putting the part of the image that is most interesting in the center strip (this indicates the part of the image that will be visible).
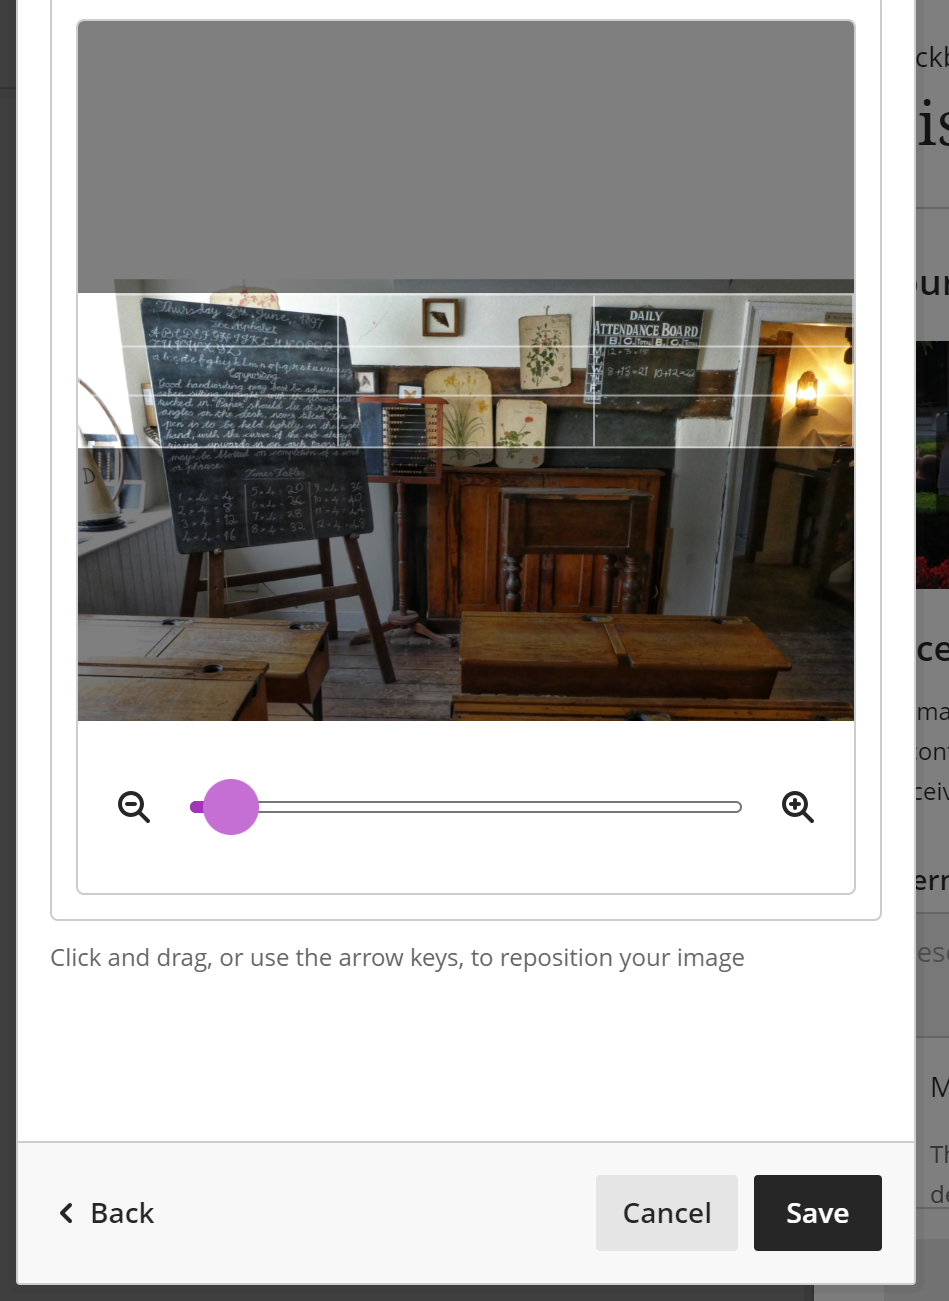
If you’ve selected a stock image that doesn’t work in the narrow banner space, click the BACK button at the bottom of the window to select a new image. When you’re happy with your selection and its position, click SAVE.
Once you’ve finished, don’t forget to click SAVE at the bottom of the Display Settings panel to lock in your new banner!